Wow.

This is one of the best workarounds I have seen for years in Revit! Did you know that you can rotate a Revit Floor Plan view in 3 dimensions?

Try it now:

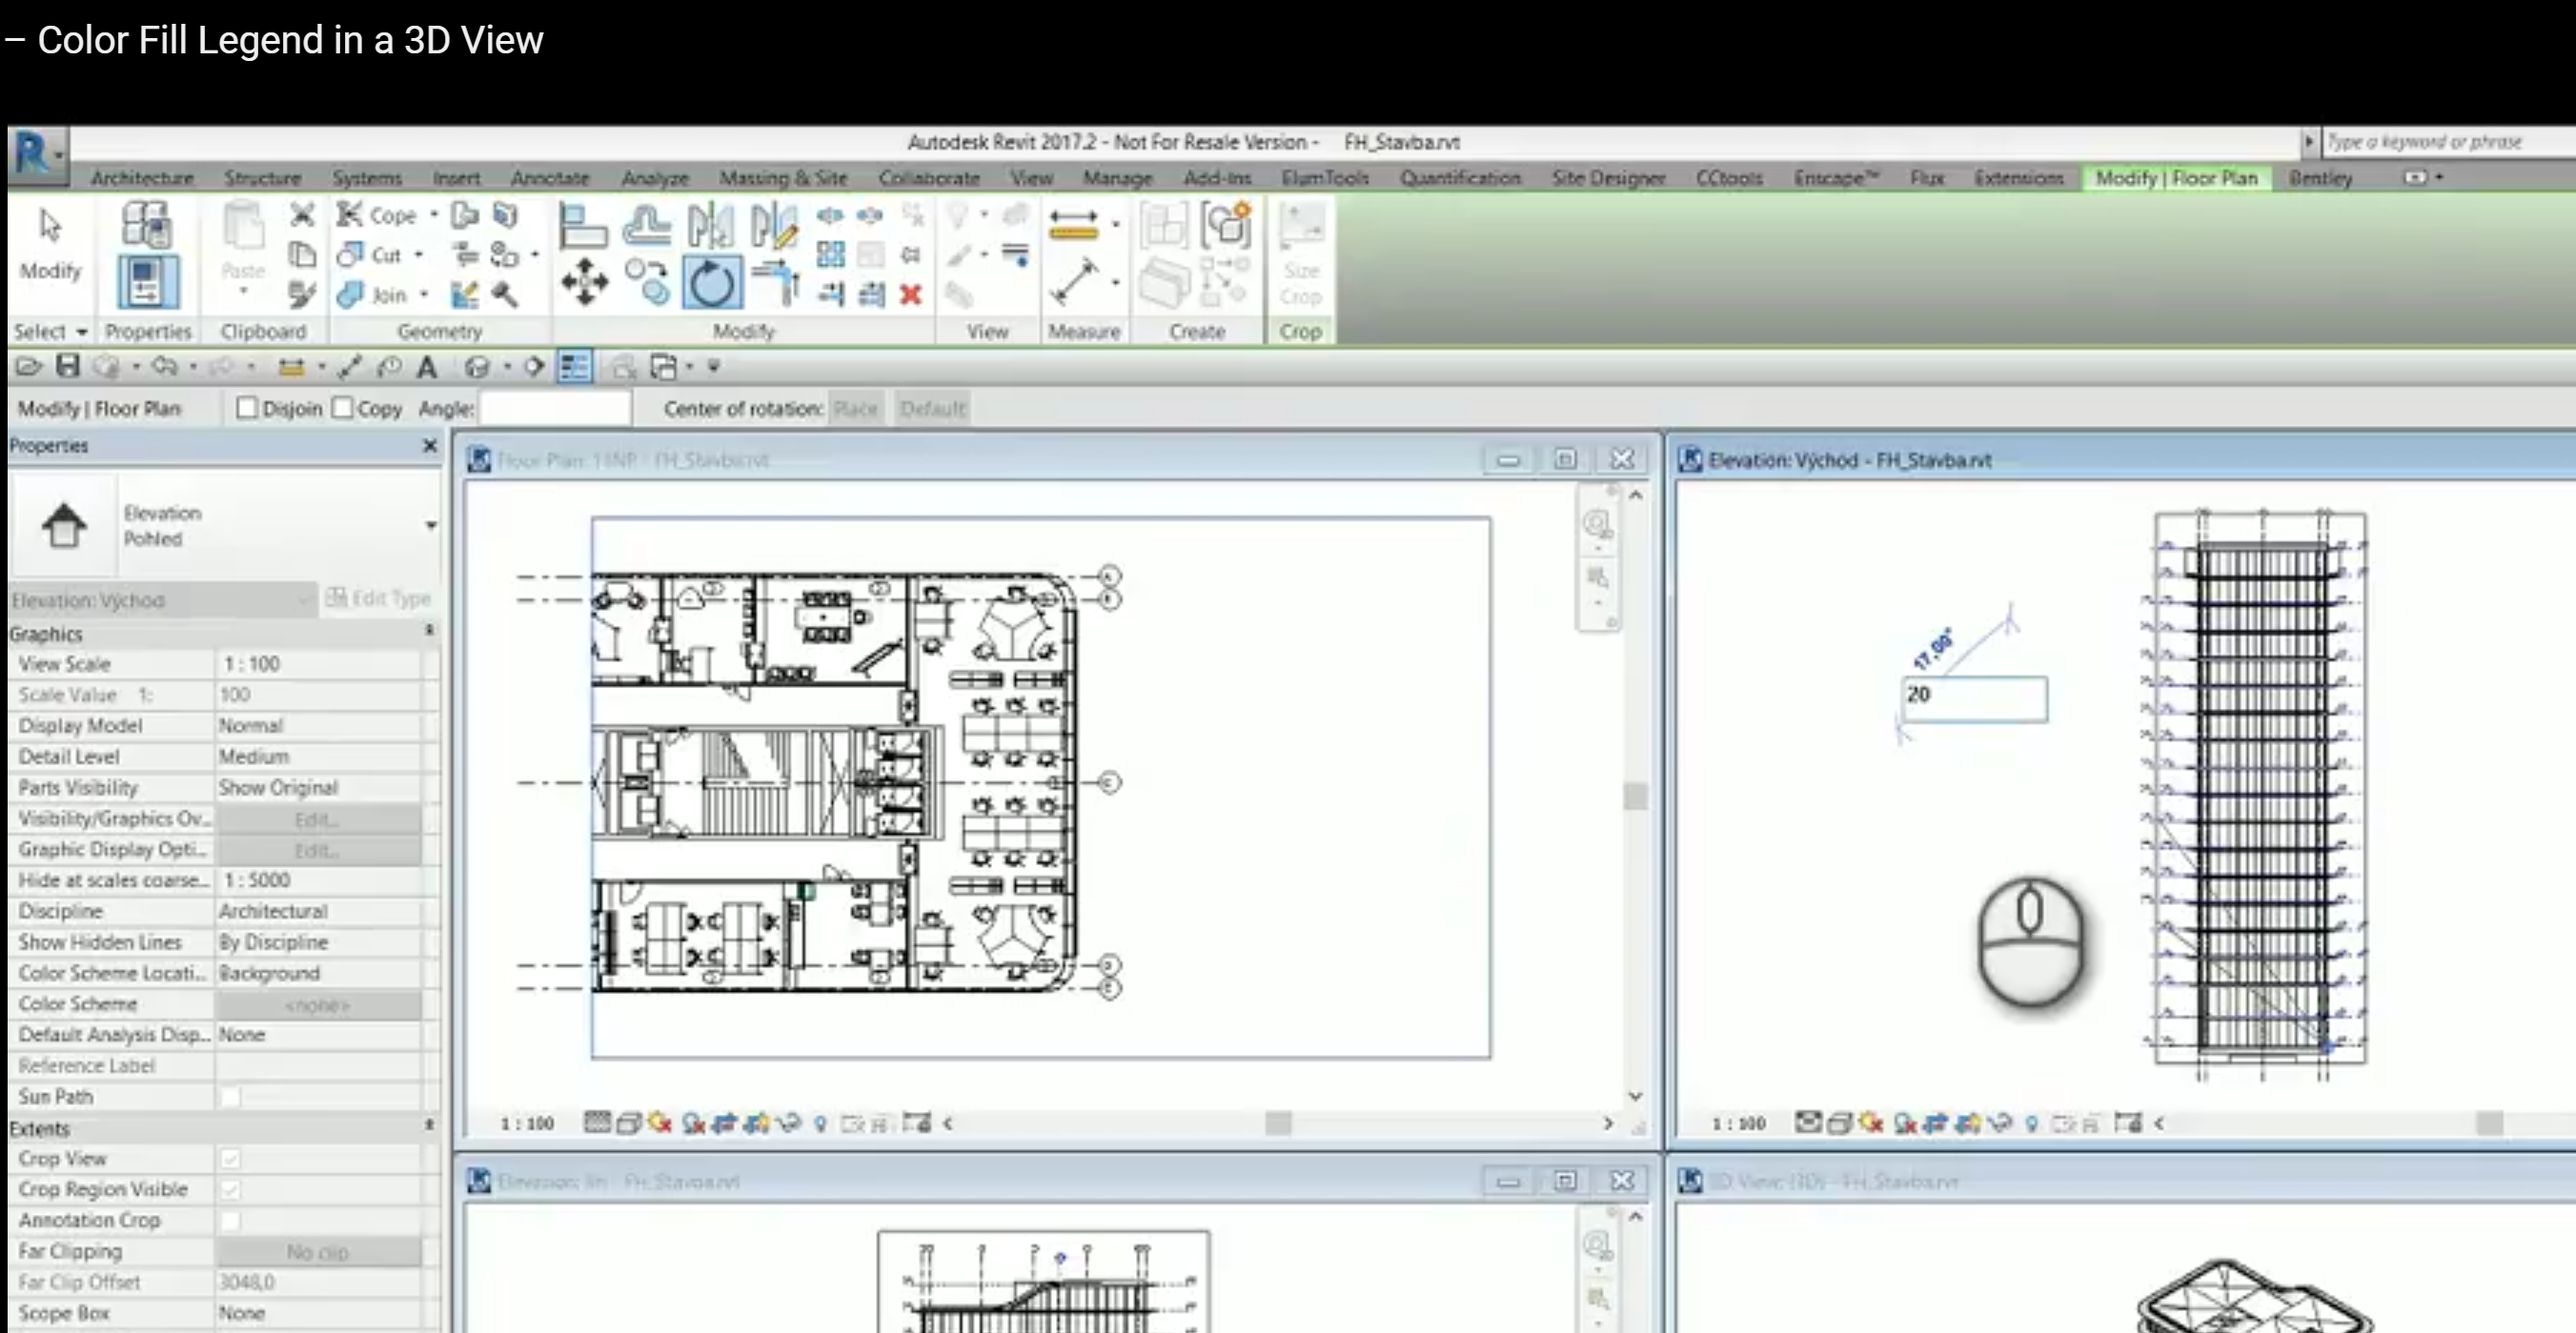
  1. Go to a Floor Plan view and make sure the Crop Region is turned on
  2. Now open a Section or Elevation View
  3. Tile the windows in Revit so you can see both views
  4. Select the Crop Region in the Floor Plan view
  5. Switch to the Section or Elevation view (the Crop Region is still selected)
  6. Start the Rotate command in the Section or Elevation view
  7. Rotate the Floor Plan away from the horizontal plane. Try 20 degrees.
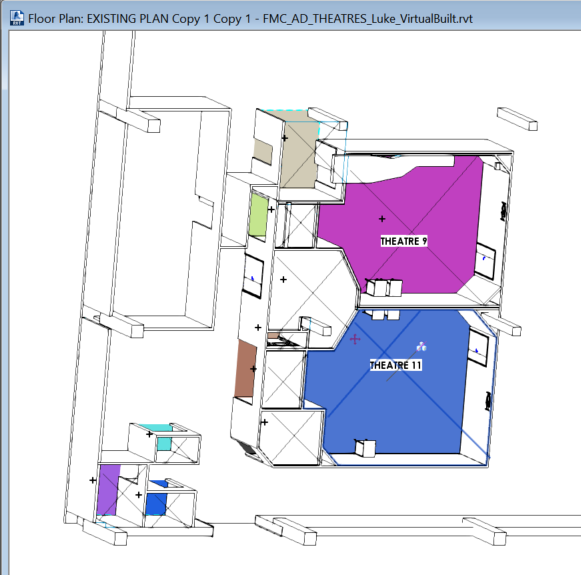
  8. Experiment with the above process until you have created a sort of forced orthographic view… but Revit thinks it is a Floor Plan! You may have to switch between some sections running perpendicular to each other and keep rotating the Floor Plan crop region until you capture the view you want.

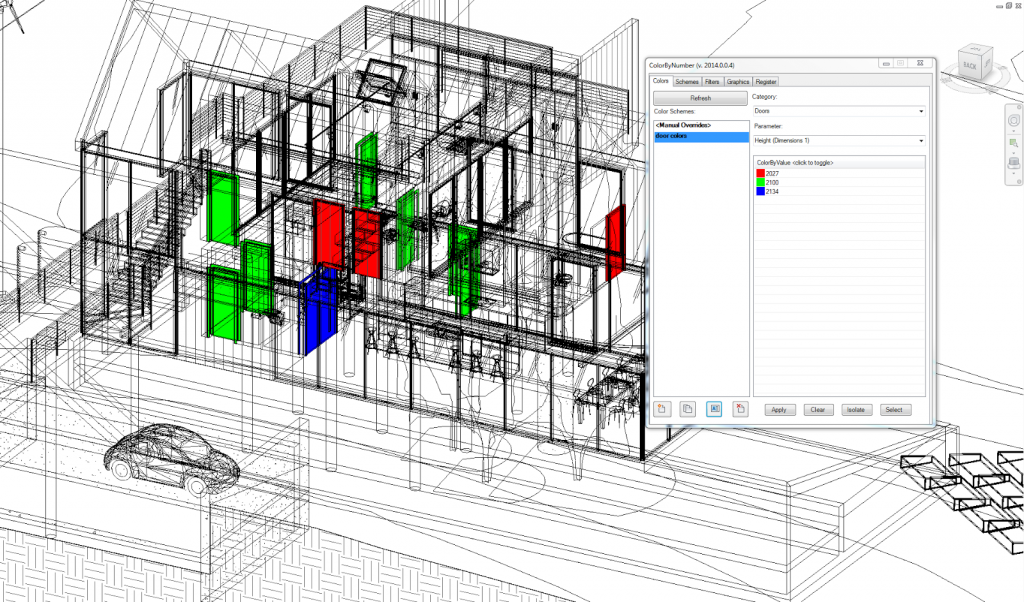
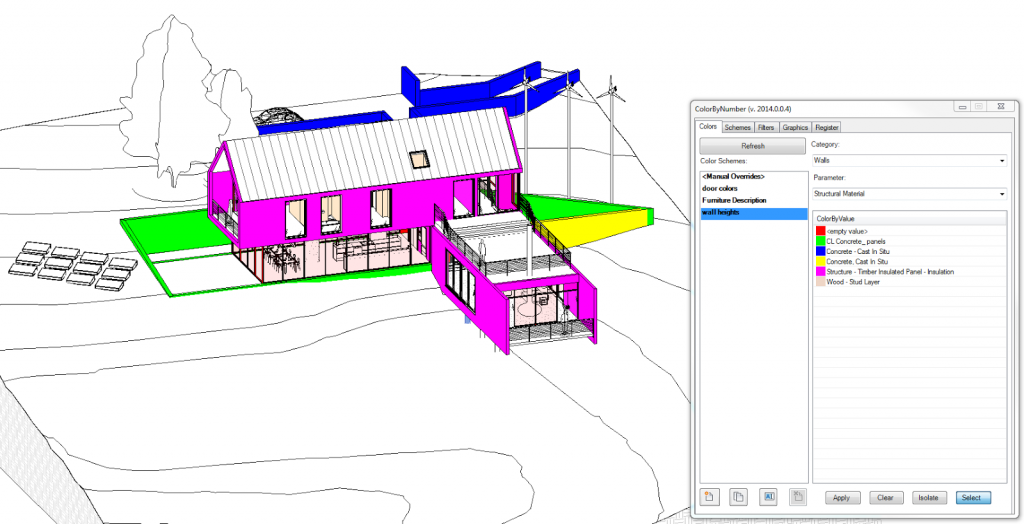
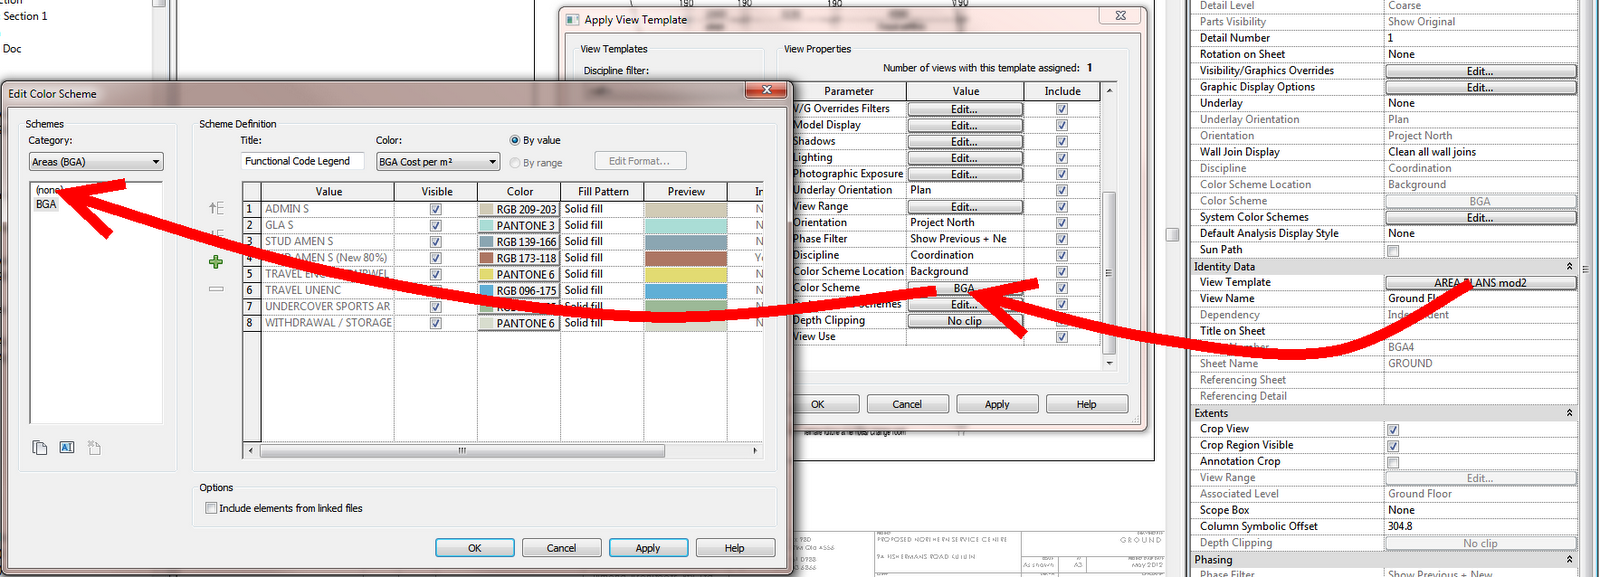
This means you can have Rooms showing. Which means you can have a Room Color Scheme showing up in a ‘kind of’ 3D view in Revit. This is awesome!

It is also a nice way to see how View Range works. As you experiment with the View Range of this special Floor Plan, you will see more or less of the elements (a bit like a 3D section box).

Not sure of the limitations or problems yet, but I had to share 🙂

Thanks to pepar for sharing on slack, and cadconsulting for making the video.

This is one of the most exciting new addins to appear for visualizing your Revit model. It is simple to use, powerful and intuitive, and I recommend you try it out.

Go ahead and click here to Download it now

Use coupon code whatrevitwants to receive 30% off

EDIT added video by Greg Demchak:
 

Follow these steps after clicking the above link:
1) Scroll down to ColorByNumber trial and add to cart

 
2) Checkout

 3) Place Order

 4) Download file

5) Install the file and open Revit

6) Click on the Color button on the Addins ribbon

7) Put in your email and the license key that you were emailed during checkout process

Here is a quick how-to on using it:

  1. Open a 3D View and open ColorByNumber
  2. Switch to the Colors tab and click on the New icon. This will make a new Colour Scheme. 
  3. Give the new scheme a name.
  4. Select a Category and a Parameter
  5. A list of all available values in the project will appear, with some preset colours
  6. Click Apply

These colours are now applied to your view. The colours will be visible in all display modes in 2014: Wireframe, Hidden Line, Shaded, Consistent Colors, Realistic and even Raytrace. Its easy, functional and overall very impressive…

Switching to the Schemes tab will now show this new scheme as an option. If we switch to a completely different Revit project, we can instantly re-use this scheme in the other project. We don’t have to transfer the scheme or anything.

Just when you were thinking how great this all is, there is a humble little button at the bottom of the main ColorByNumber dialog – Isolate. This will isolate the coloured objects, making it very easy to navigation and view your Revit model based on Category, Parameters and values.

Let’s try another example: colour all Walls by their Structural Material. In about 8 clicks, it is done.

So, who is Greg Demchak, you may be wondering? Well, he was this guy:

so you can see why he knows a thing or two about Revit and UI design 🙂

Some dot points:

  • A schedule is a good tabular view of the model data… With ColorByNumber, we make accessing information easy and visual, which can lead you to new insights on your model
  • quickly select and isolate elements by their parameter values–something you can’t do with Revit out of the box. 
  • user research found that ColorByNumber is on the order of 100 times faster than using built-in Revit tools that accomplish similar results.

Some other links:
How to Use ColorByNumber with Revit | BIMrayBIMray

What’s Next? | BIMrayBIMray

ColorByNumber “free 30 day trial” version now supports multiple users. | BIMrayBIMray

Helping search: this post is about Color By Number, otherwise known as ColorByNumber 

    I have run into an issue when using a Key Schedule, Area Plan and View Template.  My Area Plan uses a Color Fill Scheme which uses a Key Schedule as its basis for the different colors of shading. If I change an entry in the Key Schedule, it seems to ‘break’ the Color Scheme on the Area Plan.

    To correct this issue:

    1. Un-apply the View Template (set view to
    2. Open the View Template Properties
    3. Open the Color Scheme dialog for the affected View Template
    4. Set the Schemes to (none), then
    5. Reapply the original Color Scheme by clicking its name.
    6. Press OK a few times

    The Color shading for the scheme should now re-appear.

    in a project where you want to inherit the properties panel in the “Manage” choose “a color designation schemes,” and in the “Deselect” target checkbox only “color scheme designations.”

    via Google Translate
    of
    Заметки о Revit и том, что с ним связано: Копирование свойств легенды помещений из проекта в проект

    The last color scheme of some area schemes were lost, therefore the color fill function for that area scheme was also lost in the model and the user is unable to assign it color schemes.

    Solution

    To restore a default color scheme for these problematic area schemes in the Revit Project follow these steps.
    1. Create a new Revit project (project1.rvt) with default template.
    2. In project1.rvt, open the Home > Room & Area > Area and Volume Computations dialog.
    3. On the Area Schemes tab, click the New button to create an area scheme and rename it to match the Area scheme name in the Revit project containing the missing color schemes.
    4. Click OK to exit the dialog.
    5. Switch to the original Revit project file and go to Manage > Transfer Project Standards.
    6. In the dialog, choose Copy from: Project1.
    7. Click the Check None button and select Color Fill Schemes.
    8. Click OK.

    via
    Autodesk – Autodesk Revit Architecture Services & Support – Area schemes have lost their color schemes