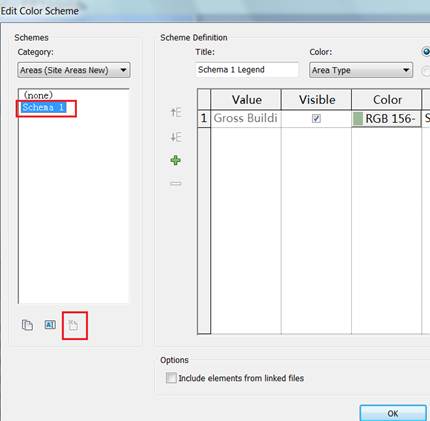
The last color scheme of some area schemes were lost, therefore the color fill function for that area scheme was also lost in the model and the user is unable to assign it color schemes.
Solution
To restore a default color scheme for these problematic area schemes in the Revit Project follow these steps.
-
Create a new Revit project (project1.rvt) with default template.
-
In project1.rvt, open the Home > Room & Area > Area and Volume Computations dialog.
-
On the Area Schemes tab, click the New button to create an area scheme and rename it to match the Area scheme name in the Revit project containing the missing color schemes.
-
Click OK to exit the dialog.
-
Switch to the original Revit project file and go to Manage > Transfer Project Standards.
-
In the dialog, choose Copy from: Project1.
-
Click the Check None button and select Color Fill Schemes.
-
Click OK.