Check them out at:
http://www.slideshare.net/BuiltEnvironmentUBM/tag/bsl2014
AI Empowered Project Management
We often have to deal with data that hasn’t always “lived” in our CAD, BIM or Revit world. Take a hand sketch, for example – how can you get that into a format that can easily be used in AutoCAD or Revit? Some PDFs have vector information, which I have described how to access before. But the below workflow takes it one step further – how to get any raster image into a vector format, using a few free tools.
Here’s how to do it, without Adobe Illustrator:
Here’s a quick video of the process:
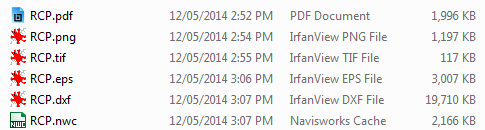
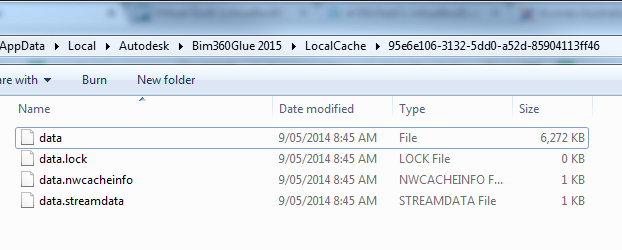
The file sizes at each step look like this:
CADmep Object Enabler is a free downloadable collaboration utility that
enables ObjectDBX host applications (i.e. AutoCAD, AutoCAD LT, Volo-View
and Navis) to view the enhanced objects from CADmep.
Read more:
Downloads:
The Autodesk Fabrication CADmep Object Enabler applies to both 32-bit and 64-bit Windows.
| Autodesk Fabrication CADmep 2014 OE — Build 3.02.600 SP2b (exe – 270334Kb) |
Autodesk Fabrication CADmep 2013 Object Enabler (exe – 246856Kb) |
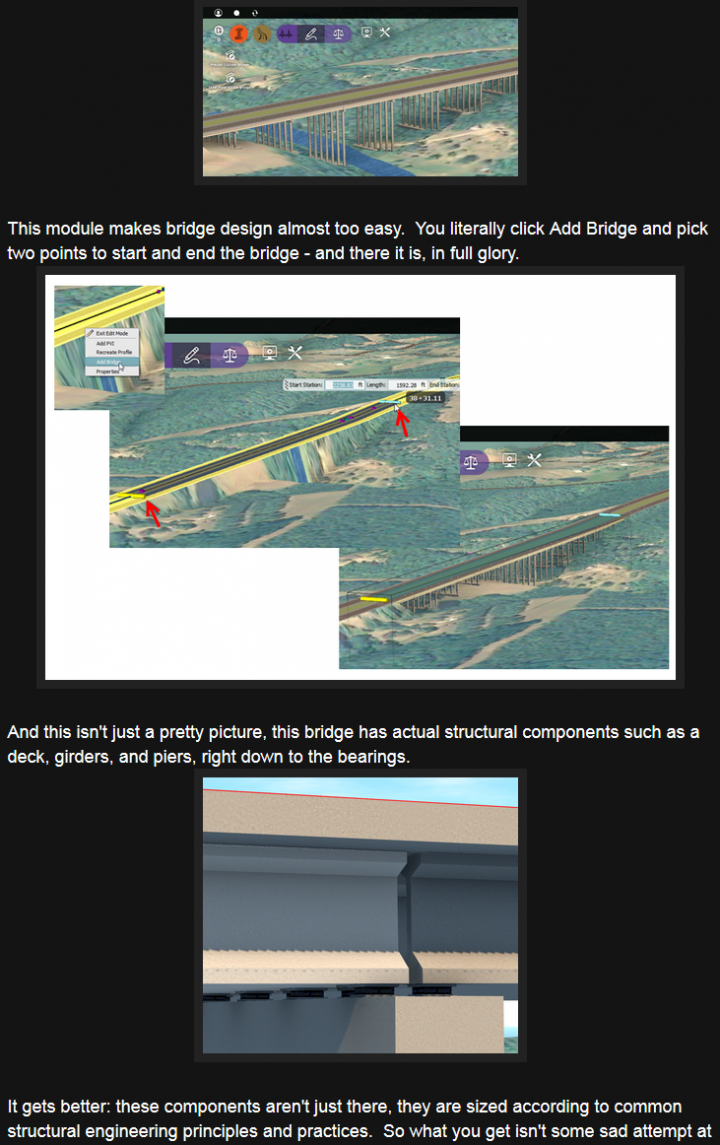
Making bridge design fast and easy…

from
Eric Chappell’s Blog: The Incredible InfraWorks Bridge Design Module
via
https://twitter.com/junctionjack/status/464878852703940608
You could use NWCOUT, or…
Steps:
Note: you may have to load this from a trusted location to avoid security problems.
From:
Help: To Load the Autodesk Navisworks Export Menu in an AutoCAD-based Application
Interesting, sounds easy… anyone using this?
Constructivity Server does not rely on any external database or web server; it stores all data within a folder structure as native IFC files and index files. Getting a server up and running requires two settings: folder location and web server port.
Video showing merge control:
via https://twitter.com/Opening_Design/status/464435922944425984
Download it here, quick summary below:
Read the whole article:
Open source BIMserver | Release 1.3.0 final
When directly appended to Navisworks, you can see the originating file name, such as:

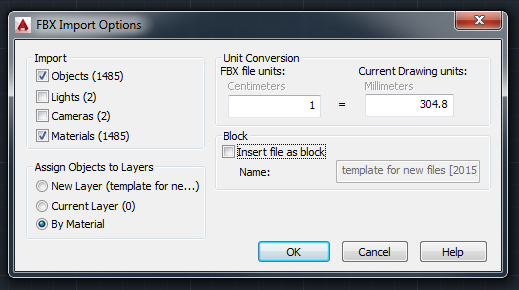
I have previously discussed going from Navisworks to Revit using FBX – 3dsMax – SAT. However, maybe we can do this without 3dsMax. Did you know that vanilla AutoCAD has a FBXIMPORT command?
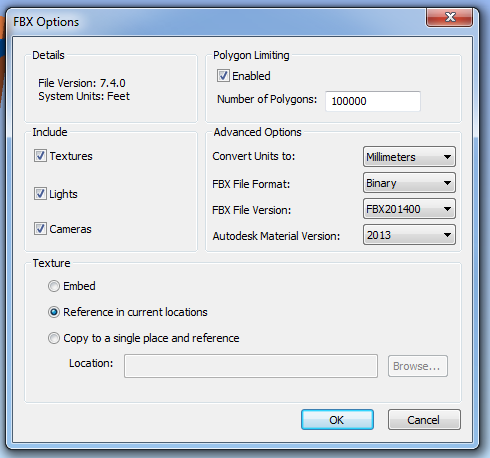
1) Export FBX from Navisworks – it will ignore Section clipping planes, but it will respect the Hide/Required setting of the view. You can limit polygons (advised for big models)
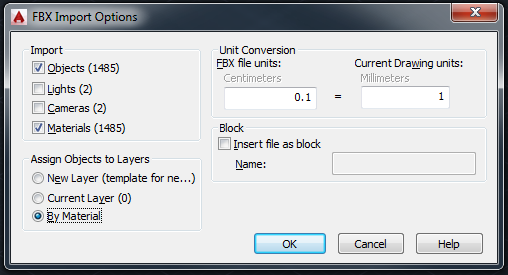
2) FBXIMPORT in AutoCAD – untick Cameras and Block options as they can be problematic.
Then save DWG. (Note – see below for correct 1:304.8 import scale)
EDIT: If using Navisworks 2015 FBX export to version 2014, with Advanced Options units set to millimeters, you can import to AutoCAD 2015 with 1:1 scale factor (using latest service packs)
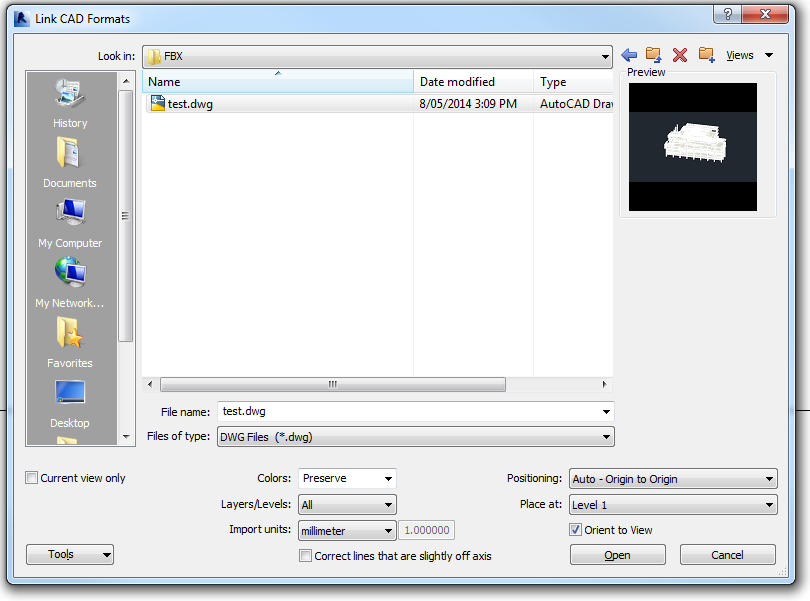
3) Open Revit and Link in the DWG.
For this example, I used Origin to Origin as I wanted to try round-tripping back to Navisworks.
Once I exported the NWC and put it back into Revit, I noticed the file was out of scale. Now, I experimented with a few different scale settings, but everytime it was a scale of about 30 or 300 wrong. 1 foot = exactly 304.8 mm. Evidently, the “internal” units of an FBX are feet. So, when we import to AutoCAD we need to use this setting to translate to mm:
This time, when I exported the Revit view to a NWC, and then appended it back to Navisworks – it can came back in exactly the right place. This workflow relies on using the internal Revit Zero point and Origin to Origin linking.
There you go – now you can roundtrip any mesh geometry from Navisworks to AutoCAD to Revit and back to Navisworks 🙂