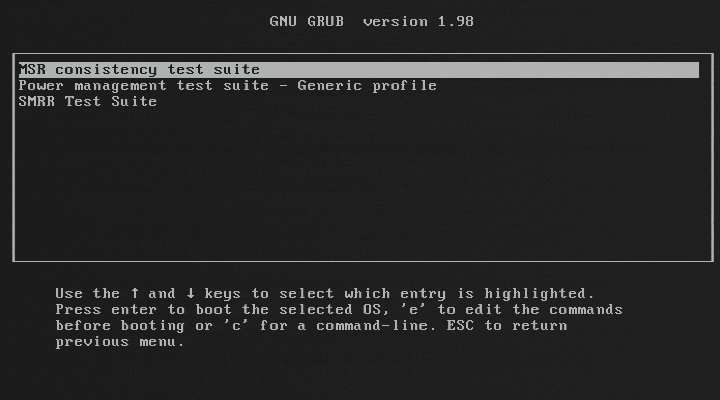
… provides a bootable pre-OS environment for testing BIOSes and in particular their initialization of Intel processors, hardware, and technologies. BITS can verify your BIOS against many Intel recommendations. In addition, BITS includes Intel’s official reference code as provided to BIOS, which you can use to override your BIOS’s hardware initialization with a known-good configuration, and then boot an OS.
http://biosbits.org/

Some download links:
https://downloadcenter.intel.com/Detail_Desc.aspx?agr=Y&ProdId=2371&DwnldID=19763&ProductFamily=Processors&ProductLine=Server&ProductProduct=Intel%C2%AE+Xeon%C2%AE+Processor+5000+Sequence&lang=eng

In almost every case, I prefer Structural Columns over architectural Columns in Revit.  However, the architectural versions can easily be made Room Bounding.  How do we do this for Structural Columns?

Change the “Material for Model Behaviour” property in Family Category and Parameters to be Concrete or Precast Concrete.

Strangely enough, changing back to Other after reloading this Family had no effect – I could not make it non-Room Bounding again…

EDIT: In the comments, Chris describes the behaviour of Structural Columns in the Project – “Deleting the columns and placing new columns with the material as “other” will make the space non-room bounding again.”

See image:

Make this registry setting:

Note: The creation of a client log file is optional for network deployments. You must enable the option in the Autodesk® Deployment Wizard. 
Not all products create a client log file by default. In the event that no client log file was created, you can use Microsoft® Windows® Installer to create a log file.
To create a log file using Windows Installer
  1. Click Start menu (Windows) > Run.
  2. Enter REGEDIT and click OK.
  3. In the Registry Editor, browse to the following folder:
HKEY_LOCAL_MACHINESoftwarePoliciesMicrosoftWindowsInstaller
  1. Right-click a blank space in the right pane. Click New > String Value.
  2. Enter Logging for the name.  
  3. Double-click Logging.
  4. Enter voicewarmup in the Value Data box and click OK.
  5. Close the Registry Editor, and run the installation again.
Log files created using this method are located in the %TEMP% folder and are named MSI#####.log.

via
Autodesk – Autodesk AutoCAD Services & Support – Using log to troubleshoot installation errors

This is basically what will happen:

So, basically you can choose to re-index to RCP, or leave them as-is and continue to use the PCG.

While there is much to love about the smooth performance RCP point clouds, I have to admit that PCG point clouds seemed to allow:

  • greater point density, perhaps due to different default indexing settings, 
  • more consistent display (ie. once the view had regenerated, that’s how it would stay – while RCP seems to slowly and continuously re-gen until you get a very realistic view)
  • and didn’t have cropping problems – I’ve noticed that a 3D Section Box with an RCP point cloud will require a greater “buffer” than with PCG.  If you crop it too close, the RCP points won’t show (even if they physically exist in that section box space).
On the flip-side, PCG point clouds are typically much larger than the RCP / RCS equivalent.

Related forum post:
Point cloud disappears partially revit 2014 – Autodesk Discussion Groups

Just use Bluestacks:
http://www.bluestacks.com/

After installing the program and performing all the requisite login / setup steps, you will essentially have an Android emulator running – you can browse and search the Google Play Store (and other Android app stores), install apps and use them in either full screen or window mode.

While on the subject of Android applications, if you want to download an APK file from the store, you may want to try APK Downloader beta.  It can only be used on free, not paid, apps.

After spending lots of time with Point Clouds lately, making heaps of section boxes and then manually rotating them to match walls, I finally decided to shoutout to the Twitterverse for some help…

Following a several-days-long Twitter exchange, Harry Mattison has created a cool add-in and provided it for download at:
http://gdurl.com/Hmdo/download

(also on Boost Your BIM product page)

And yes, it automatically rotates the Section Box!!  Essentially, this produces a box that is “aligned” to the Wall.  Conversely, the Coins version currently only produces aligned section boxes when you produce a section box around a scope box or around a section line.

Evox Linkator will give you access to a new toolbar that contains all the commands necessary to create links to web sites or files from your PC.
Everything is possible through two simple buttons with which you can connect the elements or the whole family to a Web site, to data sheets in PDF, dwg of detail and everything you need to integrate your project.
From Manager you will be able to monitor all links anytime, in order to control those to be repaired or to eliminate unnecessary ones.

Download at:
eVox Linkator TRIAL | Autodesk Revit | Autodesk Exchange Apps

Last night I posted about a new 3Dconnexion product, which was launched alongside new drivers:
3dxWare 10 for 64bit

As a SpacePilot Pro user, I was tempted to download and try these new drivers (despite the fact that the Release Notes indicated the SPP was unsupported).  Guess what?  The drivers work with the SPP, and now I have Radial Menus.
These things are amazing.  Just click a button on the SPP, and a customizable menu appears, centred over the cursor of my standard mouse.
After installing the new drivers, open Revit, and do this:
  1. Go to 3Dconnexion Properties.. (see image below) (you can also rightclick the black icon in the taskbar, while Revit is active)
  2. Click Buttons
  3. Click the arrow next to one of the buttons
  4. Expand Radial Menus, and click new Radial Menu
  5. Type the Radial Menu name, and then add 4 commands using keyboard shortcuts to the 4 entries (click in the box and type)
  6. To change the command alias, click the arrow next to the keyboard shortcut, then click the pencil.  When you change the Macro Name, this is what will appear on the screen on the Radial Menu. (You can also add a series of keypresses using this dialog, to set up T-R- for trim etc).
When setting up your menus, you could either use:

or

to determine the most “important” shortcuts.