Have you ever exploded a SAT or DWG in the Family Environment, and then gone looking for the Visibility Settings ribbon button for one of the resulting freeform elements? Its not there:

But, as you can see from the image above, you can still access these settings by using the Properties Palette – Visibility/Graphics button.

Yeah, Revit topo tools aren’t that great.  Why don’t we try exporting to a sculpting tool like meshmixer, and see if we can make it work?

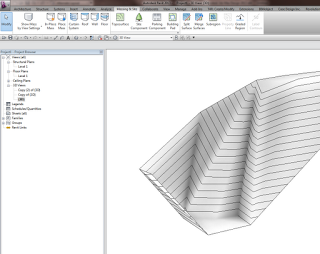
Let’s start with a simple Revit toposurface.

Export to Max by using Suite Workflows – 3ds Max Design Exterior Rendering

Once in Max, export selected (the toposurface) to OBJ using the Mudbox preset.

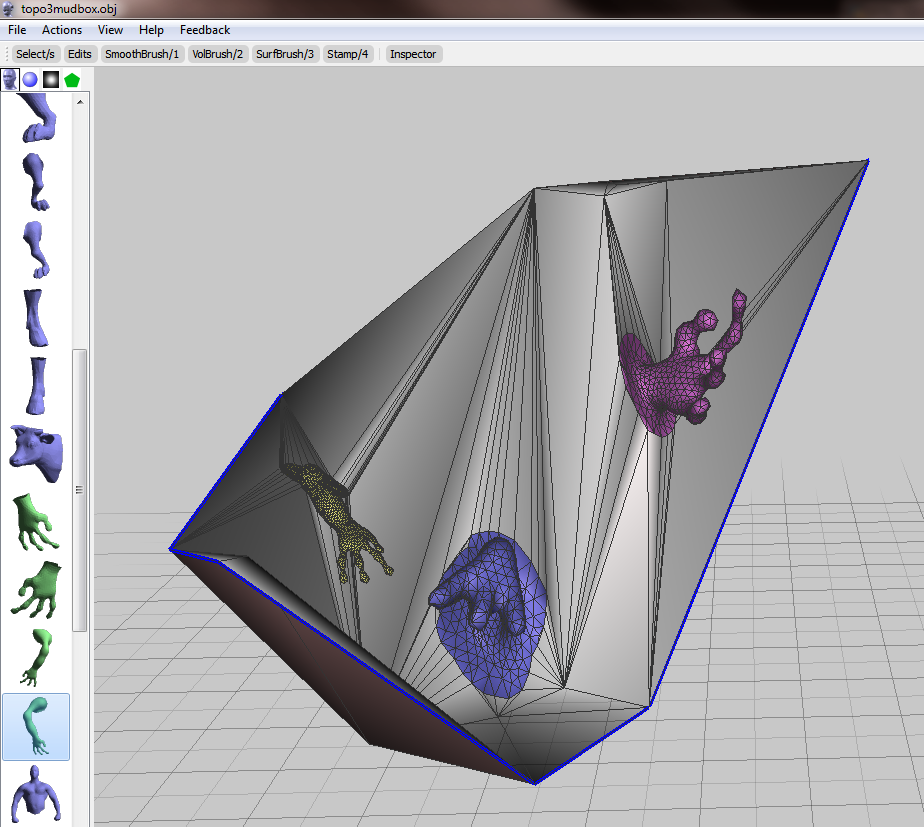
Open meshmixer (now at version 08).  File – Import the OBJ.  Start playing around with it, using the brush tools to smooth or warp the site.  You may need to ‘scale’ up your active tool by using the middle mouse button to see real results.

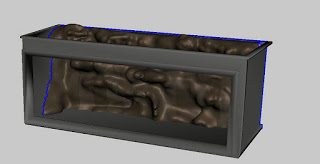
I added some body parts to the site:

Export to OBJ from meshmixer.

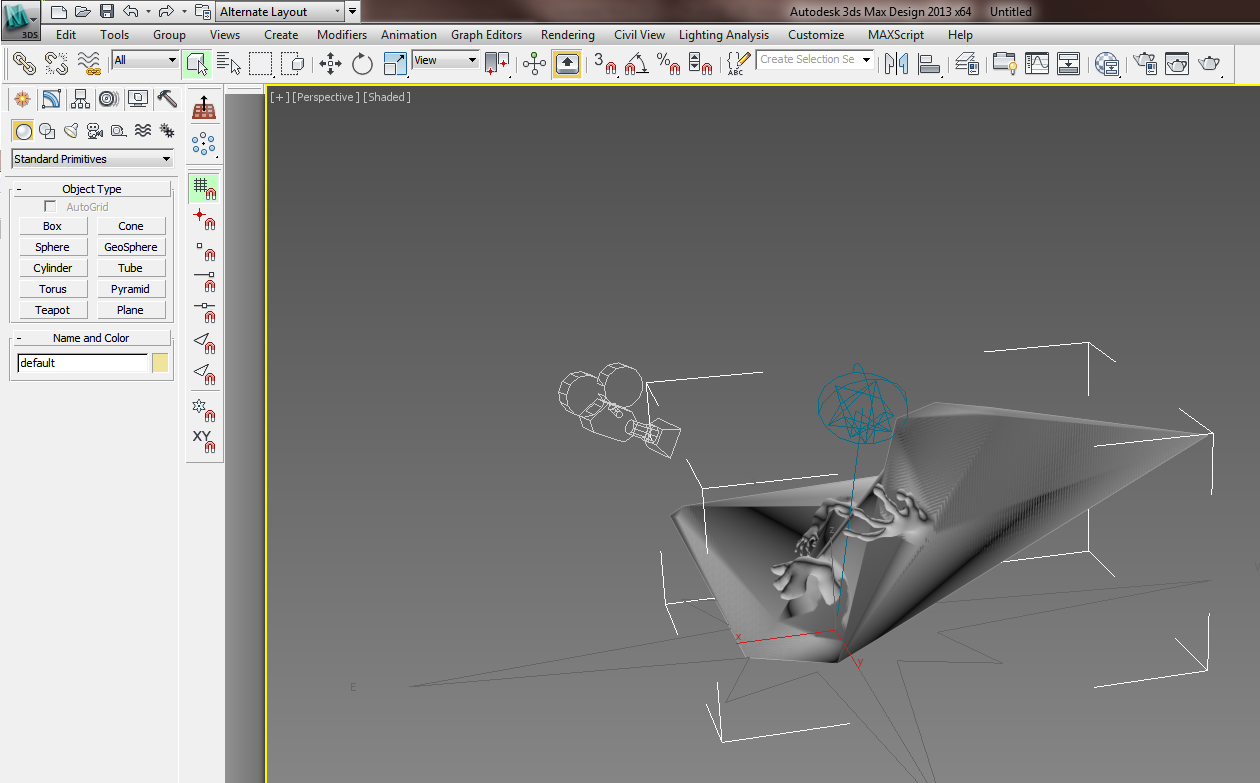
Back in Max, select the previous surface object.  Then Import, select the new OBJ you just made.

Now, export selected the new OBJ (with morphs) to a DWG file.

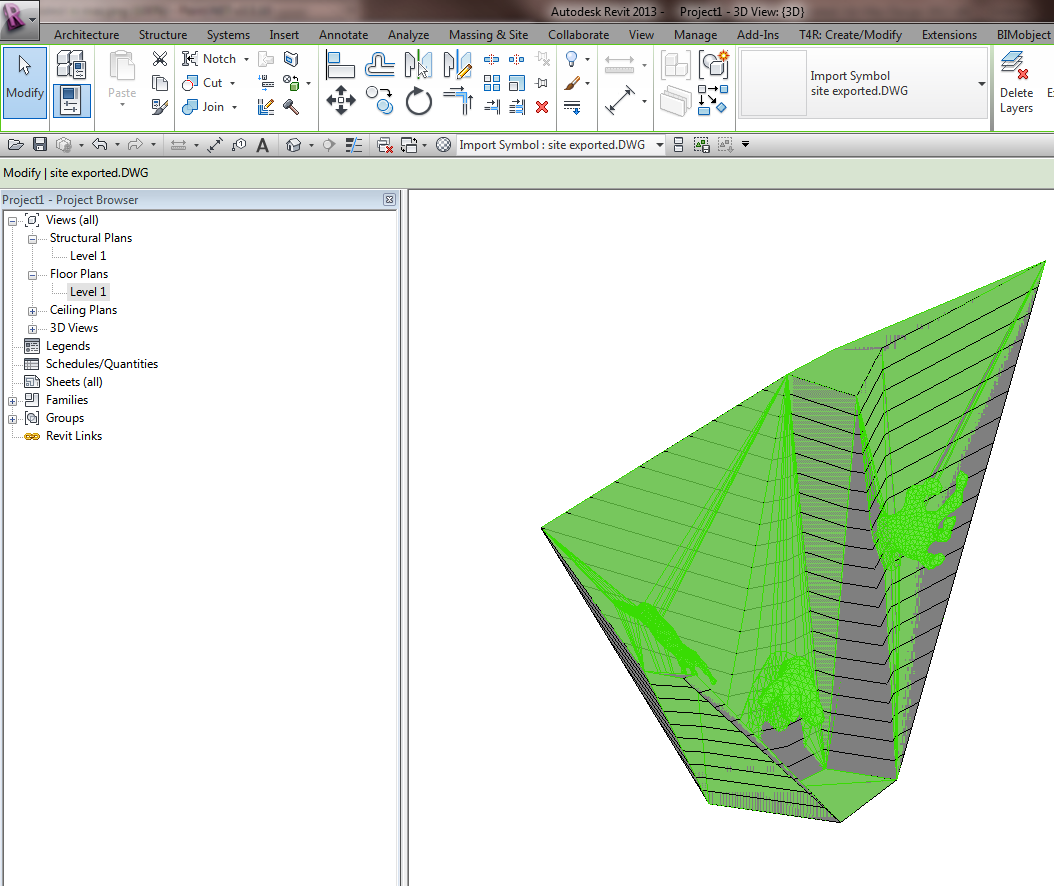
Import the DWG in Revit.  If you haven’t gone too wild, you should be able to use Auto – Center to Center option effectively.

Finally, Revit won’t like this import very much – it probably won’t find points to make a surface.  You will need to round-trip this DWG import by exporting out to DWG from Revit and then importing it back in again.

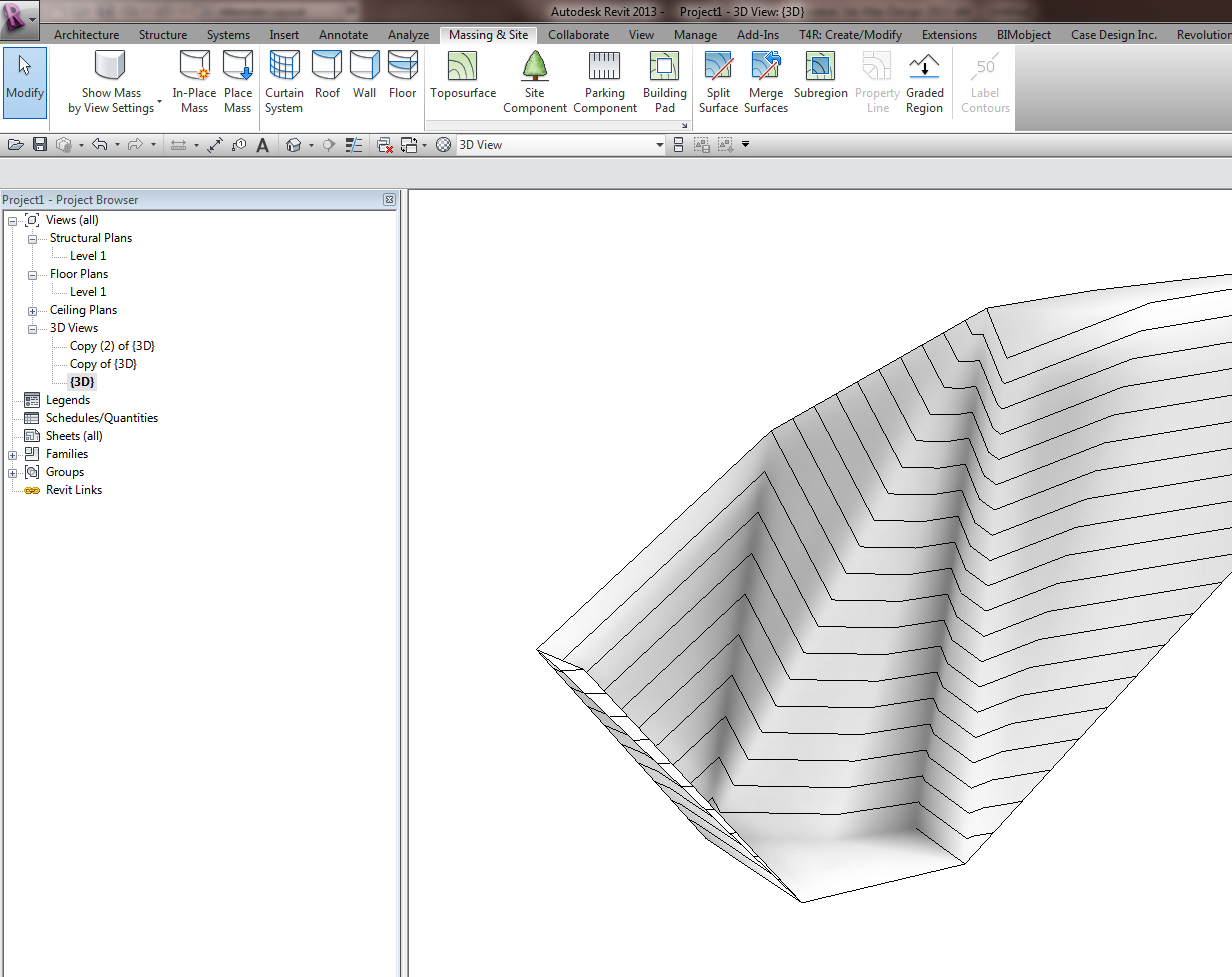
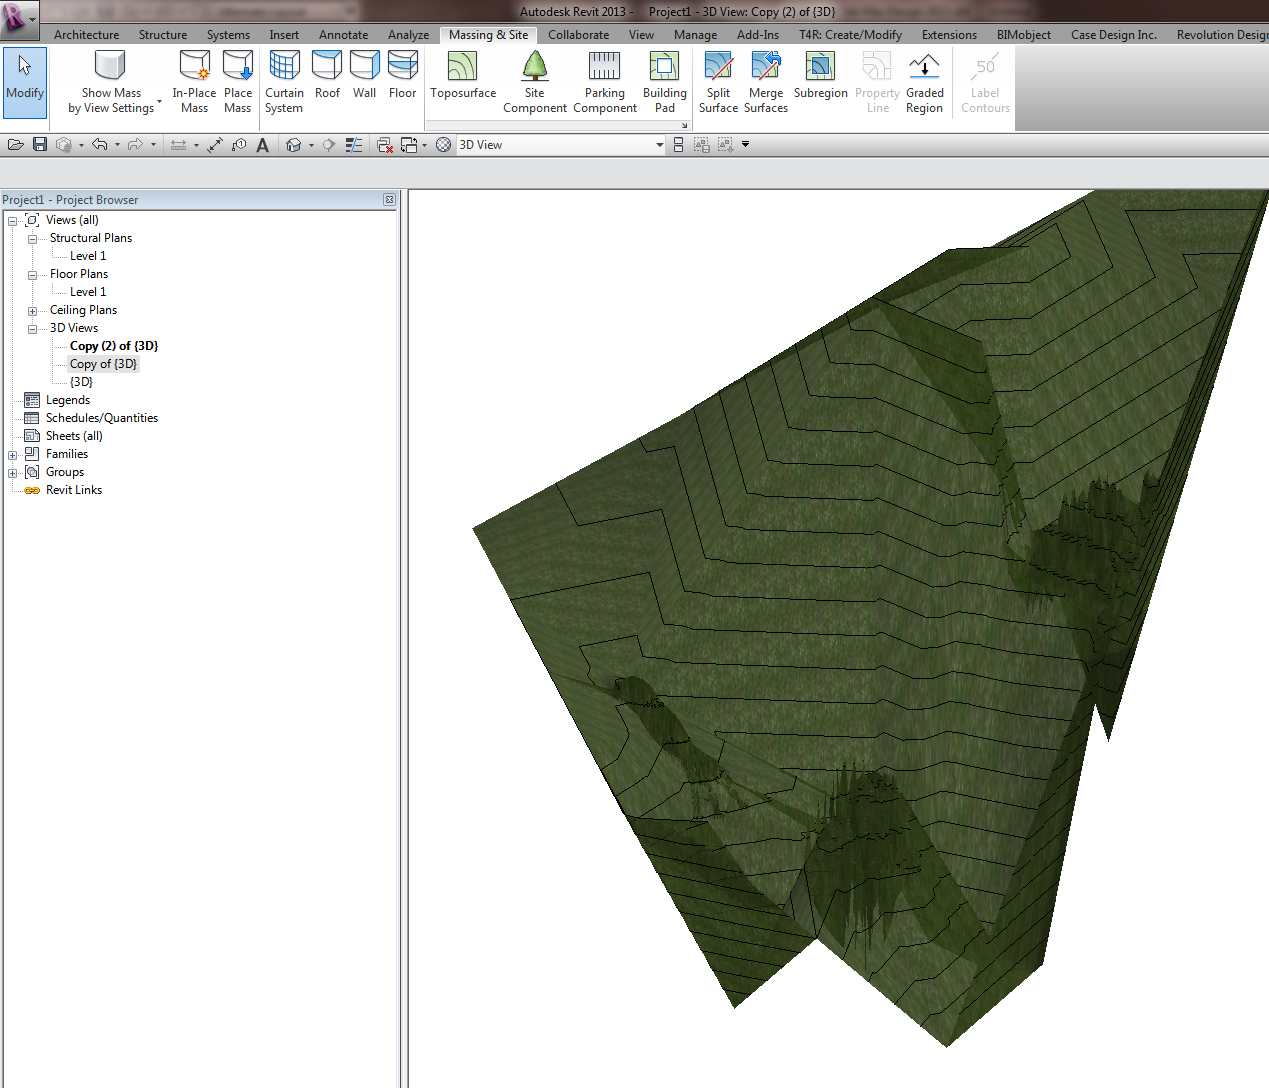
The ’round tripped’ import symbol can be used to generate the Toposurface, now morphed:

You may also be interested in:
Freeform and organic modelling from MeshMixer to 3ds Max to Revit

I’ll admit it – I’m a bit excited about MeshMixer.  I downloaded it today and was very pleased at how easy it is to sculpt things.  A few years back, we worked on an aquarium project with another architect, and it was suggested that it would be great if Revit could generate freeform rock formations that looked realistic.  At the time, I played with Blender and a little add-on called ‘Blender World Forge’.

However, I think MeshMixer can also do the job.  After installing the program I was very surprised that it is actually called Autodesk meshmixer – anyone tell me what is going on here?

Anyway, to see me create some organic-looking rocks and bring them into Revit, check out the video:

Basically, this was my workflow:

  1. Install MeshMixer
  2. Open it, grab a Sphere, do some sculpting.
    (EDIT: You can probably skip steps 3,4 and 6 if you use the built-in Export feature on the File menu… let me know if it works for you.)
  3. Create a part out of the sculpted form you made
  4. Save the project, and find the part OBJ file at
    C:UsersusernameDocumentsmeshmixerlibrariesdefault
  5. Import that into 3D Max
  6. Cap the holes in the mesh
  7. Export to SAT
  8. Import into Revit family, adjust materials.
  9. Load into Project.

Here is the download link again:
MeshMixer

Heads-up via http://labs.blogs.com/its_alive_in_the_lab/2012/03/software-makes-me-look-20-years-younger.html

David Light recommends it in this Tweet:

Freedom capabilities of #autocad 2012 are so cool, forms work very nicely with #revit & #vasari; & no i haven’t gone all soft on you 😉

via @davewlight David Light on
Twitter / @davewlight: Freedom capabilities of #a …

If you are interested in the Patch, Fillet, or Offset Edge tools, check out this video:

If you are interested in the spline form editing, check out the video at this link
http://download.autodesk.com/us/autocad/2011_featurevideos/autocad_3d_freeform_essentials_1044x828.html