Direct download link for presentation by Leigh-Marie at RUGWELL:

via
What Revit Wants

It is one of the few tags that can directly access the Level parameter – quite useful, even to the point where I created secondary Design Option called Level Tagger with a bit of Ceiling on it, and then use a Ceiling “Level” Tag to give me the Level in given views.
Using Copy – Paste Aligned to Selected Levels for the bit of Ceiling, and
Copy – Paste Aligned to Selected Views for the Ceiling “Level” tag.
The secondary Design Option is only turned on when I want to use this particular tag, meaning that the Ceilings are typically hidden.
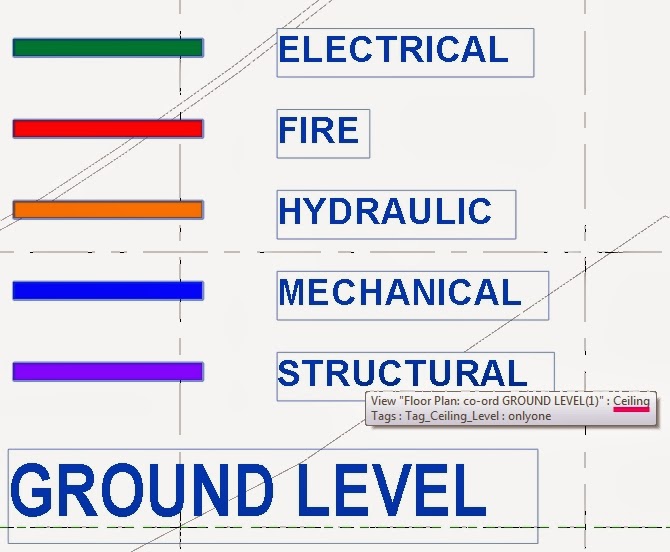
Oh, you can also tag normal Ceilings with Ceiling Tags 🙂
Another method of tagging the Level parameter is using the Case Param to Param tool:
It even gives me a step-by-step on how to do it properly. Revit is truly telling me What it Wants … and it doesn’t want to deal with Areas and Design Options!
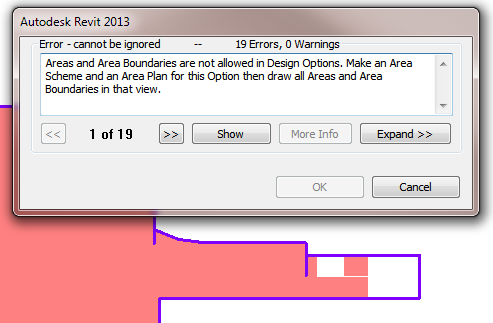
“Areas and Area Boundaries are not allowed in Design Options. Make an Area Scheme and an Area Plan for this Option then draw all Areas and Area Boundaries in that view.“
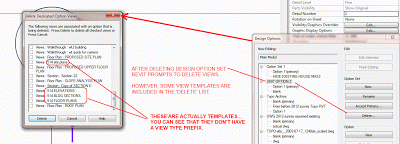
If a View Template includes a Design Option visibility setting, and then the associated Design Option Set is deleted, Revit will prompt you to delete the View Template:
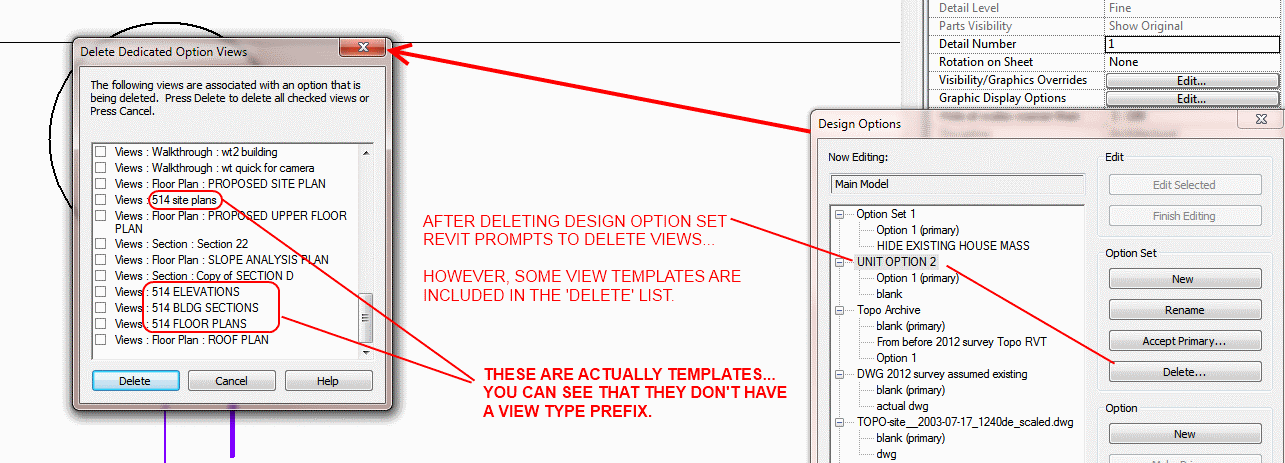
Obviously, you can untick the box to retain your View Template.
Here is another post along similar lines:
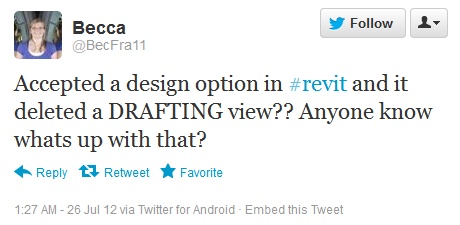
Accepting a Primary Option results in Deletion of Drafting Views – explanation
I saw this tweet and I thought I would look into the problem:
I created a Drafting View and then applied a Secondary Option to its Visibility / Graphics:
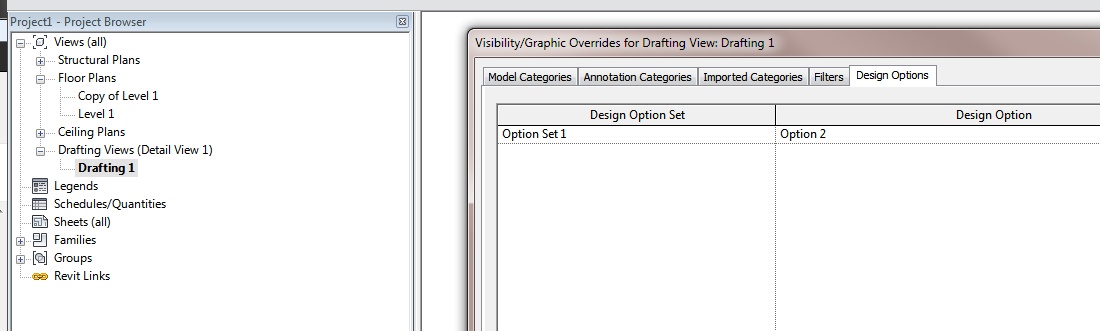
Then I used the Design Option dialog to Accept Primary – and guess what:
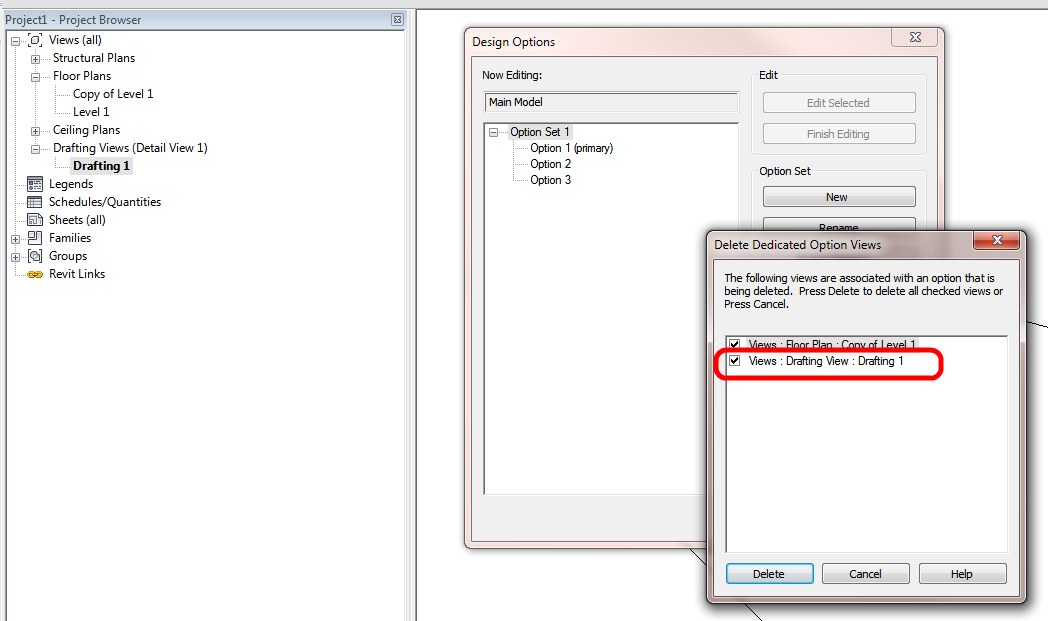
So, even though Drafting Views theoretically can contain NO Model Elements and thus can’t display variances in relation to Design Options, IF an Option is selected in Visibility / Graphics, Revit will prompt you to delete the Drafting View when the selected Option is removed.
How can you get around it? Just don’t tick the check box when the dialog comes up – the Drafting View will remain.
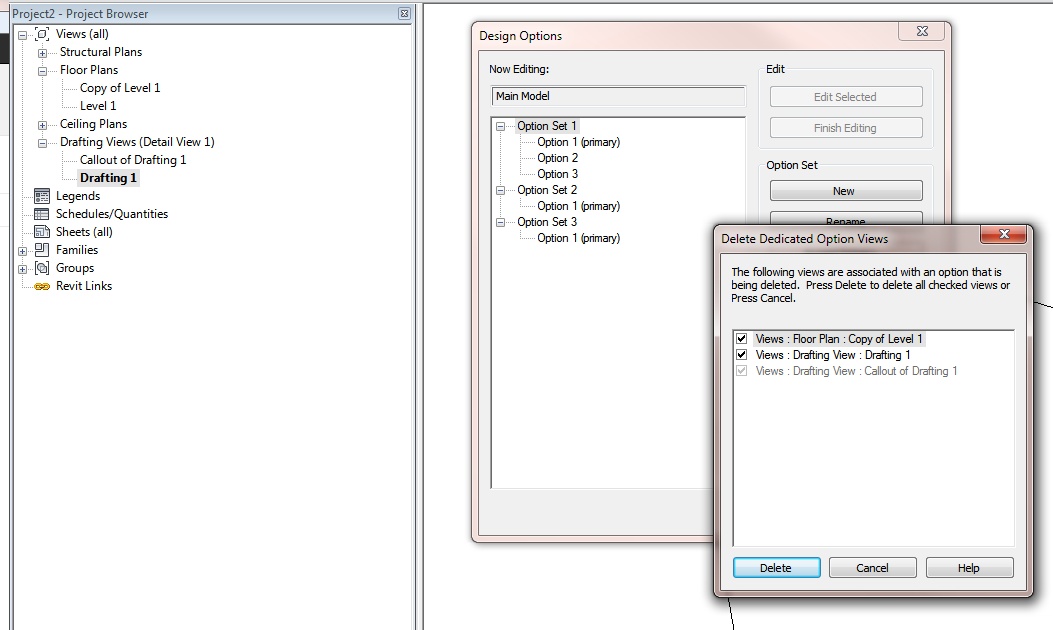
EDIT: There are situations where the Checkbox will be ‘forced’. In the example below, I created a Callout Drafting View from one Drafting View that had a Secondary Option applied. Even though there was no Option set applied in the new Callout Drafting View V/G, the Callout Drafting View checkbox is still grayed out when Accepting Primary …
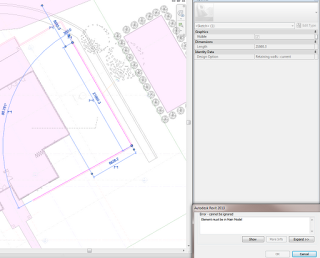
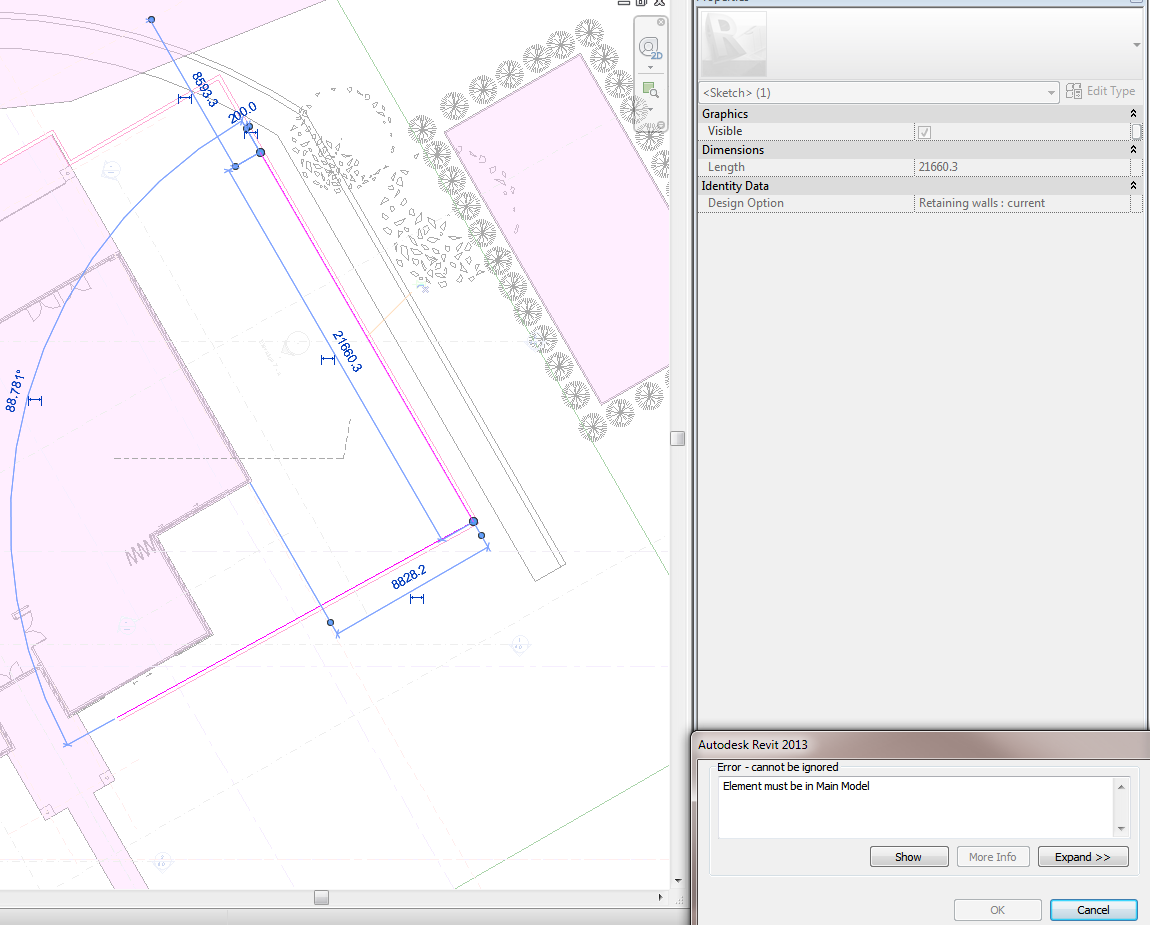
While editing an In-place family (Sweep) inside a Design Option, I tried to unpin a sketch line using the Pin icon on the screen. I received this error:
Element must be in Main Model
To get around it, I just selected the sketch line and use the keys UP (or any keyboard shortcut for Unpin).
One of those annoying little problems … hope the tip helps you.
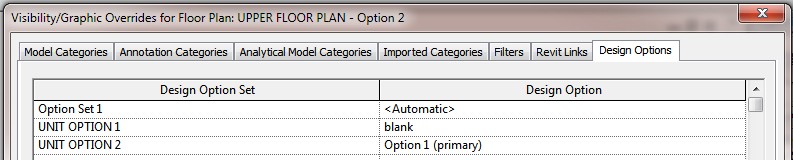
Here is the problem – I have two linked files, set as separate options in the same Option Set. If any of the Room elements overlap in the two linked files when placed in the host file, and I have the view set to a Secondary option, the Room Tag fails:
None of the created elements are visible in Floor Plan: UPPER FLOOR PLAN – Option 2 View. You may want to check the active view, its Parameters, and Visibility settings, as well as any Plan Regions and their settings.
If I move the link in the secondary option AWAY (geographically) from the link in the primary option, the Room Tags work fine.
The workaround that I am currently using is this:
EDIT:
If the above doesn’t work for you, do this:
I have used a similar technique for residential housing – where you can have repetitive plans with only small differences. It can even be adapted to work in a demolition scenario.
The visibility in each applicable view must be set appropriately, but the net result is cleaner and easier to control than the other methods.
Thanks to Aaron Maller for the video.
Interesting post from Revit in Motion: Select all Instances.
Basically, I didn’t know that ‘Select All Instances – Entire Project’ will actually look inside Design Options!
In this case, What Revit Wants is for you to use Schedules to determine the correct counts for objects when using Design Options.