I upgraded from Linux Mint 15 to Linux Mint 17 “inplace” this week. Basically, I edited /etc/apt/sources.list to match current versions (qiana and trusty), then used a few simple commands to do the upgrade. Make sure you backup everything before attempting this:
$ sudo apt-get update
$ sudo apt-get dist-upgrade
$ sudo apt-get upgrade 

I had a couple of issues to fix up. One was with fonts (I had some black squares appearing on some dialogs), so I replaced the contents of .fonts.conf with the version at this link. I also had to fix a failed hook that was stopping the final image upgrade, and for this I used:
$ sudo chmod -x /usr/share/initramfs-tools/hooks/(problem hook)
$ sudo apt-get install -f

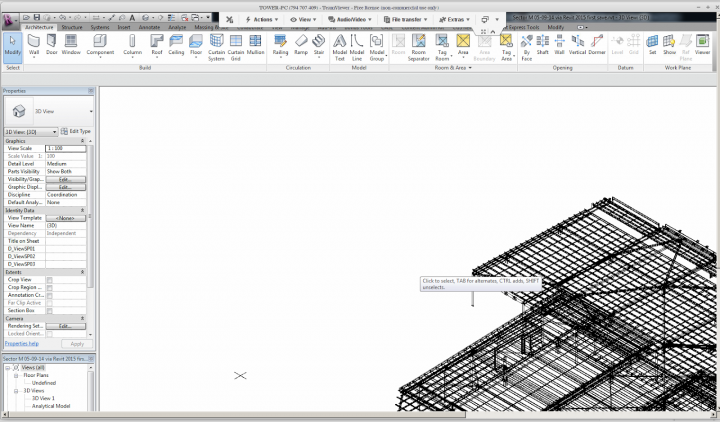
As for the “using Revit” part – I installed Teamviewer using the deb package from http://downloadau1.teamviewer.com/download/teamviewer_linux.deb  Then, I logged into my workstation and here it is, Revit 2015 on a super-old netbook running Linux:

Other options for running Revit on Linux include:

  • Wine emulation
  • Running a VirtualBox emulation of a Windows system, and installing Revit

While I was at it, I also installed the power saving tweaks over here.  Additionally, I like to use newrez to increase my resolution (through a software buffer), meaning I can kinda have 1680×980 resolution on a 1024×600 monitor.

Oh, and one final tip: I have an Android emulator running through VirtualBox that allows me to install Android apps. This means I can theoretically install and use Autodesk mobile apps on this Linux netbook.

Scenario – you have a TV that only has a LAN port (not wireless), a Netbook that sits in the corner (has been replaced by a tablet), and you want to share Internet to your TV.  You can use the Netbook as a wireless repeater … but not if it is running Windows 7 Starter.

Instead, just use JoliCloud OS Express. You can install it from within Windows (which will create an additional Linux based OS to boot your netbook into), and once installed it is incredibly easy to share internet.

To share your Internet connection, whether cellular or otherwise, 

  • right-click on the same Network Manager icon and select “Edit Connections…”.  
  • Click the “Add” button on either the Wired or Wireless tab, depending on which way you plan to share your Internet connection.  Give the new connection a descriptive name like “Shared Internet Connection”.  
  • On the IPv4 tab, select “Shared to other computers” as the Method.  Click “Apply”.

Reboot your netbook.  After you sign in, activate the Internet connection in the Network Manager menu if it is not automatically activated.  It might also be necessary to manually activate your “Shared Internet Connection” by clicking on the corresponding Network Manager menu entry.
You should now be actively sharing your Internet connection with your home network.

via
Netbook Internet Connection Sharing — Despite Windows 7 Starter � Van’s Hardware Journal

In essence, you are turning a netbook into universal wireless adapter – I’m sure some of you will find this useful.

Displayed battery information includes the battery name, manufacture name, serial number, manufacture date, power state (charging/discharging), current battery capacity, full charged capacity, voltage, charge/discharge rate, and more…

Download at
BatteryInfoView – View battery information on laptops / netbooks

Original heads-up via
http://www.raymond.cc/blog/archives/2011/09/06/view-laptop-or-netbook-battery-information-with-batteryinfoview/