Steve’s post recently reminded me of something I have done in the past – using multiple pseudo usernames to access the same Central File in different instances of Revit.

Let’s say that you wanted to render a certain scene in Revit, and then save the resultant image to the Project (a Central File).  As this render could take 10 minutes, you want to keep working on something useful in the same Central File.  What to do?

You just need to open a new instance of Revit and change the Username, then open a Local Copy of the Central as per usual.  You now have 2 instances of the same Central model open, and you can work in and Synchronize from both of them … obviously you are going to need some decent hardware if you are working on a large central file with links.  Set the first instance to render, and work in the second instance while that is happening (keep in mind that local renders in Revit can use multiple cores, so you may want to think about manually adjusting core affinity).

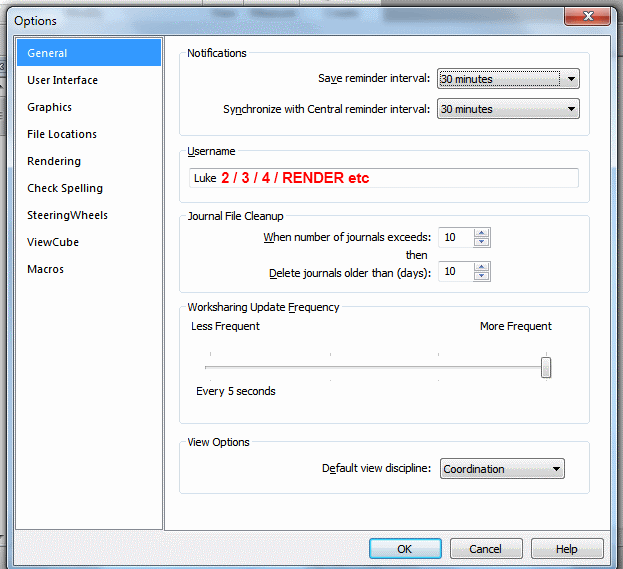
The username can be changed in the Revit Options dialog:

From Steve’s post:
You can however change your username anytime you want when you work in a central file. It isn’t a great idea to actually work this way, switching usernames as you go. It is however a way to clear out users that have not relinquished worksets properly though. When nobody else is working on the project you can open a central file and pretend to be the ill mannered users that haven’t relinquished elements properly. It’s another reason you might consider working in a central file, even though it is generally frowned upon.

Read more at:
Revit OpEd: Changing a Username

Here are a couple of system utilities that may help you to squeeze maximum performance out of your hardware (to speed up Revit, of course).  Actually, my FX580 was struggling a bit with Showcase, so I wanted to overclock it a bit to make the augmented reality plugin work a bit more smoothly…

GPU-Z is a handy information tool for your video card.  If you are overclocking, it will tell you the current clock speed, as well as the default.  It will also tell you the driver and Forceware version that you are running, as well as additional advanced performance information.

Download TechPowerUp GPU-Z v0.6.4 | techPowerUp

(also, if you are overclocking a GPU, check out hwbot – it will give you an idea of the average overclock you can achieve using air cooling only for a given GPU model)

Core Temp will give you advanced processor information, including temperature and load for each core on your CPU.

Dev Eject will help you remove USB devices safely, even if Windows is struggling to do so.

Standard Casework families can not join geometry in the project environment, but Generic Models can.  There are various opinions on how to handle this.  From RFO:

Aaron Maller (using Generic Model, non adaptive):
Ours are generic models, non-line based, and we join geometry. It reports quantities correctly but conservatively, since a mitered corner reports both full lengths. But i prefer it that way. AC’s are nice, but since they havent made one that is multiple point with point number dictated on the fly, im not making 7 different families so i can have a 2, 3, 4, 5 and so on.

Alex Page (Generic Model, but using subcategory):
Ours are Generic models (on a subcategory called Casework) so we can successfully use the join tool, and line based for ease of use… 

Steve Stafford (Casework, adaptive):
ah youze guys are chickens 
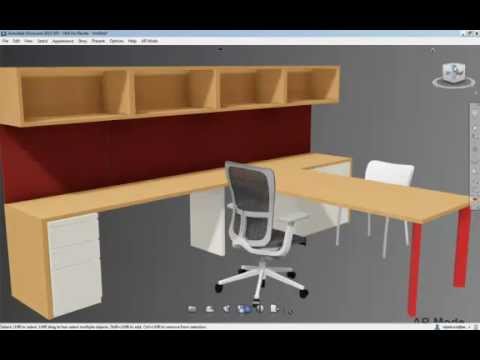
I made this one in less than five minutes from scratch. Not much more work than the old in-place deal. Make a few versions and you’re “done”.

Read more:
2012: Clever Countertops

Old 2006 post on AUGI, listing the then ‘joinable’ categories:
It seems to be that only elements of some categories can be joined. Using the default Revit Building template, these are the categories that can be joined:
Ceilings
Columns
Floors
Generic Models
Mass
Roofs
Structural Columns
Structural Foundations
Structural Framing
Walls 

via 
http://forums.augi.com/showthread.php?42732-Casework-Families-Geometries-Don-t-Join

The question remains – what do YOU do to solve this problem?

And can you find a ‘current’ and complete list showing the categories that can Join Geometry in the Project Environment?

I learned something from Wikihelp today:

  1. In the drawing area, right-click a dimension lock.
  2. Select Show Related from the context menu. The appropriate element highlights and a dialog identifies the element.
  3. Click the arrow buttons to switch between the elements constrained by the lock.

From:
Distinguishing a Dimension Lock’s Related Element – WikiHelp
via
https://twitter.com/RevitWikiHelp

I had one of those slap-your-head moments when this finally came to me … use Coins Auto Section Box!

Step by step:

  1. Close Revit
  2. Install Coins Auto Section Box
  3. Open Revit
  4. Open a project
  5. Draw a Scope Box
  6. Go to a 3D view where you want to match the Scope Box
  7. Select the Scope Box
  8. Go to Add-Ins > Auto Section Box
  9. Set Element extents, plus buffer: to 0
  10. Hit OK!

The 3D view now has a Section Box that matches the selected Scope Box.

I previously tried to implement some sample code from The Building Code, but couldn’t make it work (see below the lines).  I’m sure this is due to my less-than-optimal API skills…

How to compile code SLN for Revit (using Building Coder as example:)

  1. Download the ZIP
  2. Unzip it
  3. Double click SetSectionBox.sln and open it in Visual C# Express (or use SharpDevelop, see below)
  4. Click on the Reference Paths side-tab
  5. Using the … add your Program FilesAutodeskRevit 2013Program directory
    it is looking for RevitAPI.dll and RevitAPIUI.dll
  6. Right-click on the SetSectionBox node and press build
  7. Find the setsectionboxsrcSetSectionBoxSetSectionBoxbinRelease folder, and copy the SetSectionBox.dll
  8. Paste it into %AppData%AutodeskRevitAddins2013
  9. If it isn’t already there, paste SetSectionBox.addin into the same folder.

Revit 2013 ships with the open source IDE SharpDevelop.

If you want to use SharpDevelop:
“yourdrive:Program FilesAutodeskRevit 2013ProgramSDAbinSharpDevelop.exe”

Just drag and drop the solution file into the SharpDevelop window.

Running the command, I get a couple of different errors.  One is:
Revit encountered a Autodesk.Revit.Exceptions.ArgumentException: Box is
empty
Parameter name: box
at Autodesk. Revit.DB.View3D.set_SectionBox(BoundingBoxXYZ section Box)
at SetSectionBox.Command.Execute(ExternaiCommandData
commandData, String& message, ElementSet elements)
at apiManagedExecuteCommand(AString* assemblyName, AString*
className, AString* vendorDescription, MFCApp* pMFCApp, DBView*
pDBView, AString* message,
Set< Elementldstd::less tnallc< Elementld> > • ids,
Map tnallc > * data, AString*
exceptionName, AString* exceptionMessage)

Here is SetSectionBox.zip containing the complete source code, Visual Studio solution, and add-in manifest of this command. 
via
The Building Coder: Set View Section Box to Match Scope Box

Nice tip from Revit Rants on how to round values within a family – and it allows much greater flexibility as to the rounding increment.  In the example below, Chris uses ROUNDUP to round to a 5mm degree of precision.  You could combine his method with Shared Parameters to ensure that the resulting value is schedulable (make Param2 a shared parameter in the example given below):

Quote:
I have a parameter called “Param1” that I want to drive “Param2” from.

Param2 = (roundup((Param1 + 5 mm) / 5 mm)) * 5 mm

Read more:
Revit Rants: Revit Formula Rounding

I find it interesting that AutoCAD 2013 can directly link (XREF) DWG files directly from the Autodesk Cloud.   Just Insert – DWG Reference… – then press the Autodesk 360 button in the dialog.

Revit Server is necessary technology (at the moment), but it is essentially a ‘do it yourself’ server system.

When will see the little Autodesk 360 button appear in our Revit Link dialog?

Read more at:
XREF Drawings from Autodesk 360 | The CAD Geek Blog