So what’s the deal with Stingray? Basically we are talking about a realtime rendering engine that talks to 3ds Max. As we know, Max talks to Revit. Autodesk is essentially providing (another) realtime rendering workflow from the BIM environment, and that is obviously a good thing…

Here’s a snippet from In the Fold:
To understand the impact of this new capability within 3ds Max, let’s take a look at the state of a BIM workflow using Autodesk solutions before today’s announcement.

The  Stingray engine allows designers, owners and stakeholders to access and  visualize a building model in real-time to fully understand the scale,   feel and experience of the building before construction starts.

Building designers using Autodesk Revit software have had the ability to easily import models into 3ds Max to create stunning, photo-real images and animations to communicate design intent. It’s a workflow that’s been widely accepted in the AEC industry and plays an integral part in the design process. Now, with the Stingray engine, Revit models can be brought into 3ds Max to be made visually stunning and then imported to the Stingray engine to be made fully interactive, allowing users to explore “what if” design changes in a compelling visual environment not unlike a first person walk-about in a physical building. The real advantage of this is that it allows designers, owners and stakeholders to access and visualize a building model in real-time to fully understand the scale, feel and experience of the building before construction starts. 

Read the whole post:
Autodesk Stingray Real-Time Engine Takes Design Visualization to a New Level for AEC Industry

I have previously discussed going from Navisworks to Revit using FBX – 3dsMax – SAT. However, maybe we can do this without 3dsMax. Did you know that vanilla AutoCAD has a FBXIMPORT command?

1) Export FBX from Navisworks – it will ignore Section clipping planes, but it will respect the Hide/Required setting of the view. You can limit polygons (advised for big models)

2) FBXIMPORT in AutoCAD – untick Cameras and Block options as they can be problematic.
Then save DWG. (Note – see below for correct 1:304.8 import scale)
EDIT: If using Navisworks 2015 FBX export to version 2014, with Advanced Options units set to millimeters, you can import to AutoCAD 2015 with 1:1 scale factor (using latest service packs)

3) Open Revit and Link in the DWG.
For this example, I used Origin to Origin as I wanted to try round-tripping back to Navisworks.

Once I exported the NWC and put it back into Revit, I noticed the file was out of scale. Now, I experimented with a few different scale settings, but everytime it was a scale of about 30 or 300 wrong. 1 foot = exactly 304.8 mm. Evidently, the “internal” units of an FBX are feet. So, when we import to AutoCAD we need to use this setting to translate to mm:

This time, when I exported the Revit view to a NWC, and then appended it back to Navisworks – it can came back in exactly the right place. This workflow relies on using the internal Revit Zero point and Origin to Origin linking.

There you go – now you can roundtrip any mesh geometry from Navisworks to AutoCAD to Revit and back to Navisworks 🙂

“new ability to import and visualize massive datasets captured from reality as point clouds. If you are a modeler, you can view point clouds in true color in the 3ds Max viewport, interactively adjust the extent of the cloud displayed, and create new geometry in context by snapping to point cloud vertices.”

Coming 30 September 2013

Read more:

This is a great post / video from pedroeron on RFO.  It essentially shows you how to hide the edges of imported geometry (such as from Sketchup), so that when it imports into Revit, you only see the shaded surfaces – not the ugly triangulated surface edges.  Nice!

Also, this video shows that it is possible to Link a DWG into an inplace Component family – some interesting possibilities arise from that.


via
From 3ds max to revit without viewing triangles edges

EDIT – the steps are basically:

  1. In 3dsMax, Use ProOptimizer Modifier to get your model to less than 32000 faces (so that it can be exported to DXF)
  2. Convert to Editable Mesh
  3. Use Mesh Selection – Edge tool
  4. Select all Edges and change to invisible
  5. Make one or two triangles visible (so that you can select the model in Revit)
  6. Export to DXF 2007 version
  7. Import into Revit

Note – you can also go Export to 3DS, then import to AutoCAD (using 3DSIN command) and divide object by Material (creating a new layer for each material), then go to Revit from there.  You may experience some geometry issues through this multi-handling of the data.

From Jeffrey McGrew on RevitForum (I’ve underlined key parts):
“While I respectfully disagree that rendering in Revit is a waste of time, for there are still times we do so, I totally agree with what you’re saying here. If you want to produce renderings from Revit models using anything but the built-in Mental Ray (and it’s vast limitations) then your best bet really is to link the Revit file into Max.

The new model linking in Max 2013 works very well, so we simply link our models, continue to do the ‘real work’ in Revit while we simply swap materials / plants / lights in Max and then use Octane Render to produce the images.

We’ve tried just exporting OBJs out of Revit or Max & bringing those into Octane Render, and the lack of control over UVs, instancing, entourage, etc. drove us back to using Max.

Just to be clear, I HATE Max. The UI drives me crazy, and it’s so crash-tastic that it’s a wonder we get work done sometimes. I’d much rather work with another program, but the Revit linking works so well, and the Octane Render plugin works so well, that well, I just suck it up. 😉

I’ve tried several rendering plugins for Revit, and run into the same problems. Even if there were a Octane Render plugin for Revit, I don’t know if we’d use it, unless it was as well integrated as the Mental Ray one is…

Jeffrey McGrew
Architect

via
2012: Maxwell for Revit

  1. File – Save As – Archive
  2. This will make ZIP with all the resources.
  3. If you want to view them all in one folder, use 7-Zip, Extract Files… with no pathnames (this will put all the files in one folder)

If you have exported a file from Revit to 3ds Max Design (perhaps using Suite Workflows), this is a good way to capture all the texture and material resources that are needed and put them in one easy-to-use location.

This may allow you to export more easily to other formats and use the associated bitmaps in those other formats (like OBJ or similar).

I have spent hours trying to figure out how to take actual camera locations from 123D (Photofly) and get them into Revit as ‘real’ cameras (3D views).  I thought it would be cool to be able to use a real-life camera location in Revit, because then you would already have the existing scenery as a background image (because 123D Catch would have used it in processing the model).  This was partly in response to this comment.

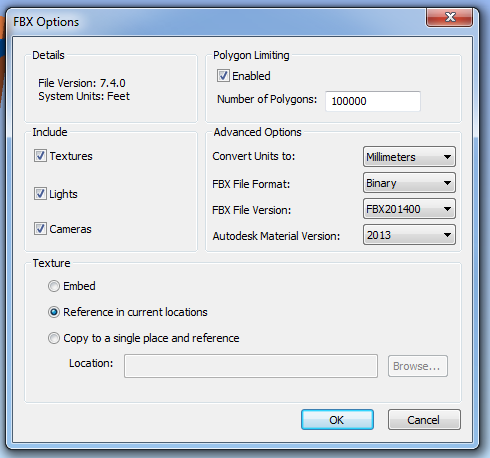
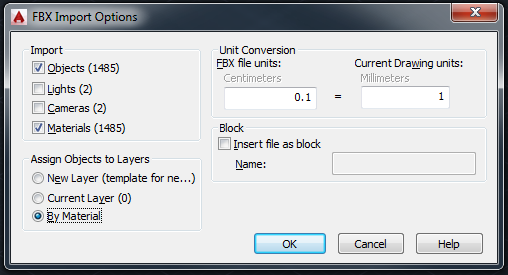
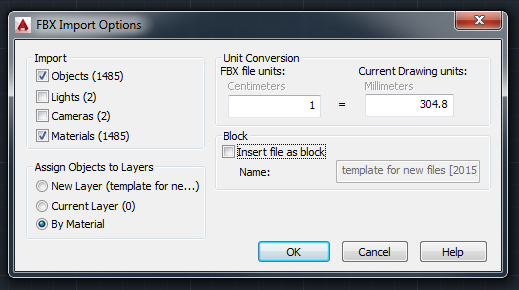
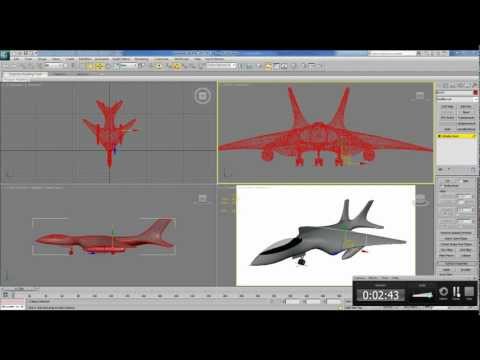
Its easy to export an FBX from 123D Catch, and open that in 3ds Max – you get cameras, yay.  You can use FBXIMPORT in AutoCAD and you get the named views (cameras), yay.

However, I have not been able to find an equivalent process for Revit.  At this point, I have to admit defeat.

My big idea was to convert the FBX into IFC with view information in the schema, and then open that IFC in Revit.  Sadly, I kept coming up against problems.  AutoCAD Architecture can import FBX and then export IFC, but the 3D views do not seem to come through.

One possible workaround would to compose your presentation in Showcase – you can export from Revit to Showcase, and you can also export an FBX from 123D and bring that into Showcase too.  But I want a purely Revit way.

If you have any thoughts on how to make this happen, PLEASE comment 🙂

Here is a list of links and notes that you may find useful.  There are some really cool resources on IFC available now – read on below:

NOTES on FBX and IFC
Autodesk sign in is required on 123D Catch to actually activate the Export feature to allow exporting of FBX.

Explanation of the export formats available from 123D (formerly Photofly):

Menu Command Format Contents
saveas .3dp The 3D photo scene contains cameras, reference points, 3D mesh, reference lines, and distance measures. This is the native format for Project Photofly.
export .dwg The drawing contains reference points and reference lines.
.fbx The Autodesk FBX asset exchange file contains the 3D cameras, the photo textured 3D mesh, reference points, reference lines, and reference labels.
.rzi The ImageModeler file is a subset of the 3dp file based on what was selected at the time the photo scene was exported.
.obj The OBJect file contains the photo textured 3D mesh.
.ipm The Inventor Publisher Mobile file contains the photo textured 3D mesh and can be viewed with the free Inventor Publisher Viewer available in the Apple iTunes App Store.
.las The binary LASer file contains the 3D point cloud that was automatically extracted from the pixels of the source photographs. The LAS file format version is 1.2.

via
http://labs.blogs.com/its_alive_in_the_lab/2011/09/viewing-ipm-files-generated-by-project-photofly.html

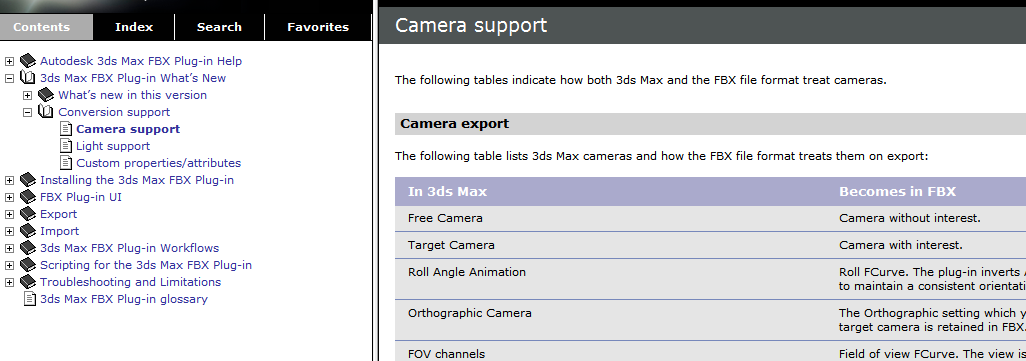
Camera Support – 3ds max and FBX

http://download.autodesk.com/us/fbx/20112/3dsmax/files/WS1a9193826455f5ff6026605b1181237e94650be.htm

AutoCAD Architecture IFC export information
http://exchange.autodesk.com/autocadarchitecture/enu/online-help/browse#WS73099cc142f4875510b13df10ec0b2c48a-7a62.htm

3D views can be export FROM Revit TO AutoCAD Architecture
http://wikihelp.autodesk.com/Revit/enu/2013/Help/00001-Revit_He0/1468-Document1468/2171-Print_Ex2171/2172-Export2172/2245-Structur2245/2251-Exportin2251

List of IFC softwares, tools and viewers
http://www.buildingsmart-tech.org/implementation/get-started/ifc-toolboxes/ifc-toolboxes-summary

IFC schema information for views (plans, sections, 3d views etc)
Context
http://www.buildingsmart-tech.org/ifc/IFC2x4/rc2/html/schema/ifcrepresentationresource/lexical/ifcgeometricrepresentationcontext.htm
Subcontext
http://www.buildingsmart-tech.org/ifc/IFC2x4/rc2/html/schema/ifcrepresentationresource/lexical/ifcgeometricrepresentationsubcontext.htm

DDSViewer – can view DWG and IFC

  • also a very easy way to open DWG and save as PDF!

http://www.dds-cad.net/132x2x0.xhtml
To get a free version of the DDS Viewer, visit the ftp server and download DDSViewer.exe
IfcWebViewer – online web viewer for IFC using WebGL
http://code.google.com/p/ifcwebserver/wiki/IfcWebViewer


Exporting cameras as .3ds files using Flame
http://wikihelp.autodesk.com/Flame_Premium/enu/2013/Help/01_Flame_Premium_–_Flame/2037-3D_Compo2037/2267-Action%3A_2267/2274-Importin2274/2276-3ds_Max_2276

Vectorworks and 3ds
http://www.scribd.com/doc/34074946/128/Importing-and-Exporting-in-3ds-Format

Showcase can import views from FBX files
http://download.autodesk.com/global/docs/showcase2013/en_us/index.html?url=files/Help_ImportSettings.htm,topicNumber=d30e2896

IFC to OBJ:
IfcOpenShell