This video is a mashup of various Construction Animations we’ve done over time. Contact us for more information: virtualbuilt.com.au
A Demo Reel / Mashup of some recent work…
Over the years we’ve
played with many software solutions to get the kind of results our clients are
after. Each time we do this kind of work it’s slightly different, either a
client will require something different, there’s all sorts of budgets, a client
might want to focus on a specific area, and what we can get our hands on in
terms of models etc, is always different. In the past we’d model in Revit and
Sketchup, federate and visualise in Navisworks or 3DS Max, animate in
Navisworks or 3DS Max and then post production in iMovie or Motion and Final
Cut. A complex high end animation, might see us jump in and out of several
different applications several times over before completion.
However, since Lumion has come along, we’ve been able to significantly increase our output by simplifying the often many different steps we’d need to take. And whilst it isn’t quite a one stop shop, it is definitely made life a lot easier.
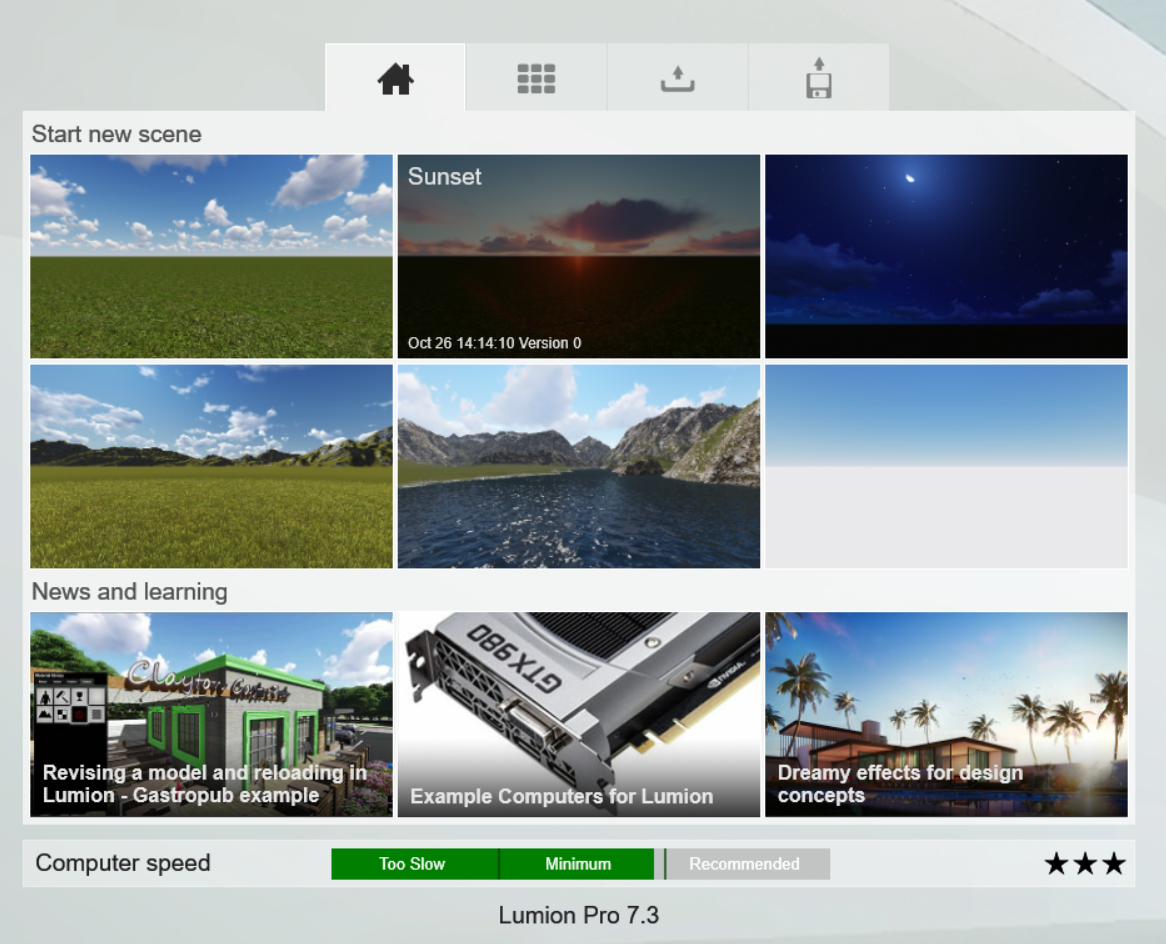
How we use Lumion
Firstly we define
the clients requirements. Is it just images, or is it an animation? Then we
define what are we trying to show in the images or the animation – Is it the different stages of construction,
the site setup, the greater site context (say a busy city street), the
architectural finish? The animation might become more complex if there’s
something specific that the client wants to demonstrate in detail (say safety,
traffic, or a lifting sequence) In this case, we’re not just rigging up a
camera, we might also be keying and animating objects.
Lumion is more then
capable of all of the above, but more importantly it’s able to do it all with
ease. The software is intuitive and simple. And since this type of work is very
susceptible to ‘scope creep’, and client whims, this kind of simplicity and ease
adds up to hours and hours of time saved.
Building a model (a typical example)
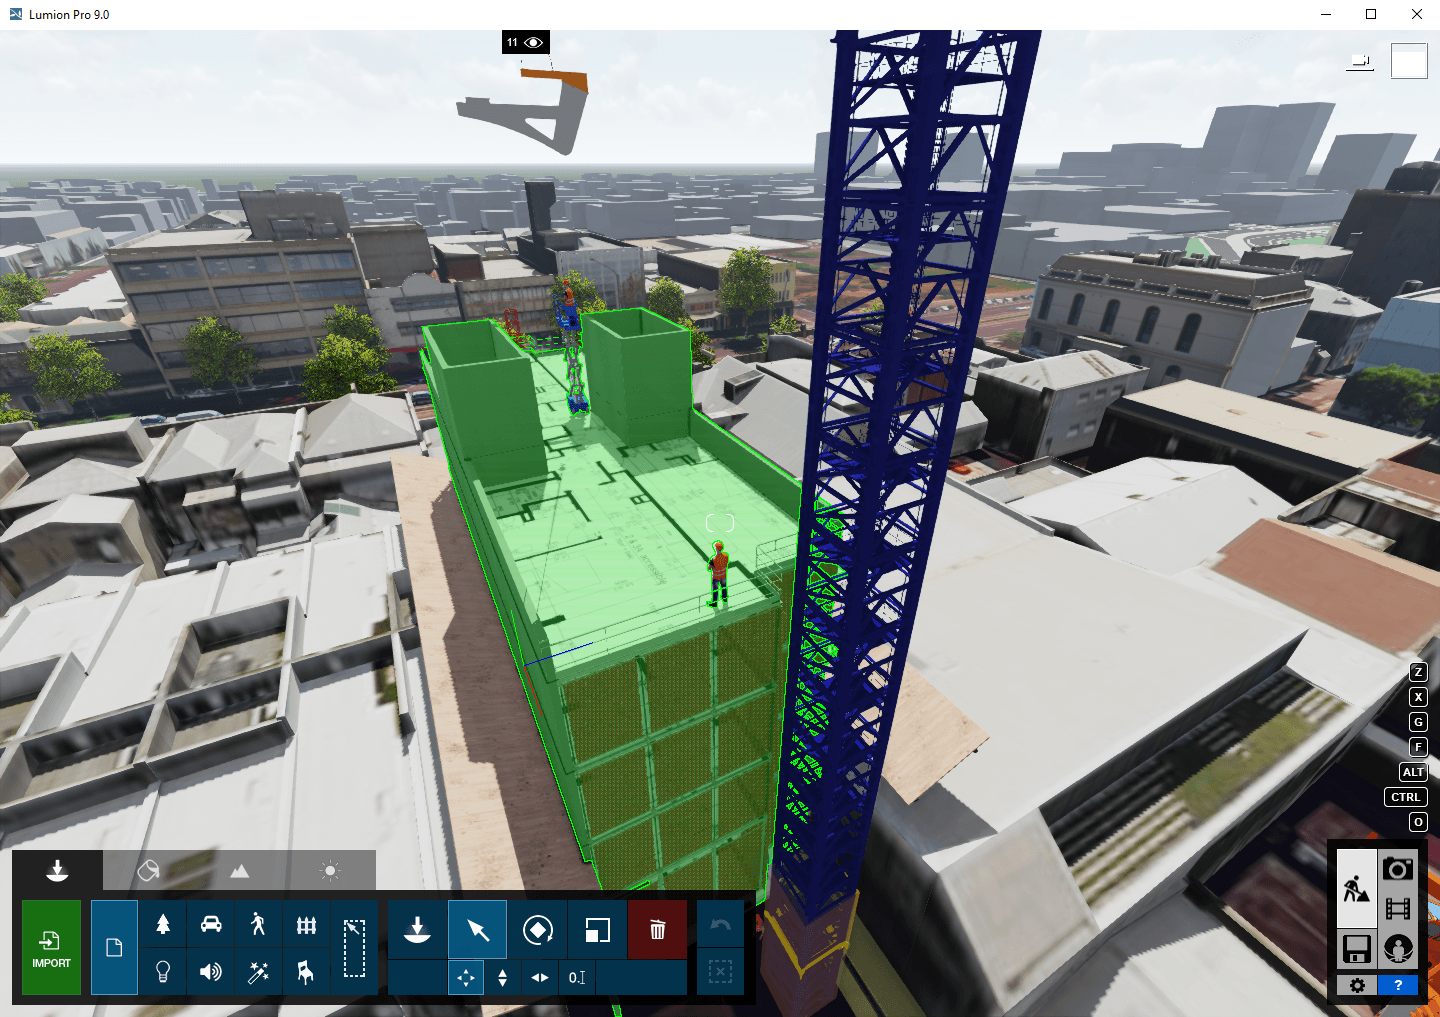
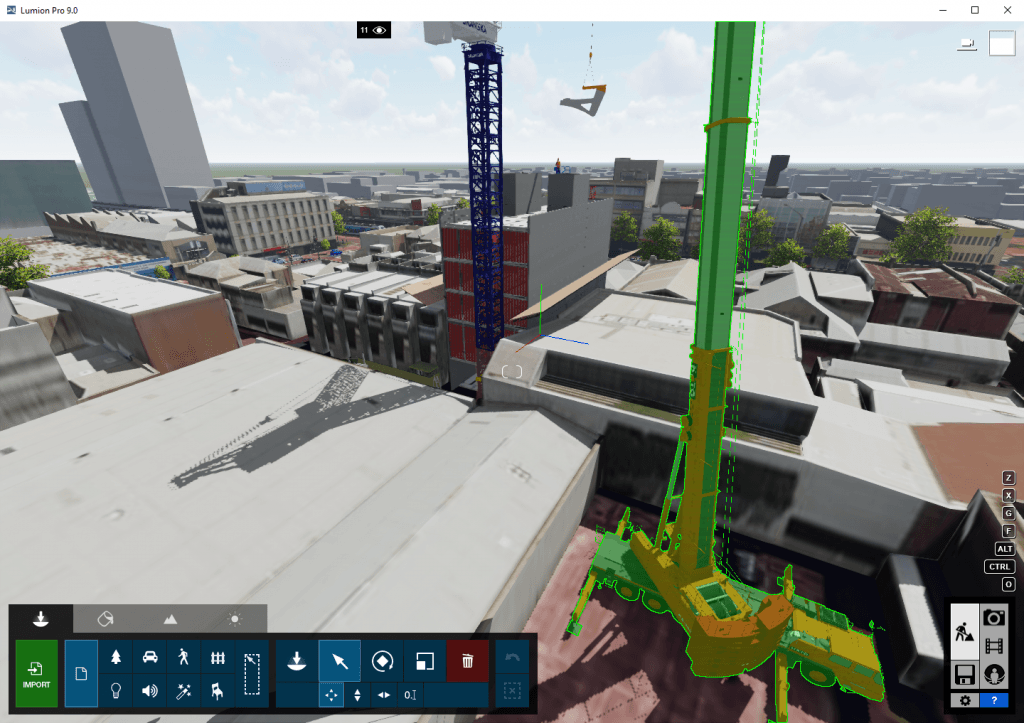
We primarily use Revit for developing a lot of our initial model content. Often we’re able to get our hands on the consultants models (or we build up our own), then we add some context like neighbouring buildings, streets, pathways etc. (Lumion can also do this with OpenStreetMap data) Then we add other content like cranes, concrete pumps, people, fences etc. This particular part requires some thought, because there’s a couple of ways we can arrive at the end result. Firstly Lumion provides a lot of really good content (People, cars, trees, cats, etc) and we can add this in Lumion (saving a few steps in the process), however, there isn’t a lot of “Construction” content or the right content, so we often need to get that elsewhere. Sketchup Warehouse is an example of a good source. Getting content from Sketchup Warehouse, we can either bring it directly into Lumion, or go via Revit into Lumion.
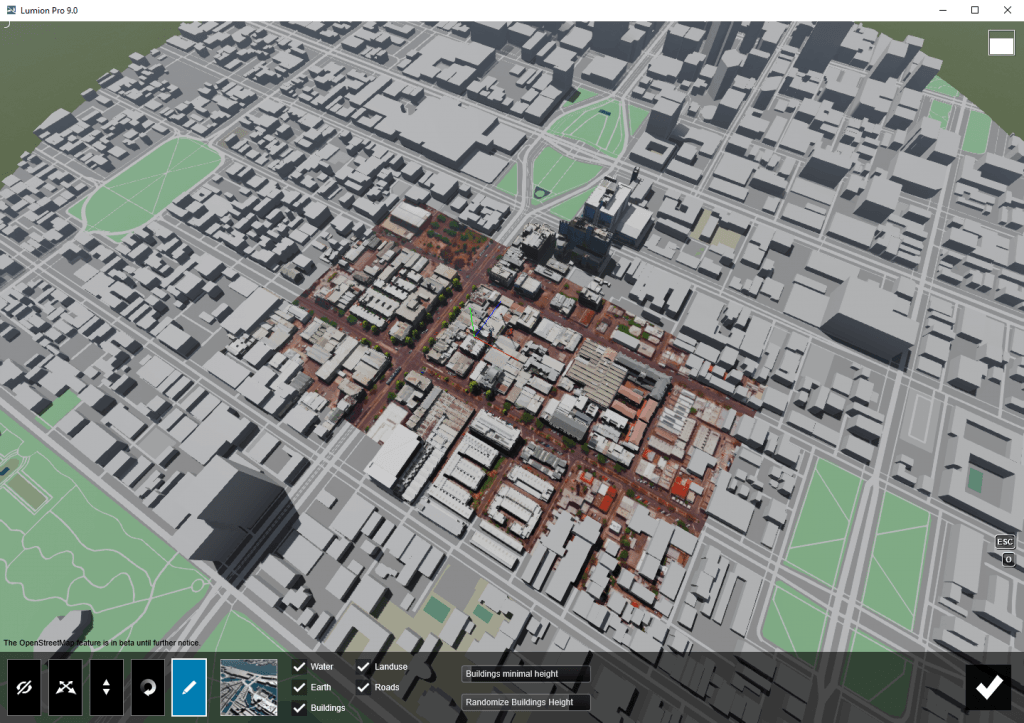
Open Street Map in Lumion
Some content in Revit
Sketchup Warehouse in Lumion
Google maps in Revit
Back in Revit
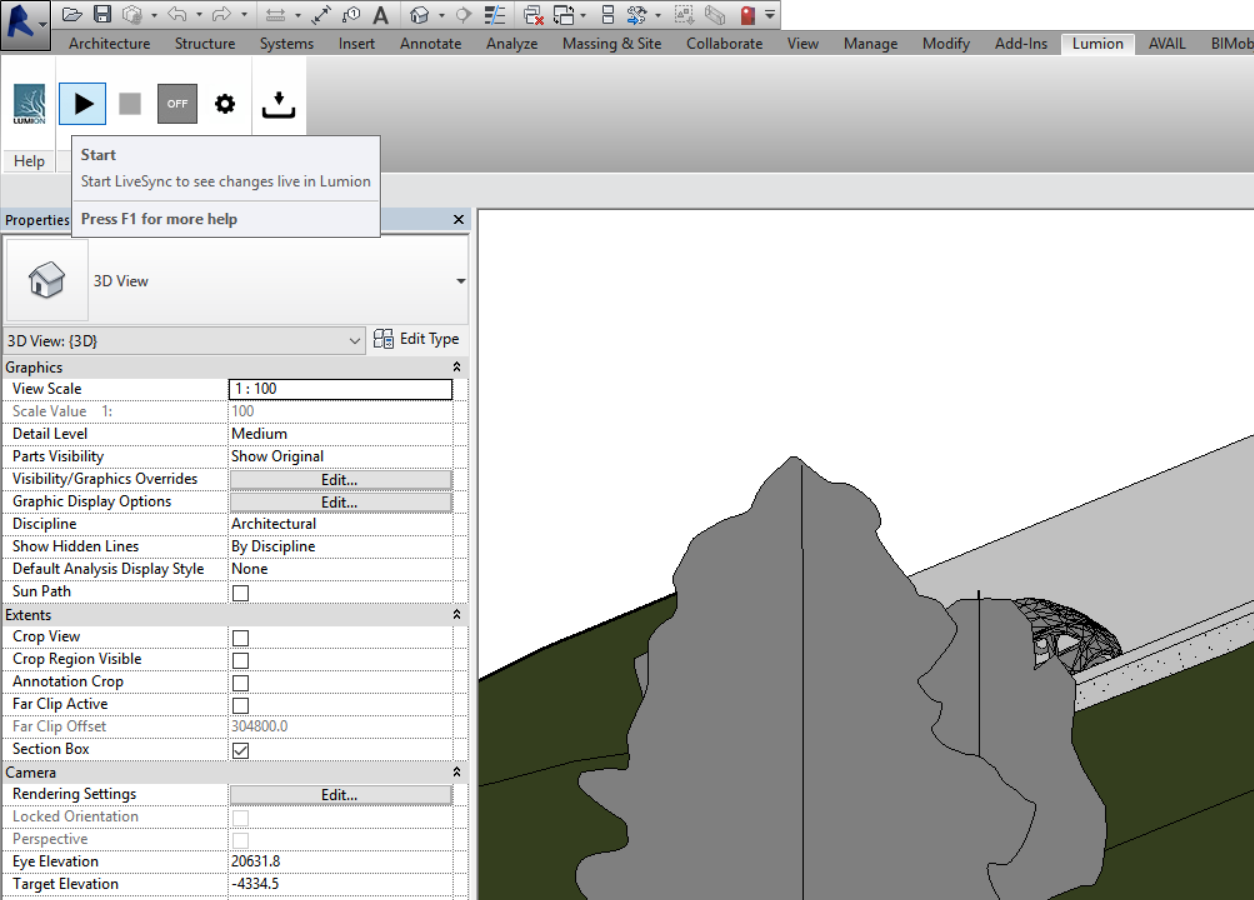
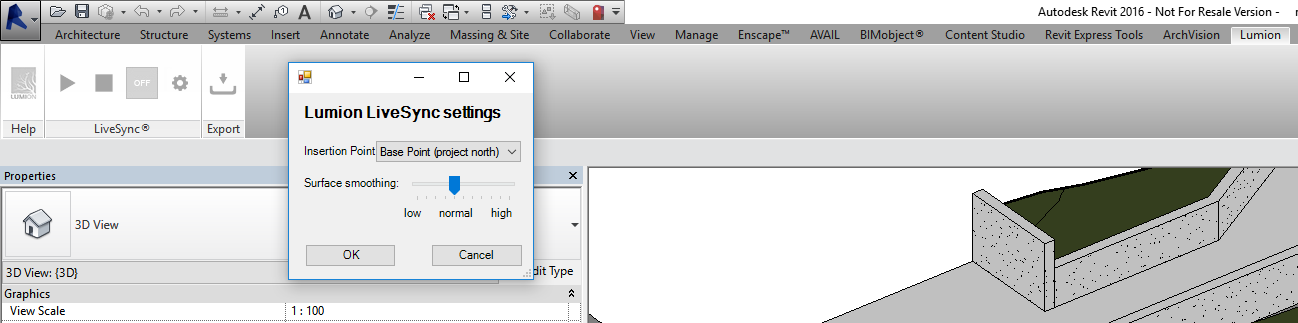
however, we can utilise the LiveSync option to quickly generate content and see
it populating Lumion. I’ve created a tutorial of the LiveSync tool below.
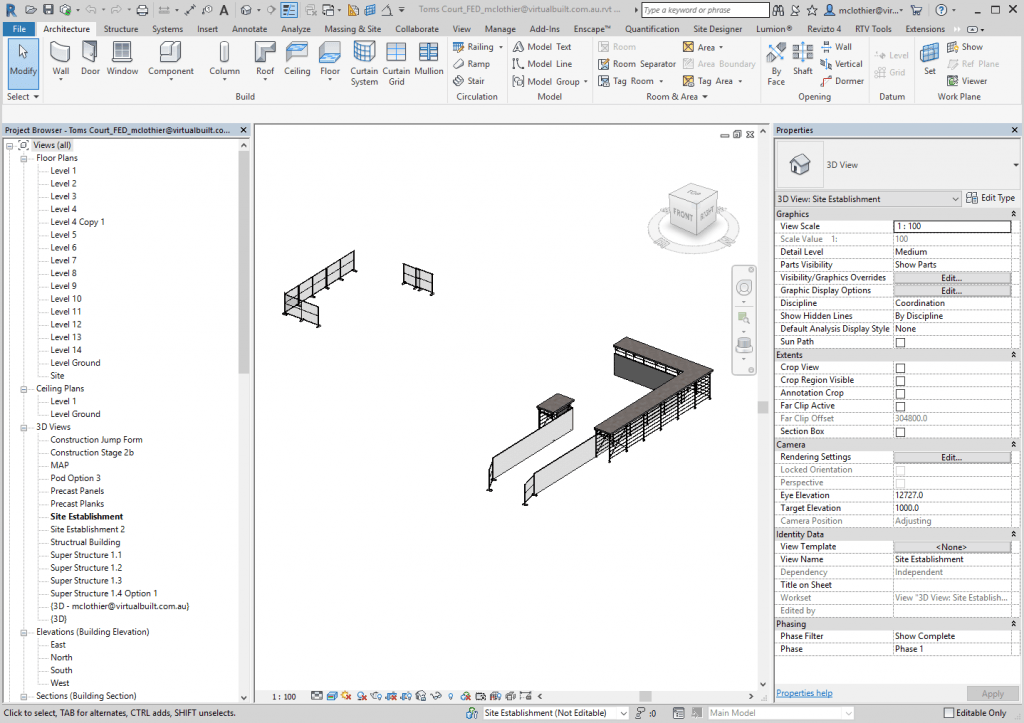
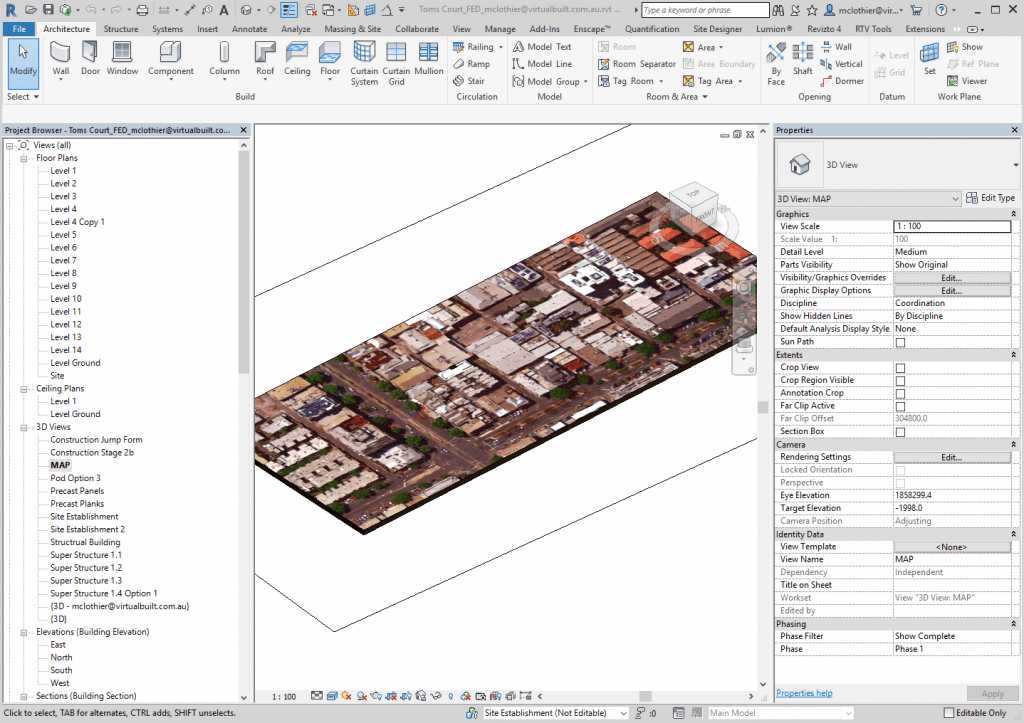
In the more complex
projects, we will use many 3D views to export different ‘scenes’ to Lumion.
With each 3D view’s content being controlled by Worksets or Phases. Lumion has
layer control (20 max) that can control the visibility of content. So, the different
views in Revit might then correspond with different layers in Lumion.
The layer manager is pretty limited however, and one area Lumion could improve on.
Lumion Layer Manager
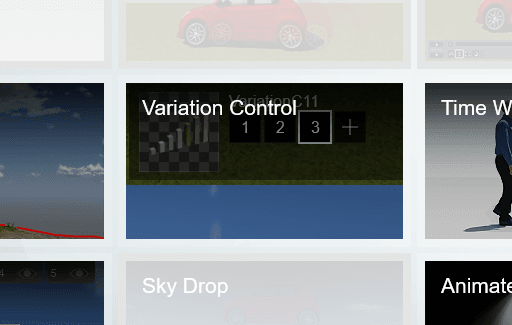
Lumion also has a feature called Variation Control that allows another layer of management to model variations
This particular
feature is great for different phases of the same model. (ie construction
phasing) You bring this feature into play particularly when you’re animating a
sequence where you want a model to change over time. It is limited a little in
its fine tune control, for example you cannot “fade” the different
phases in, it’s just one at a time.
Images and Animations
Once my model is
sufficiently built up and materials applied we can now begin composing images
and animations. Lumion provides three different outputs. Photo, Movie, and
feature called 360 Panorama.
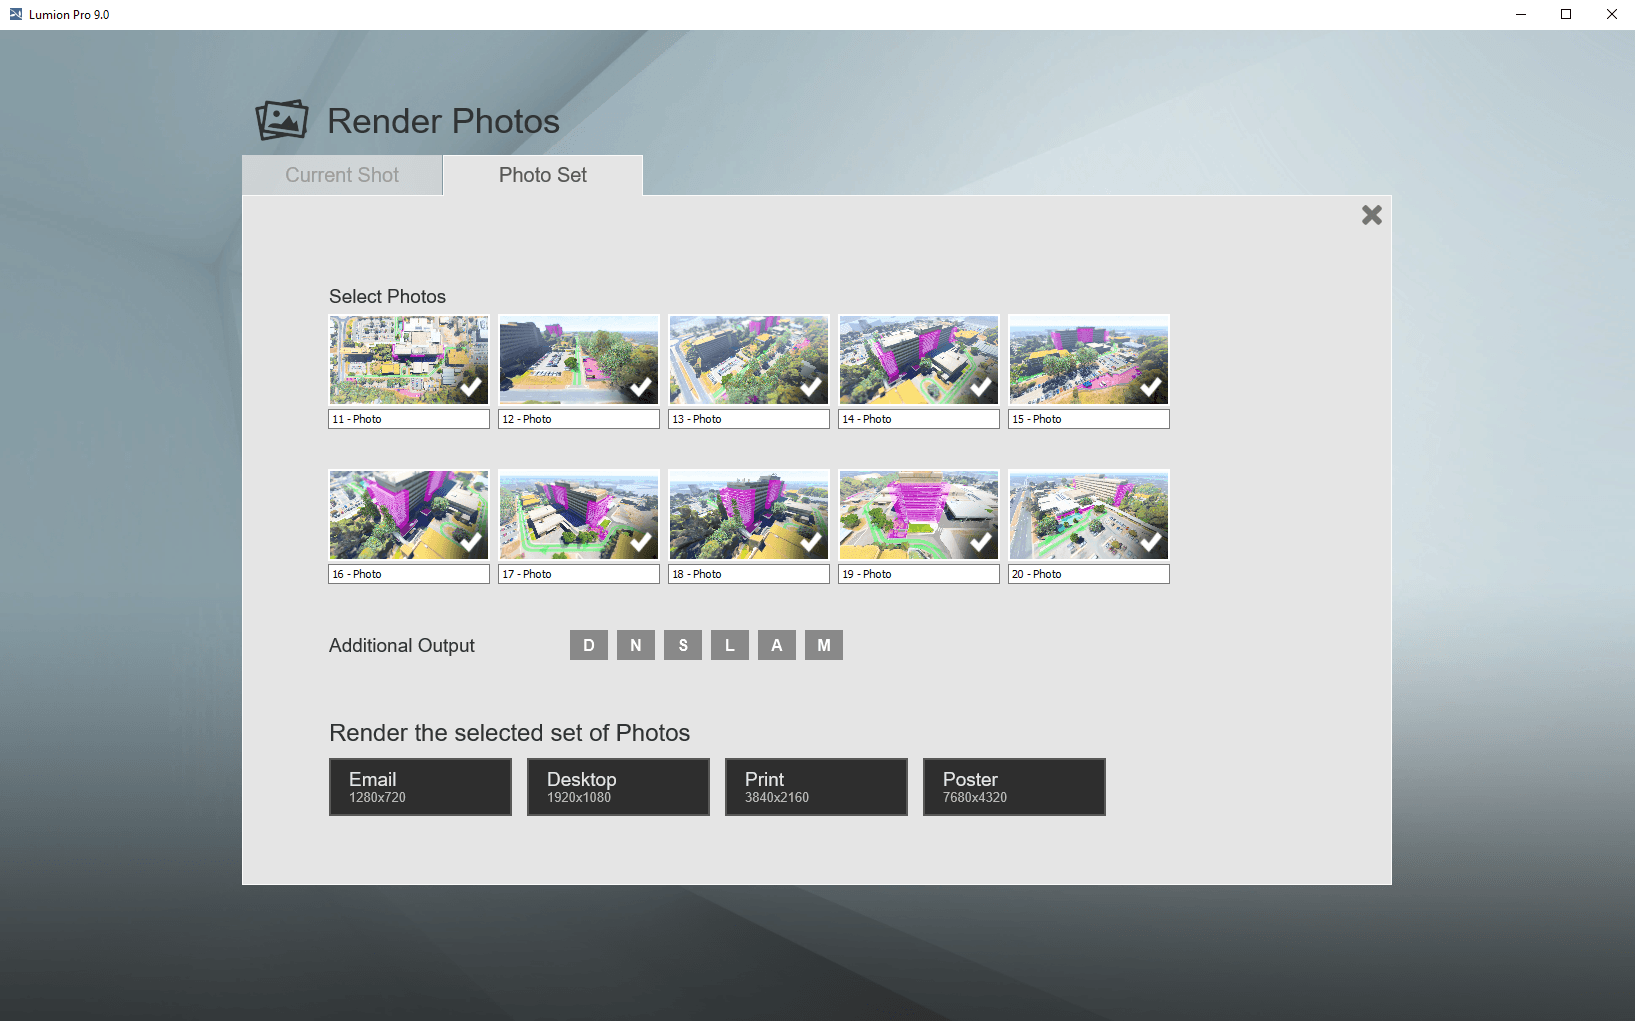
Photo
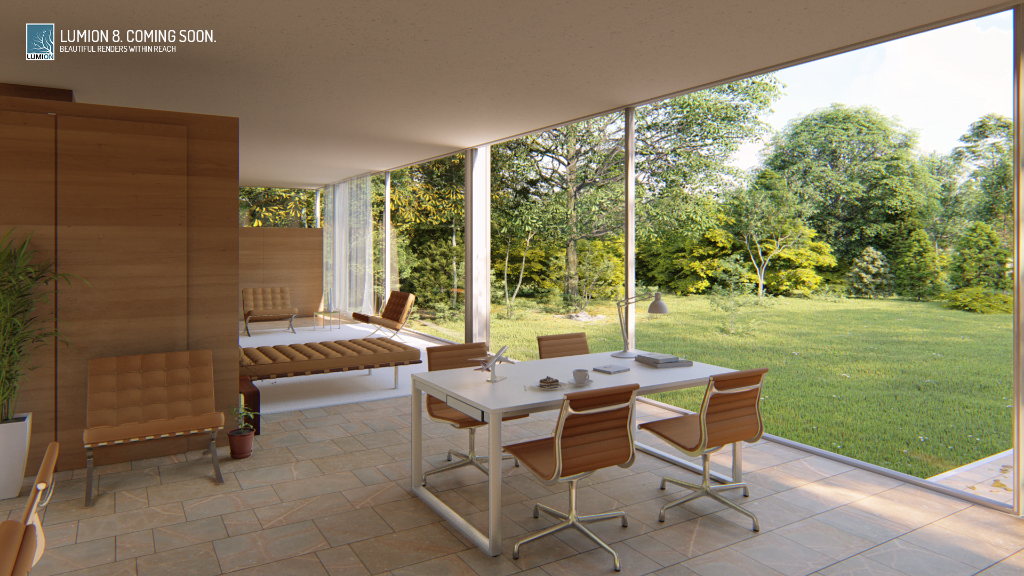
In the Photo tool, you simply navigate your viewing window to a desired location and Store the camera. Then it’s simply a matter of adding a Style or adding various effects. Then hit Render and you’re done… It’s really that simple!
The camera location
and Effect is stored, so, as you change your content (at your clients whims)
you can very quickly fire off an updated rendering that reflects the changes.
Movie
I’ve created a tutorial on how to create an animation in Lumion.
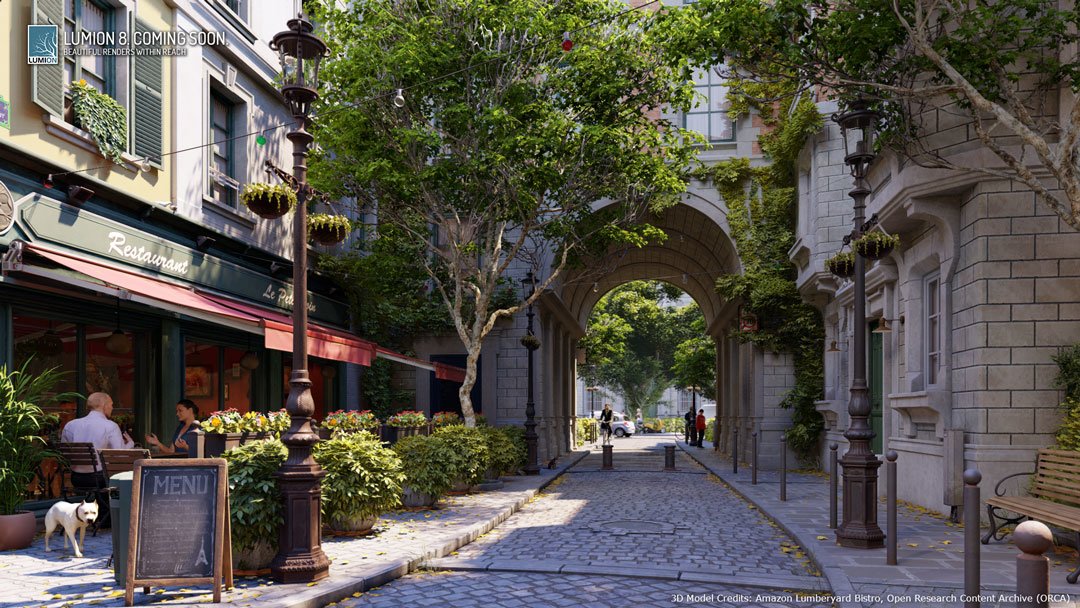
Lumion 9 is available now! See what’s new here: https://lumion.com/what-s-new.html In this “New Feature Medley,” we’ll quickly walk you through a mix of new features, including: – Automatic file recovery (0:15) – Updated eye-level camera (0:22) – New materials (0:35) – Furry materials (0:46) – New objects (0:55) – Updated cluster mass placement (1:12) – Save groups (1:21) – Updated OpenStreetMap (1:33) – Updated import edges (1:45) Get involved with the Lumion community at https://forum.lumion.com/.
Summary
Lumion is a certainly a fixture in our animation and image rendering workflow. It’s a great tool that has significantly increased our speed and output.
Because the
visualisation is so good even in the building/editing environment, we’ve been
using it live in client presentations and meetings.
Recently, I was involved in the development of a construction animation with my colleague here at Virtual Built. The end result was very good, but I observed quite a few challenges he faced along the way. For example, to get the data in we had to manipulate and modify quite a few things. We had a city model in FBX, but it was difficult to work with. My colleague had to add a lot of content to the animation to make it realistic, and then he also had to do some significant post-processing work to end up with a convincing end result. To achieve this, we used about 4 or 5 different software packages. At the time, I was thinking “surely we could produce something more easily and quickly in Lumion!“.
Right now I am pleased to be able to have a look at Lumion 8 in detail in this review, and I will be thinking about how Lumion could have optimised or assisted in the animation production. As you know, I have written about Lumion before, so let’s focus on a few major headings:
What Key Features in Lumion 8 can be used to really enhance and present your design? How could we quickly apply these new features to some existing workflows?
More links for Lumion 8 information
How to apply the OpenStreetMap patch?
Video Tutorials and Webinars
Graphics Card Hardware recommendations
Release video and first renders in Lumion 8
Key Features of Lumion 8
Let’s go through some of the key new features one-by-one. Firstly, I used OpenStreetMap to bring in some city context, then opened a model in Revit 2018 and used the LiveSync addin to bring the model into Lumion 8. This took about 40 seconds on my machine, as the video below shows:
Then I cleaned up the OSM City Model a bit (inside of Lumion) and positioned my model. I hid the Topography in Revit, and it immediately and automatically was hidden in Lumion (nice).
Now it was time to try out some of the new features of Lumion 8!
Styles:
What it means: “No more hunting around for the right effects. Gone are the days of meticulously balancing sliders. Once you dress up your 3D model with Lumion materials and objects, just click the Styles Button and select an interior or exterior style. In an instant your design becomes a beautiful render with a carefully balanced effects combination.”
How I used it: In my case, I used the model I had running in LiveSync. Styles is part of the Photo capability of Lumion, so to use it:
click the Photo button
click the Style button
choose a style
be amazed at how quick and easy it was to get something that looks great 🙂
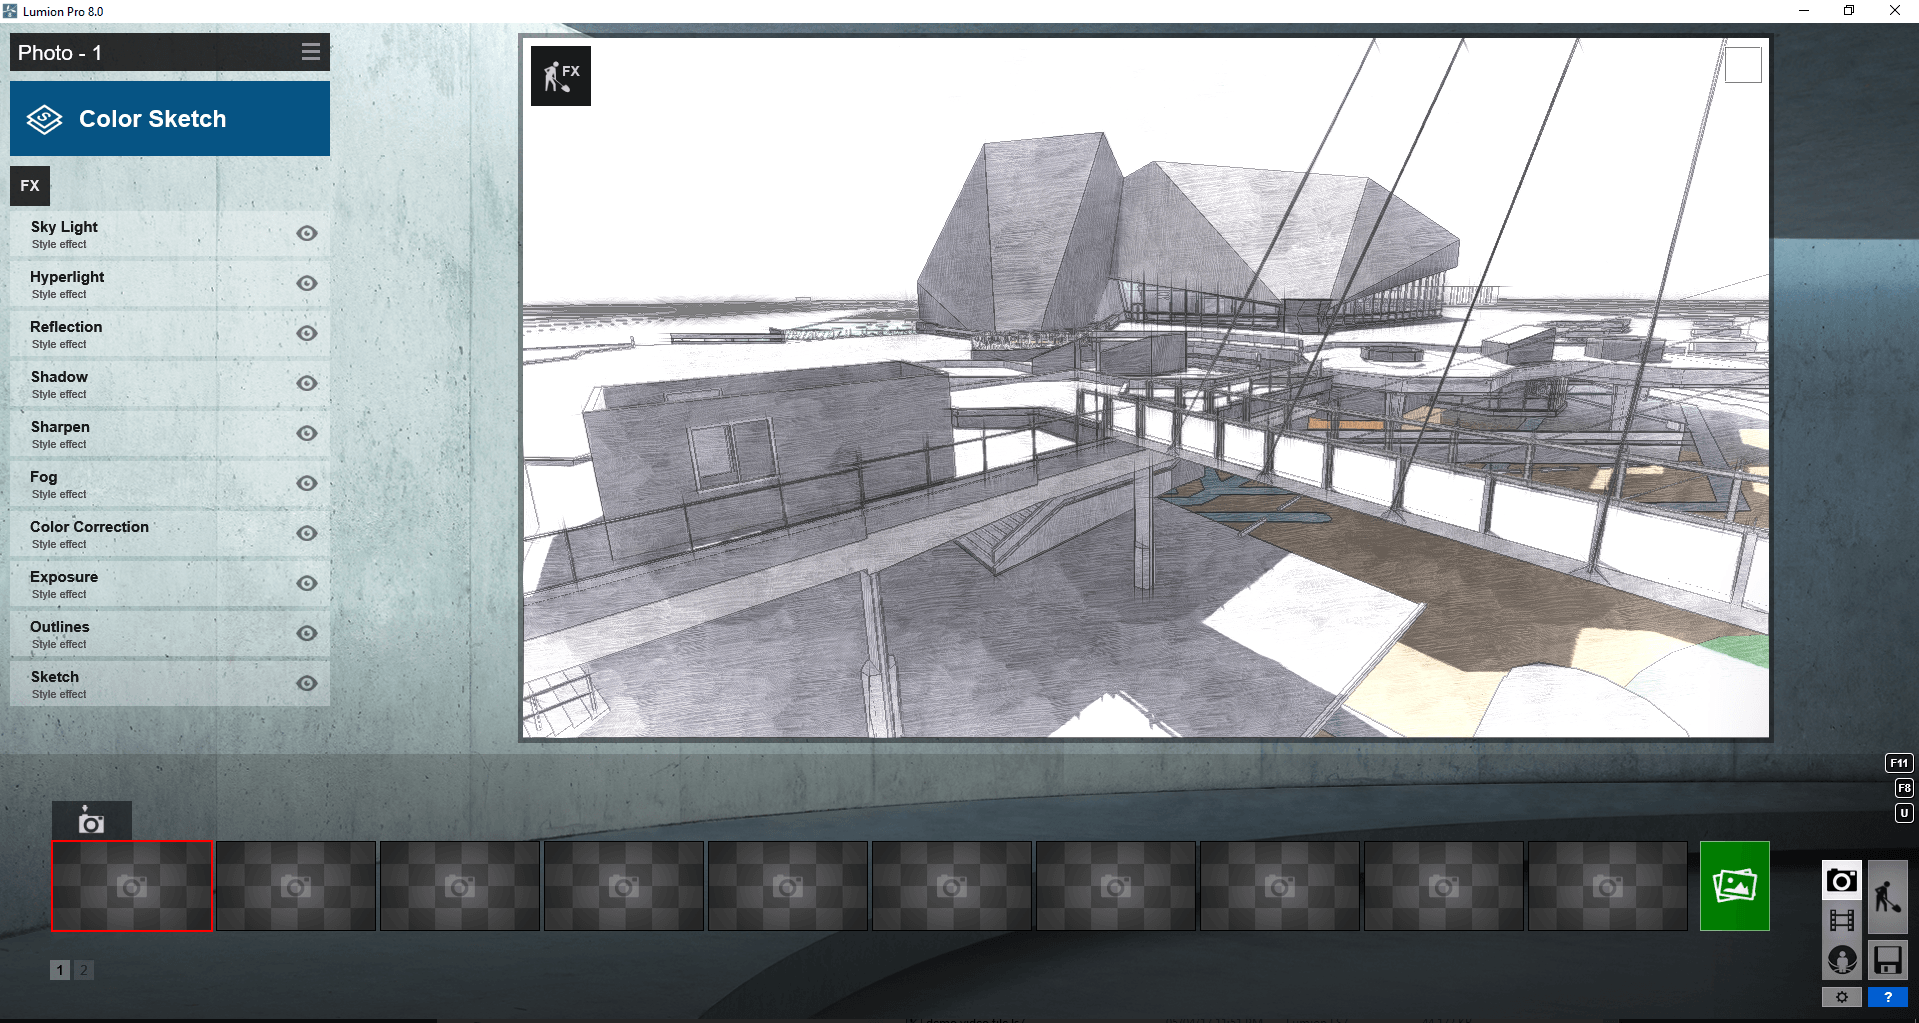
Here is an example of the “Color Sketch” style. It amazed me how this transformed a somewhat bland image into something that had a kind of organic and architectural feel.
Here is one of the ‘hero’ shots showing the Styles feature:
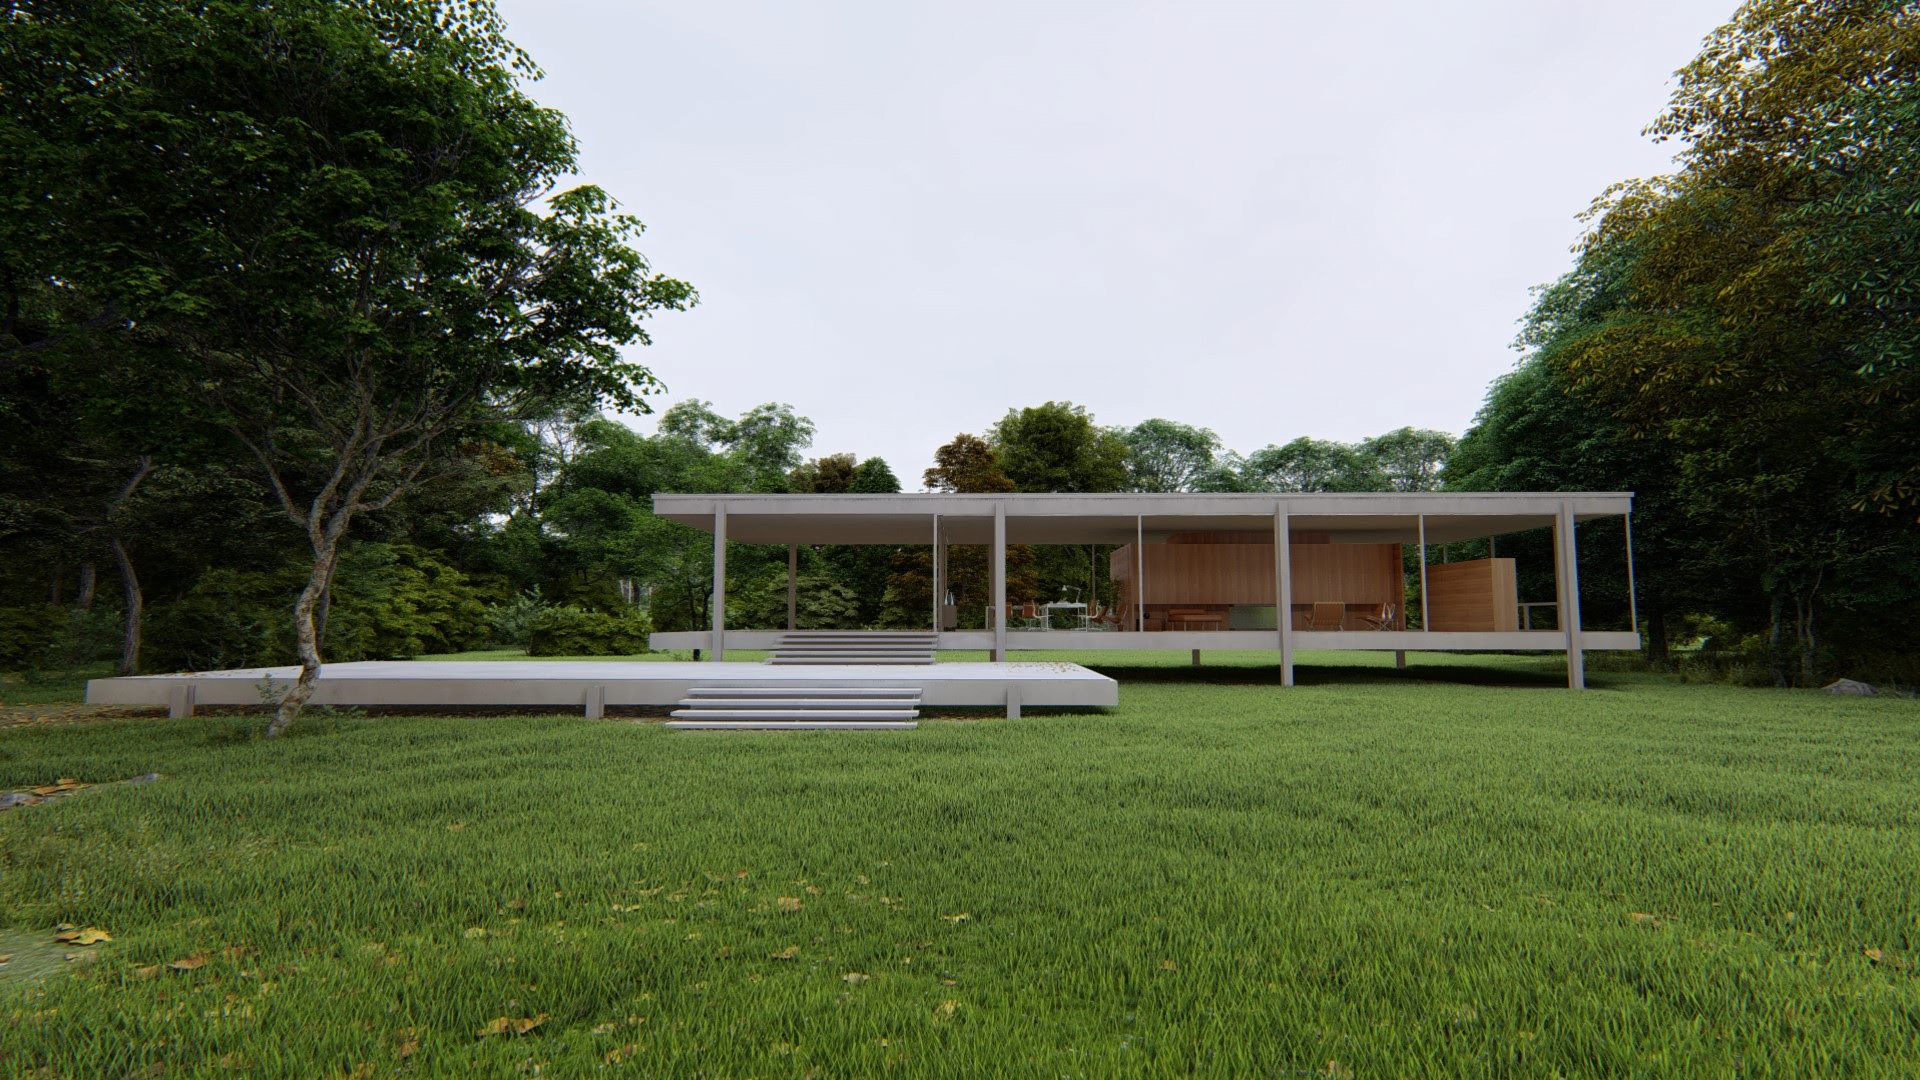
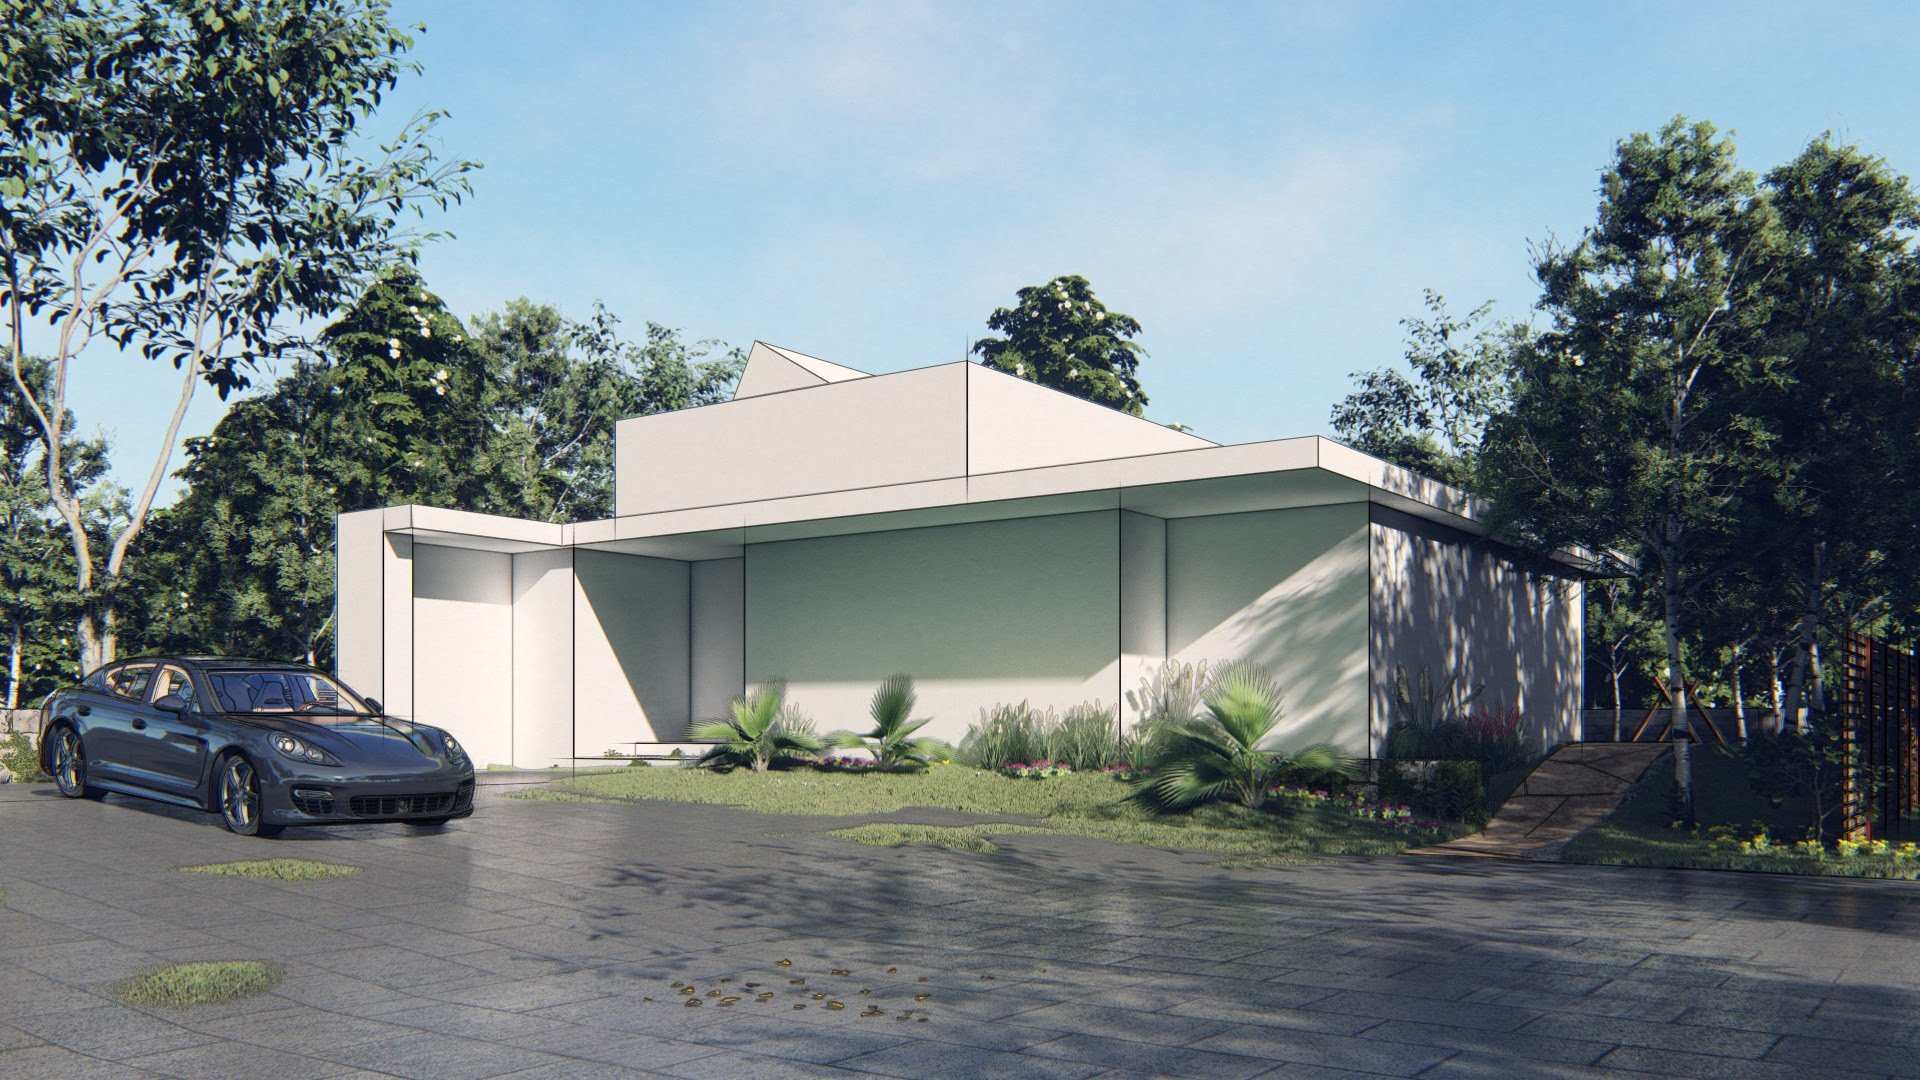
Sky Light daylight simulator What it is: Ready to render? If you haven’t added the Sky Light effect, then…well…no. Maybe not. Because it’s an impressive technology developed especially for Lumion 8 to heighten your image’s sense of environment, realism and depth. Sky Light is an advanced, daylight simulator for softening and dispersing the scene’s environmental lighting. Used in combination with Soft Shadows and Fine Detail Shadows, it strengthens the real-life interplay of these elements. Watch as the foliage and trees become photorealistic, and discover as people, buildings and landscapes suddenly look like they belong where they are.
How I used it: I tried out turning Sky Light on and off with different Photo Styles. It is one of the FX options, as shown below:
Here is another example of the daylight simulator:
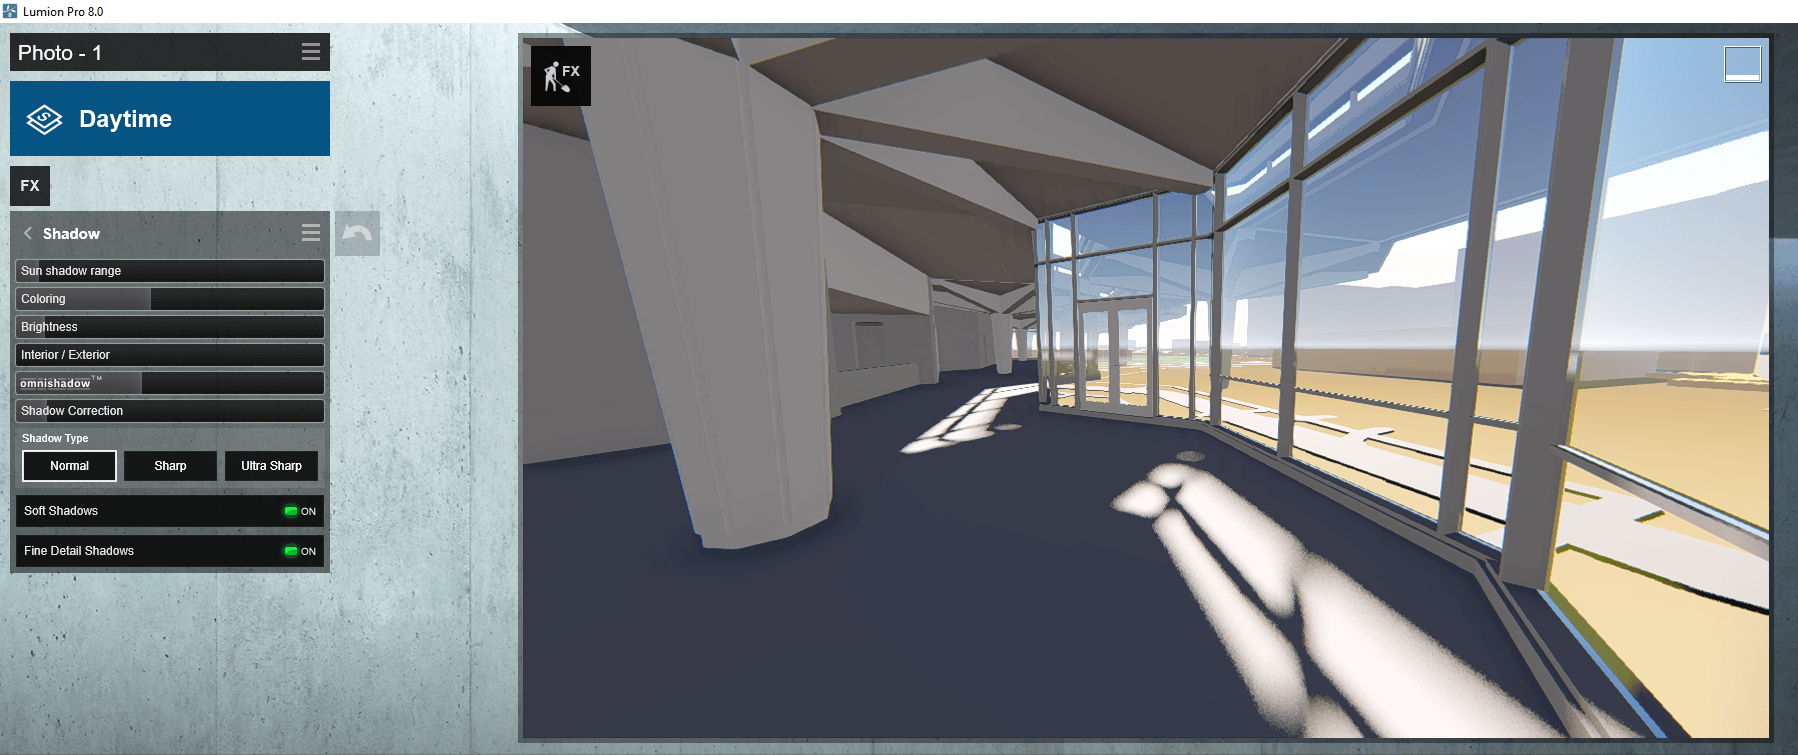
Soft and fine shadows What it is: Designing realistic shadows, whether from scratch or in a rendering program, may be one of the most difficult things you can do. Until now. In Lumion 8, you can inject realism into your render by turning on the Soft Shadows and the Fine Detail Shadows as part of the Shadow effect. Instantly, the shadows become softer, the penumbras grow. Hundreds of fine detail shadows are enriched and a realistic sense of depth permeates the image. You’ll feel yourself smile as you view your unbuilt design looking uncannily like the real thing.
How I used it:
I tried it out on my sample model. You find these options under the Shadow FX of the Photo toolkit. In the image below, the Soft Shadows are shown as the sun hits the floor, while the Fine Detail Shadows are showing the foot path outside the building with more clarity. So in a scene that was more developed, these options can really make the overall visual more clear and appealing.
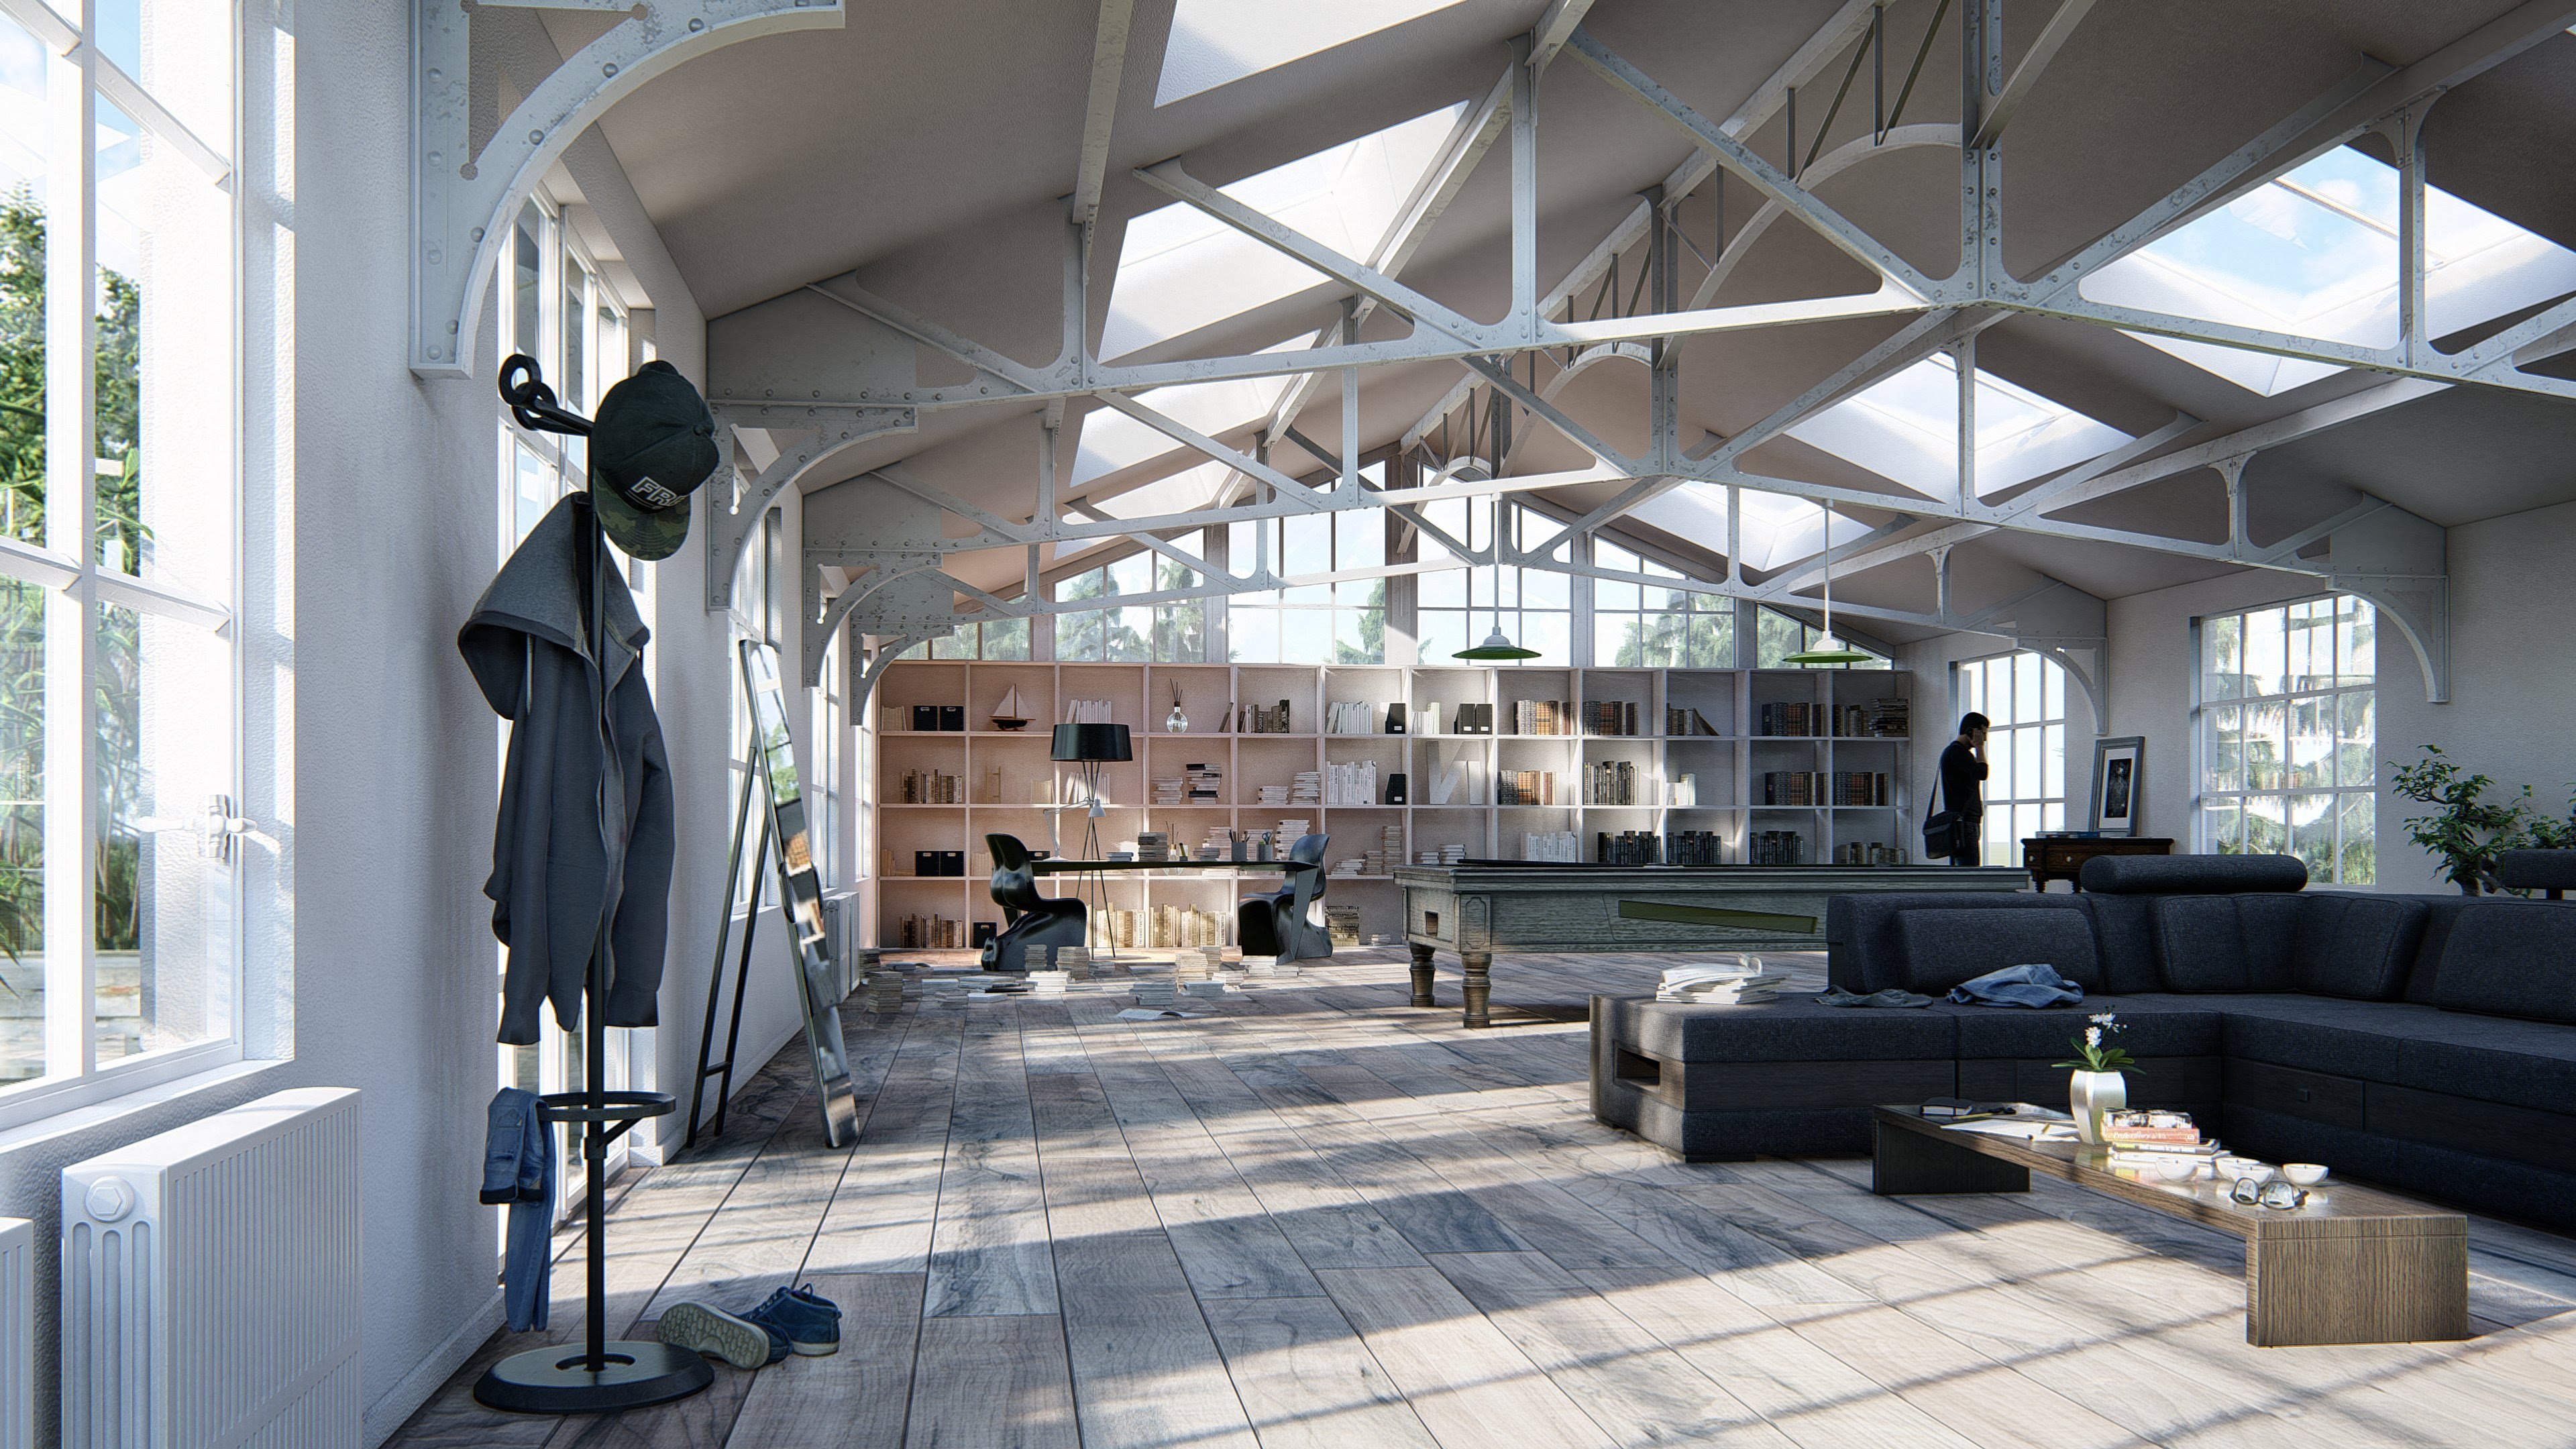
Here is another example of soft and fine shadows:
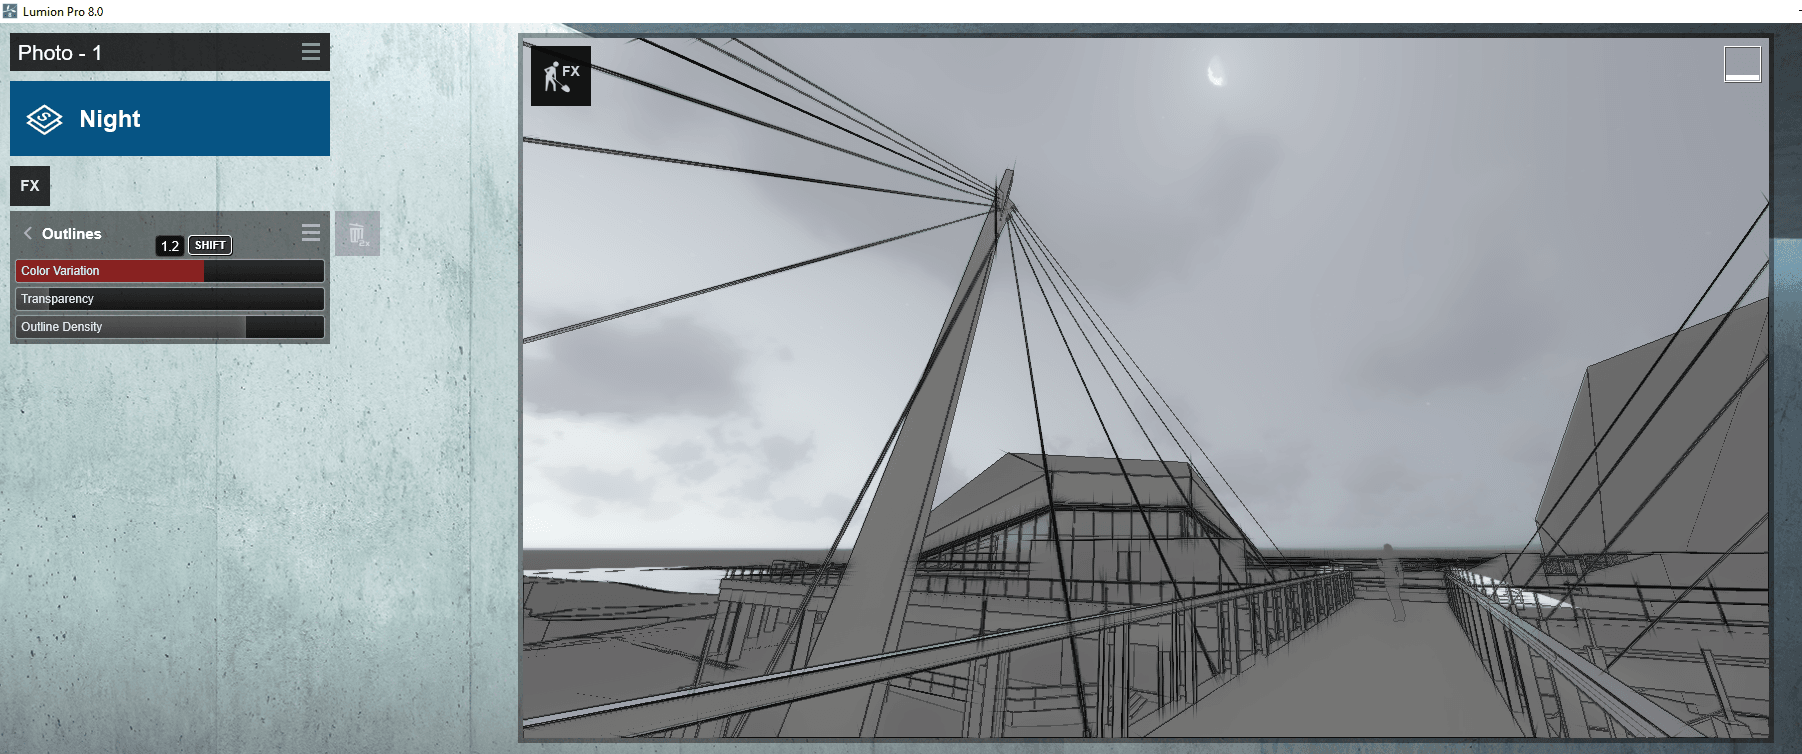
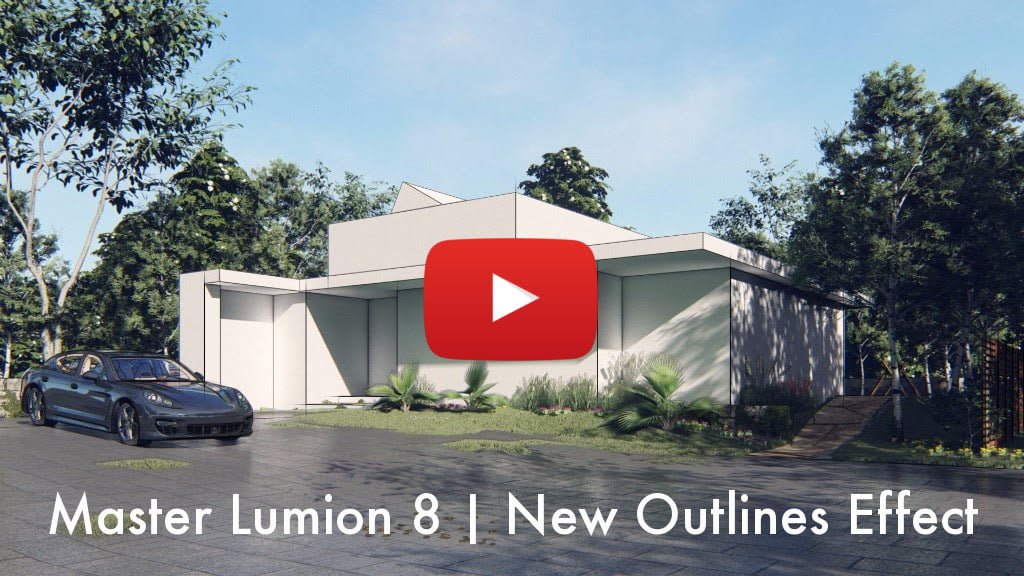
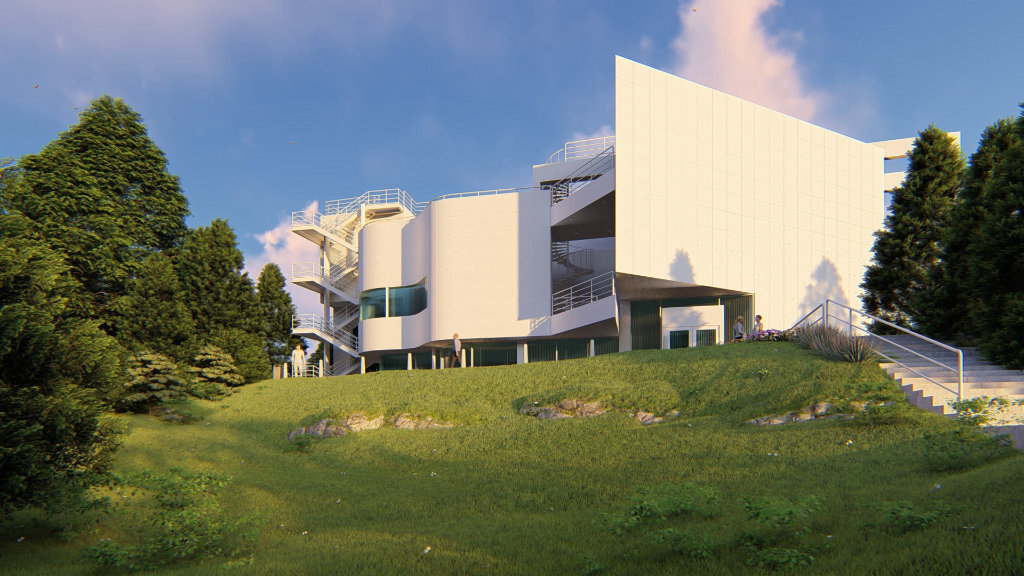
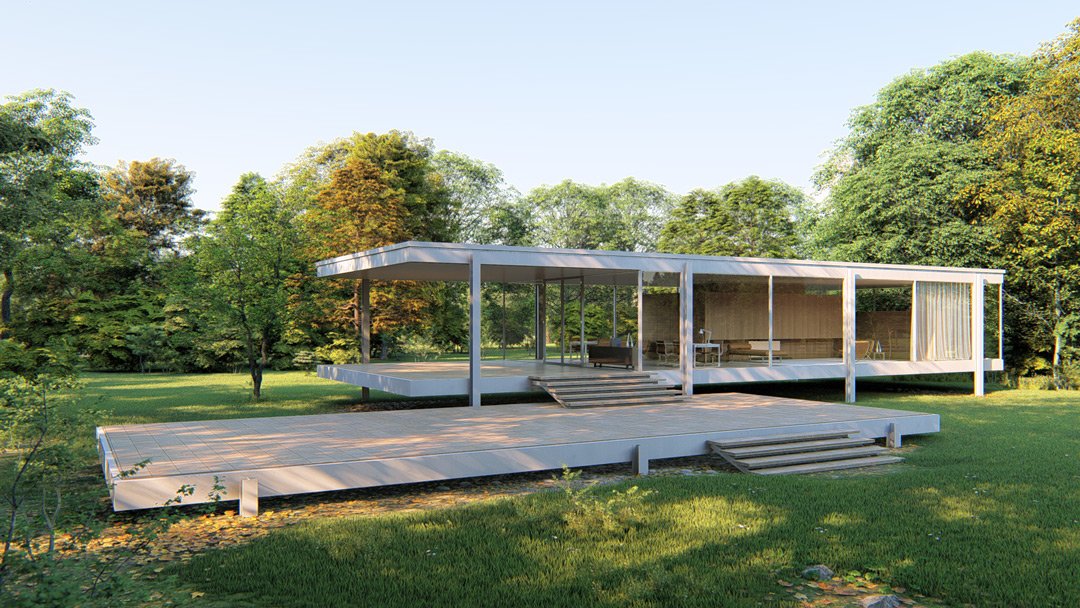
Hand-drawn outline effect (Pro only) What it is: Lumion 8 makes it easy to clearly communicate the form of your design with the “hand-drawn” outline effect. Apply it together with photorealistic, sketch or artistic effects to draw a focus to your building’s general shape and form. It’s the bones of your design, rendered beautifully and easily.
How I used it: You can add the Outlines effect from the FX button. Once you have added the effect, you can fine-tune with the 3 sliders. I found that increasing the Outline Density really helped to punch out even very thin elements in the scene.
Here is another example of the Outlines effect:
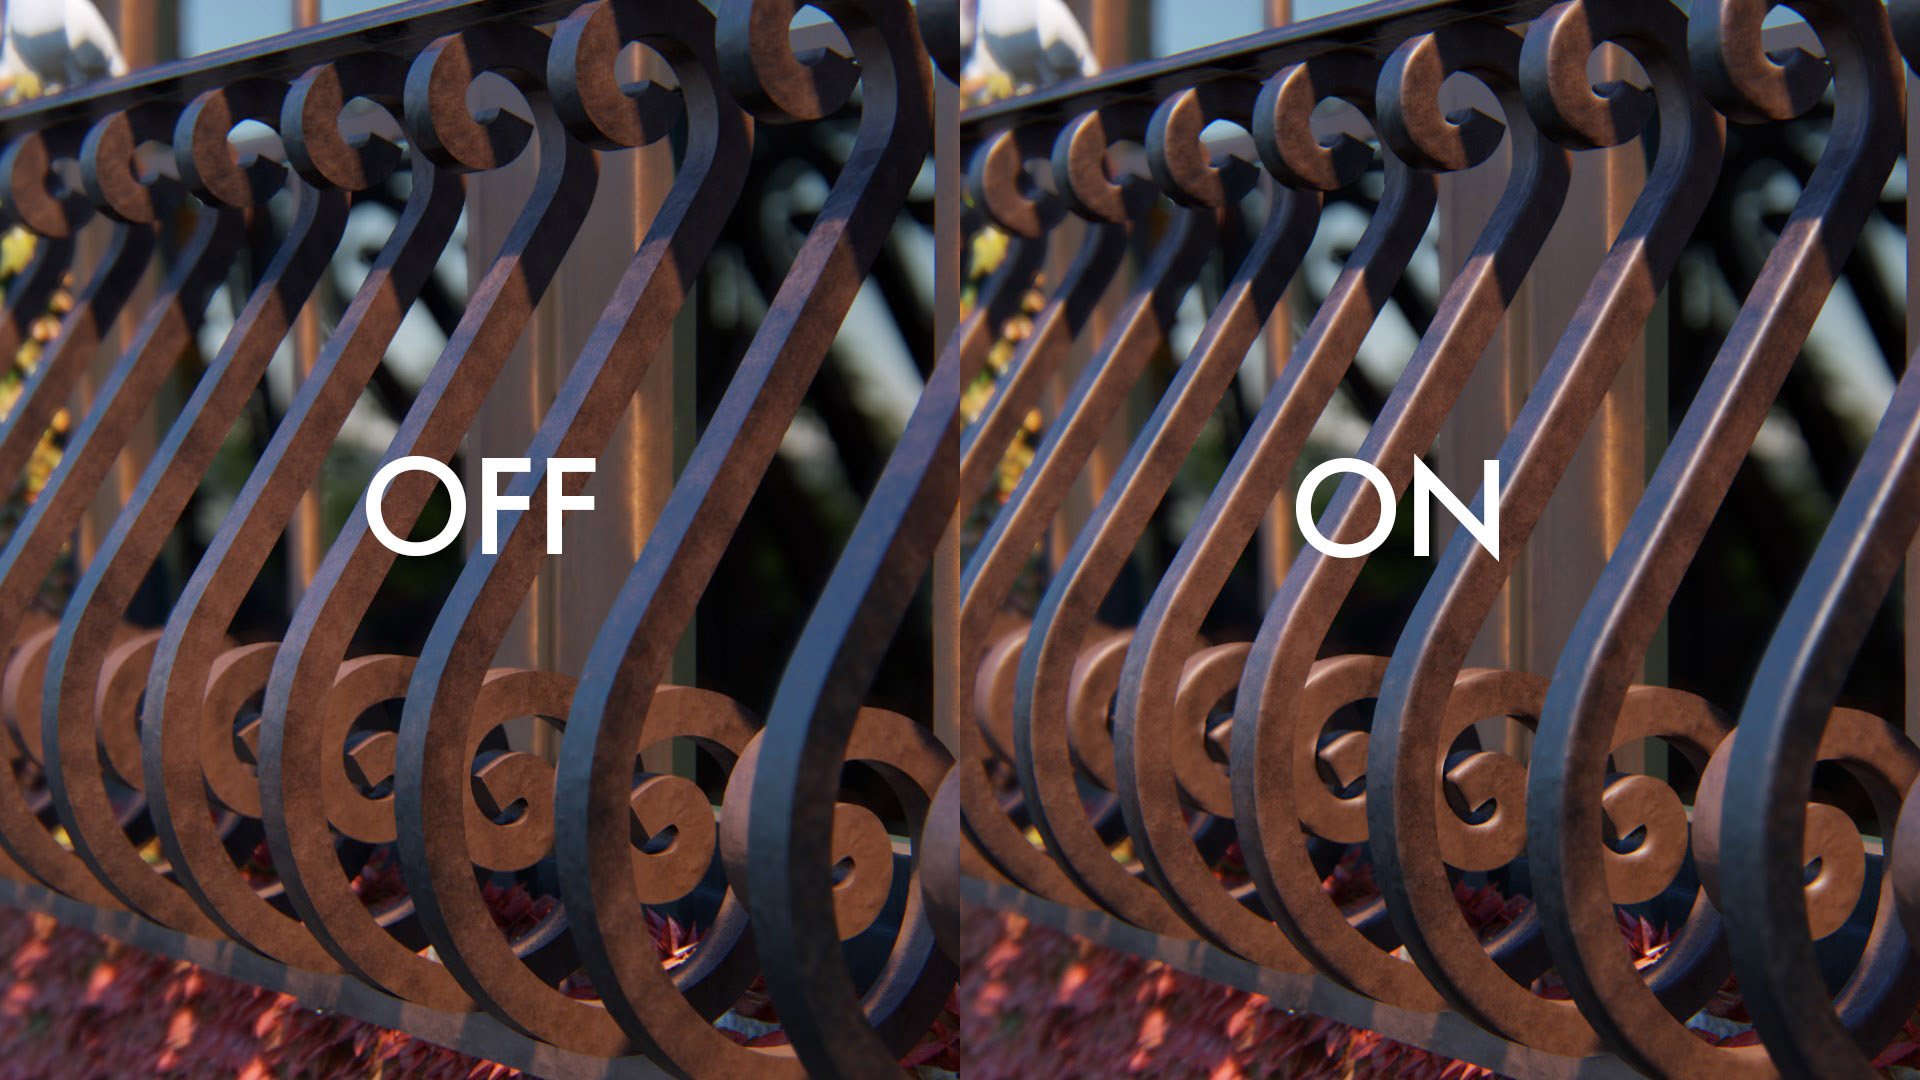
Soften hard edges (Pro only) What it is: In real life, the edges of any surfaces generally appear slightly rounded or worn. They are never perfectly sharp. With the new edges slider in Lumion 8, your model will take on a more natural and weathered look, one better representing the real qualities of physical homes and buildings. Impart age and realism by smoothening the edges of adjacent faces. Soften the corners of brick, concrete, wood and other materials. A simple slider movement, a more realistic building. Easy. Effective.
You can check out an tutorial of how to apply this Material modifier here:
Here is a comparison image of the Soften Hard Edges feature:
“Look at fixed point” for the handheld camera effect
What it is: Create an impressive first-person video and never lose sight of the most important parts of your design. As an addition to the handheld camera effect, the new “Look at fixed point” option in Lumion 8 lets you lock the camera onto a single target point.
Check out this video of the ‘Look at fixed point’ feature:
Feature Summary
We have just looked at a few of the key features in Lumion 8, but I think you will agree that yet again, Lumion brings new productivity features that are also artistic and professional. I recommend you give Lumion 8 a try, and keep in mind that some of the more impressive features are available in the Pro version only.
Below I will include some links and more information about Lumion and Lumion 8. You can get it here.
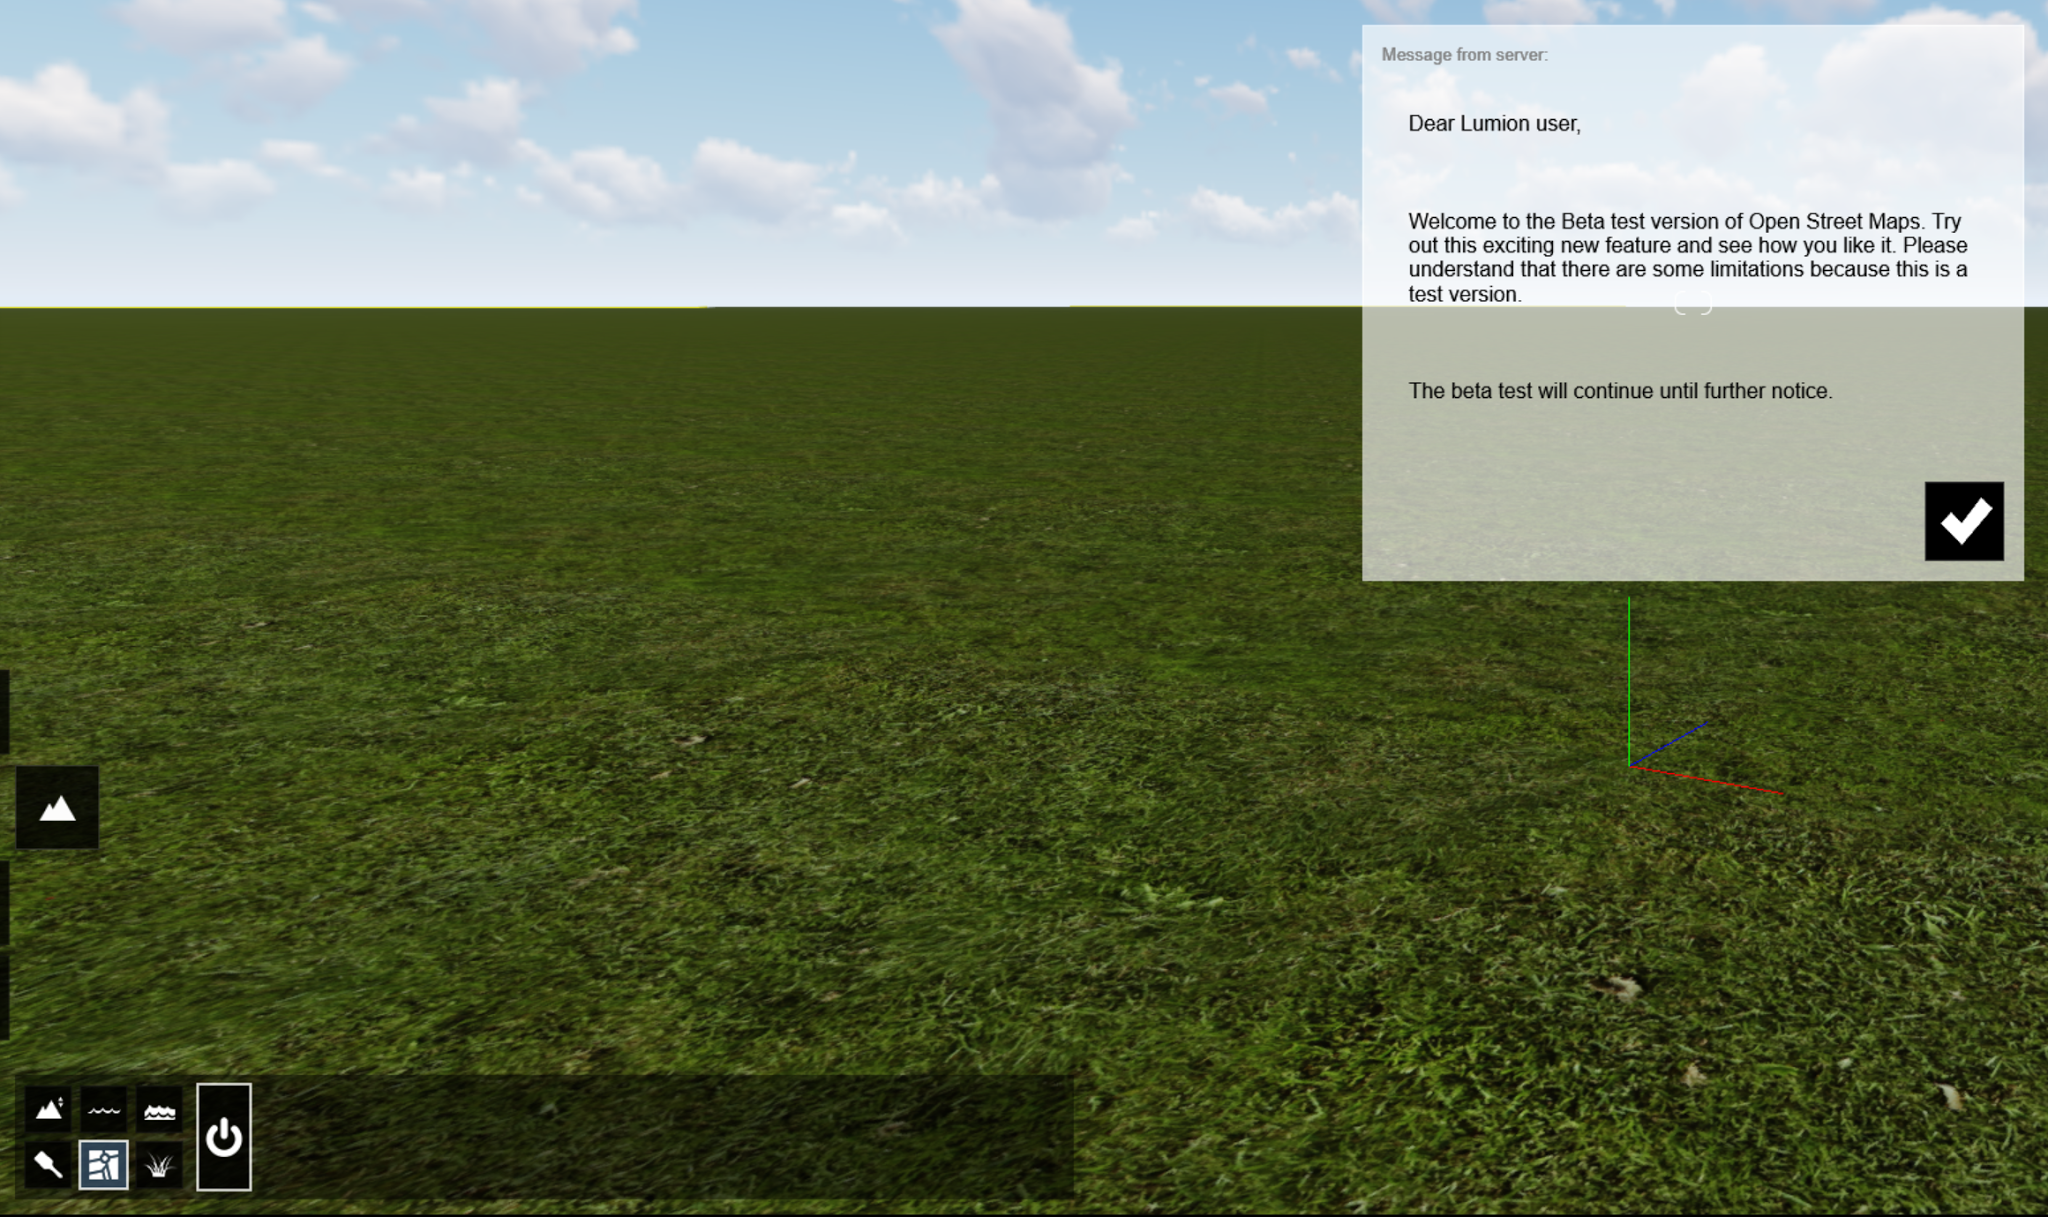
With Lumion’s OpenStreetMap (OSM), it became possible to instantly surround a project with context. OSM was also a beta feature still in development and it used a third-party service to import accurate map and building height data.
The third-party service has announced they are closing down, and on February 1st, Lumion will no longer be able to download the map and building height data.
In light of this news, Lumion developed a little tool called the “OSM Patch” to ensure continued map functionality.
Click here to download ‘OSM Patch’ for ‘Lumion 7.5 Pro’. Click here to download ‘OSM Patch’ for ‘Lumion 8 Pro’.
Close Lumion
Extract into your relevant \Program Files\Lumion 8.0\ directory and ‘Replace’ files.
Start Lumion
You should be good to go with OSM
Video Tutorials and Webinars
Expand your rendering capabilities with more video tutorials:
BIM is supposed to make things easier and more efficient, right? Then why do we often have to re-do work in different platforms, simply to get the result we want? Surely, we can do better… especially when it comes to high quality rendering and presentation workflows.
One common scenario is that you might export a Revit model to some 3D editing and animation software, perhaps like 3dsMax. Then, you will do some work, modify materials, tweak some lighting perhaps, and then render an image. That image might go into Photoshop where additional Entourage and effects are added. And you do get a kind-of good result. But, what if you change the model? Well, you have to go through multiple steps just to update things. Or, what if you want to take the nice material from Photoshop and bring it back to Revit? That can be a real pain. However, now there is a better way…
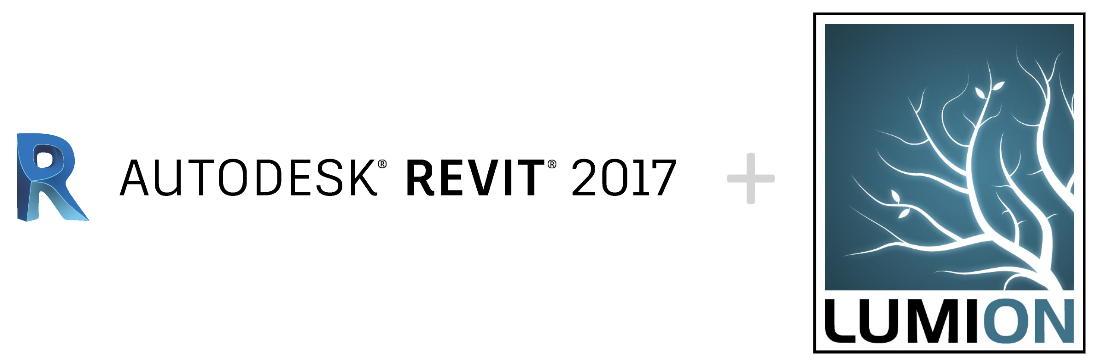
I have written about Lumion a few times before. It is a incredibly powerful tool for Architects to present and share designs. However, it may still have suffered a little from the ‘endpoint syndrome’ described above. But that is no longer the case! Now, Lumion offers a Live Link to the Revit model, meaning that work does not have be done over and over again.
Getting started
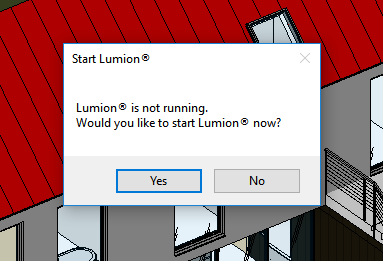
To get started, install a trial of Lumion 7.3, and install the Lumion plugin 2.01 for Revit. Open up a Revit project. Then, simply go to the Lumion ribbon and press the ‘Play’ button.
You will be prompted to launch Lumion. Press Yes.
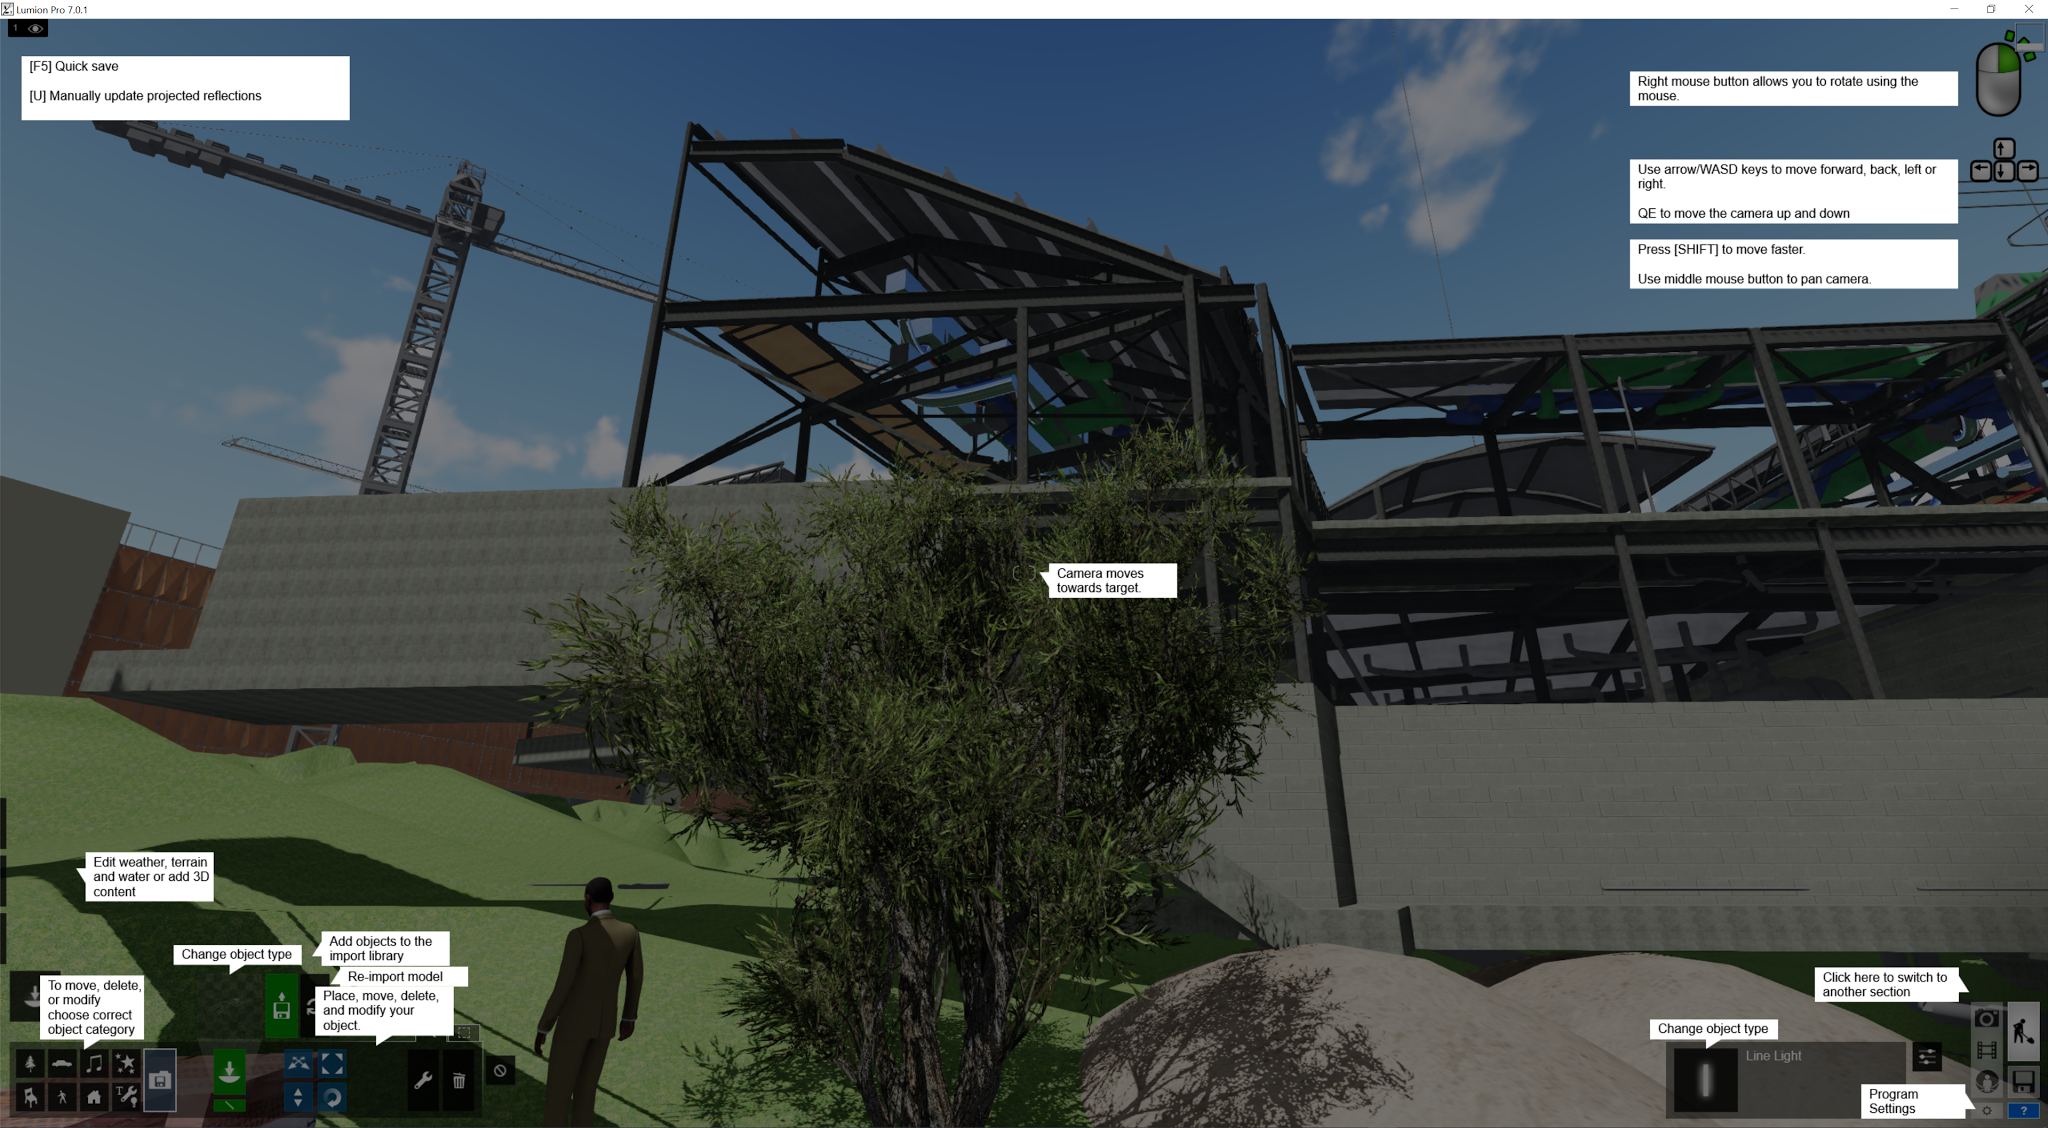
After Lumion starts, you will be prompted to start a new scene from the scene templates:
In just a few seconds, it launches showing your Revit model. Seriously, it is really fast! This workflow is so much quicker than an export – import method, and will be familiar to users some of the other popular realtime visualisation solutions out there. You can immediately start navigating in this rendered environment. And of course, you can start building your Lumion scene by adding content from the immense library. However, we really want to focus on LiveSync. How does it work?
Here is a list of some things that work really nicely:
you can move objects in Revit, and they immediately move in Lumion
you can add new objects to Revit, and they will show up in Lumion
you can edit Revit materials, and they will update in Lumion
delete an object in Revit and it disappears from Lumion immediately
you can use terrain tools in Lumion to merge in with your Revit topography
I have created a short video that describes how to get up and running with Lumion 7.3 and LiveSync for Revit. Check it out here:
Further, this new Exporter provides a much tighter integration between Revit materials and Lumion materials:
Workflow Tip
After you have completed an editing and model building session with LiveSync, what happens next? Well, you can close Revit and Lumion, and Lumion will prompt you to save. It does actually save the embedded LiveSync object. So, later, you can open Lumion and do some scene development work without using Revit.
How smart is this connection? To test it out, I did this:
closed everything
opened Lumion 7.3
opened a scene that included a LiveSync model
then, I opened Revit with the appropriate Revit model
for some reason, it didn’t update… until I realised that the LiveSync model uses the File Name and Path to determine which model it came from. Because I had used ‘Save As’ on that Revit model and put it somewhere different, the link was broken. I then used a Revit model in the correct location, and Lumion immediately updated the import
This means that using a Revit model in a consistent location will allow easy updating of the Lumion model. You can work independently in Revit or Lumion, and then at any time restart LiveSync to updated the model in Lumion with the changes from Revit. Nice!
Demo
LiveSync in action
Video – Moving Objects
Video – Editing Materials
Video – Settings
Further Considerations
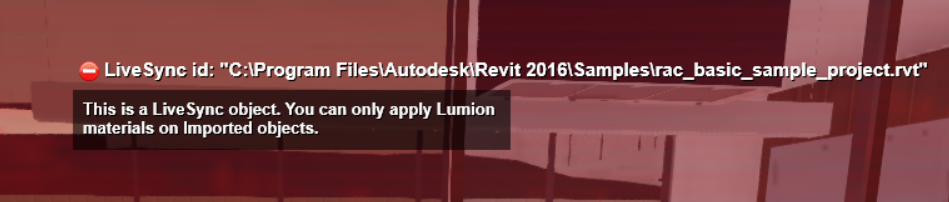
It is interesting to note that Lumion materials are essentially ‘disabled’ for LiveSync Revit objects.
This makes sense of course, because we are trying to keep as much intelligence as possible in Revit, and leverage the strengths of Lumion for high quality outputs.
If you find that your Revit model is ‘too low’ and embedded into the Lumion terrain, you can globally move it, just as you would with other Imports:
Items in worksets that are closed or invisible by default will not show. What this basically means is that the Lumion LiveSync addin does not work on the specific objects you can see in the current Revit view, but rather it works in a more ‘complete’ sense, showing all objects that would typically be visible in any view.
Summary
If you are already using Revit and Lumion, these new additions will make designing much easier and more efficient. If you haven’t used Lumion before, now is definitely time to try it out! This improved connection to Revit, along with the already powerful content creation capability of Lumion, will truly allow design and present in ways you have never even imagined!
To try LiveSync for Revit for free, go to this page on the Lumion.com website were you can download the trial based on Lumion 7.3 PRO. This trial includes the LiveSync for Revit.
From the Press Release: Make changes in Revit® and immediately see them appear live in Lumion!
Lumion LiveSync® provides a real-time high quality 3D view of your Revit® design. This plugin for Revit® creates a live connection with Lumion, so that changes in Revit® can be previewed in real-time in Lumion.
Live synchronization can help you work faster, for example in the early stages of design, when you are making frequent adjustments to your Revit® model.
Lumion 7.3 is a FREE update for Lumion 7 users and the Lumion® plugin 2.0 for Revit® is FREE of charge to anyone.
How does it work?
● You need a Lumion 7.3 license
● Download the FREE Lumion® Plugin 2.0 for Revit® from the Lumion website or Autodesk® App store (LumionPluginForRevit_2.0.exe)
Lumion Lumion® is easy-to-use, fast, high quality visualization software for architects. It is compatible with almost all 3D CAD software packages such as Revit®, SketchUp®, ArchiCAD®, Allplan® and many others. It offers a full package. With a CAD program plus Lumion you have all you need to make great presentations. It includes sky, water, an extensive library of materials, people, plants, cars and furniture and loads of special effects.
Before Lumion®, rendering used to be really hard. Setting up and completing a render used to take days. With Lumion® you can do it in hours. You can even make last minute changes before a meeting and update your renders in minutes. Anyone can sit down with Lumion® and within 15 minutes learn how to create videos, images and 360 degree panoramas. Lumion.com
For more information contact Linda van Wijk, Director Marketing Communications Lumion.Linda@Lumion.com
Design is a funny thing. The word itself carries a certain weight, it is somehow deliberate and exciting at the same time. Yet, so often design is let down by the poor translation or communication of ideas. You may have an excellent ‘design’ in your mind, but displaying or presenting that to a client is an entirely different matter. Every designer faces the same challenge of communicating their design ideas in a thoroughly engaging way: whether the communication be to their clients, other stakeholders or even as part of their own internal design process.
This is a site about Revit, but this article is about discovering new possibilities, new ways to express your design, new ways to add context, realism and reality. It is also about a powerful piece of software called Lumion– a design communication tool that I personally use and have used for quite a few years. Thecombination of Revit and Lumion give architects a complete toolkit for modeling, understanding, sharing, adjusting and presenting their design.
So, what is Lumion? Recently, I was speaking to the Chief Operating Officer of Act–3D, (the parent company of Lumion), Roger Hammond. He told a me a very heartening story about the development of this piece of software…
Often we don’t immediately recognise the full potential of a new, beautiful idea. Roger describes that Lumion was initially designed to be a powerful presentation tool, but Architects soon discovered that it can also shift the way they design in very positive ways. He describes how a new user of Lumion can easily get comfortable with the basic concepts of the software, even those who are not ‘technical’ or especially comfortable with computers. Yet, once they start using Lumion, they get to grips with it easily and quickly learn to iterate design changes and brief clients more rapidly and smoothly. Lumion gives a certain realism and context to your design that can assist you to modify and improve the design internally, before it is even time to present it to anyone.
We often become so used to a way of working that we almost feel like there is no other way, or that perhaps we already have the best way. Yet, if that were true, innovation would not be a reality. Sometime, disruption is necessary. So if you have an established way of designing and communicating, take this opportunity to re–evaluate as I reviewLumion.
The user interface itself is nice and clean and easy to read and understand. As someone used to complicated programs like Revit and AutoCAD, this is a welcome breath of fresh air to me. Rather than present you with an overwhelming and detailed set of buttons, Lumion allows you to progress your digital presentation in stages, from Building to Materials and Lighting and Presenting and so on.
Lumion – A User Interface For Designers
In this way, the development of your design and your presentation output can be very logical and layered. You can import your design from a variety of different programs and platforms (like Sketchup and ArchiCAD, not just Revit), and once imported you can add people, trees, and soft and hard landscaping. You can sculpt the site topography and add water and grass areas. Once you feelcomfortable, you can dig deeper, modify lighting, adjust materials, add special effects, work on camera angles…
And finally, you can display your design in some truly simple yet beautiful and intuitive ways. The key thing is not to be afraid. You can’t break things in Lumion, it is not a imposing or complicated environment. Navigation is straightforward, nothing is very complicated. As you use it, extra functionality will reveal itself. It is a tool that has been built for designers, and its development has been shaped by their feedback. Roger recalls that it is not uncommon for users to say that “Lumion has changed my business”, and there are plenty of ‘wow’ moments. For example you can add the ocean to your scene with just one click…
We have experienced this realisation at Virtual Built. Recently, we have been demonstrating Virtual Reality tools to our clients. However, in some programs it can be difficult to populate a scene quickly and then output to a suitable VR platform. This is not the case in Lumion, as the included content means you can get up–and–running quickly. If you have a few basic building models, you can add site context and a few nice little details like a truck or a crane to create a site utilisation model, and then output to a number of different VR panoramic formats.
I have been using Lumion over a number of years and different versions, so I was excited to see theupdates and new features available in Lumion7. The major new features are listed below, and we will dig into each feature and uncover the new opportunities they present.
Lumion7 New Features OpenStreetMap (OSM) is an online resource that stores 3D building models along with map information like roads and water areas. In the past, I have used many methods to try to get a locality plan or model created, and it can be quite clunky and challenging. However, in Lumion7, this is now completely automated. Using the OpenStreetMap import, in just a few minutes you can have a realistic map in Lumion to locate your building models, and it will even have adjacent 3D building models as well! It will automatically ‘cut out’ your own building model from the OSM data. The OSM function in Lumion7 is still Beta functionality, but it can already be very useful to quickly add context or a background to your design.
To get started with OSM in Lumion, just:
Start Landscape mode (left side flyout menu) and turn the OSM switch ‘On’
OpenStreetMap Switch
Click the Longitude / Latitude area to bring up a searchable map
Search for your location
Location Search
Set the import Range and press Download
Tip: hold Shift + Spacebar and use arrow keys to move quickly on large sites
Check out this page for more information on OpenStreetMap and Lumion.
New Features for Weathering and Foliage
Building models sometimes appear ‘flat’ due to the way various platforms handle materials. However, in Lumion7 you can now remove the coldness of computer–generated imagery by seeking out edges, roughness and other properties of natural materials to make them look like they’ve been around a while. My associate here at Virtual Built, Michael Clothier, recently used this to add realism to an important theatre building in Adelaide that is currently under construction.
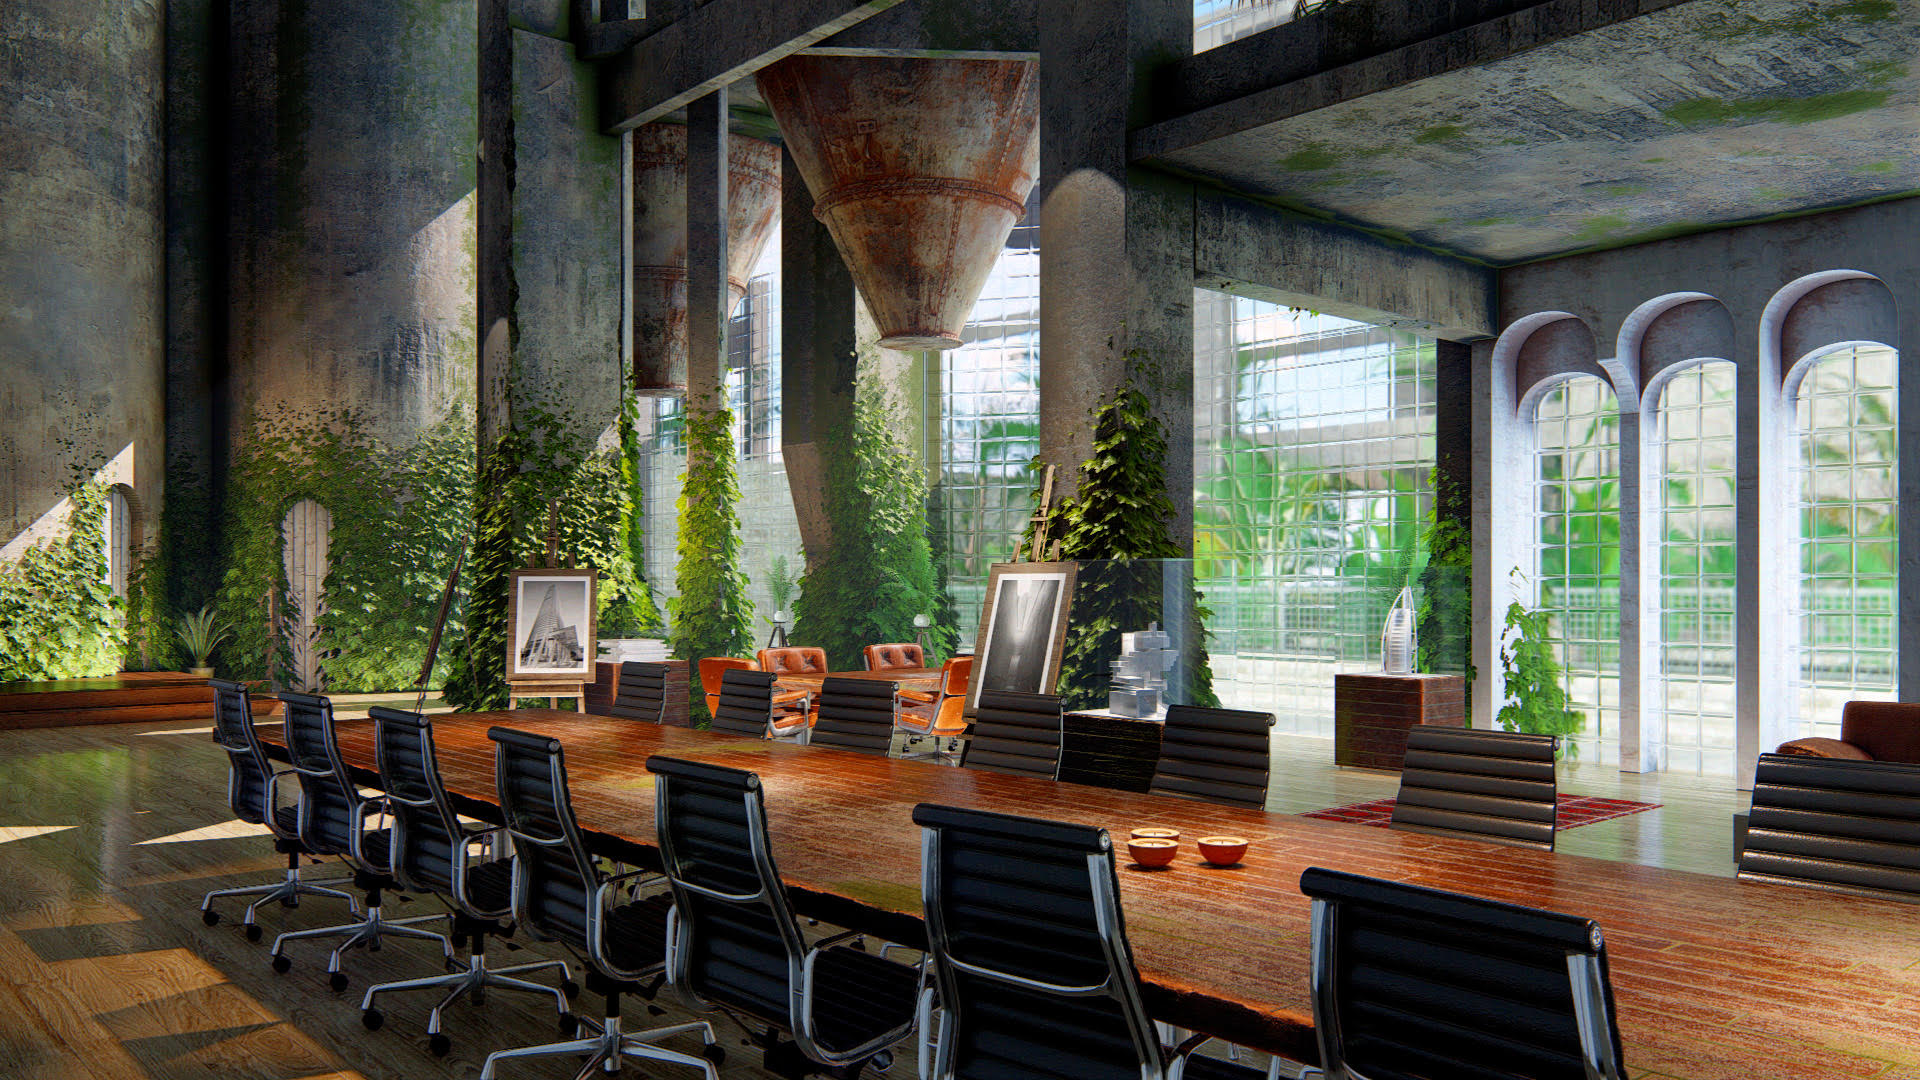
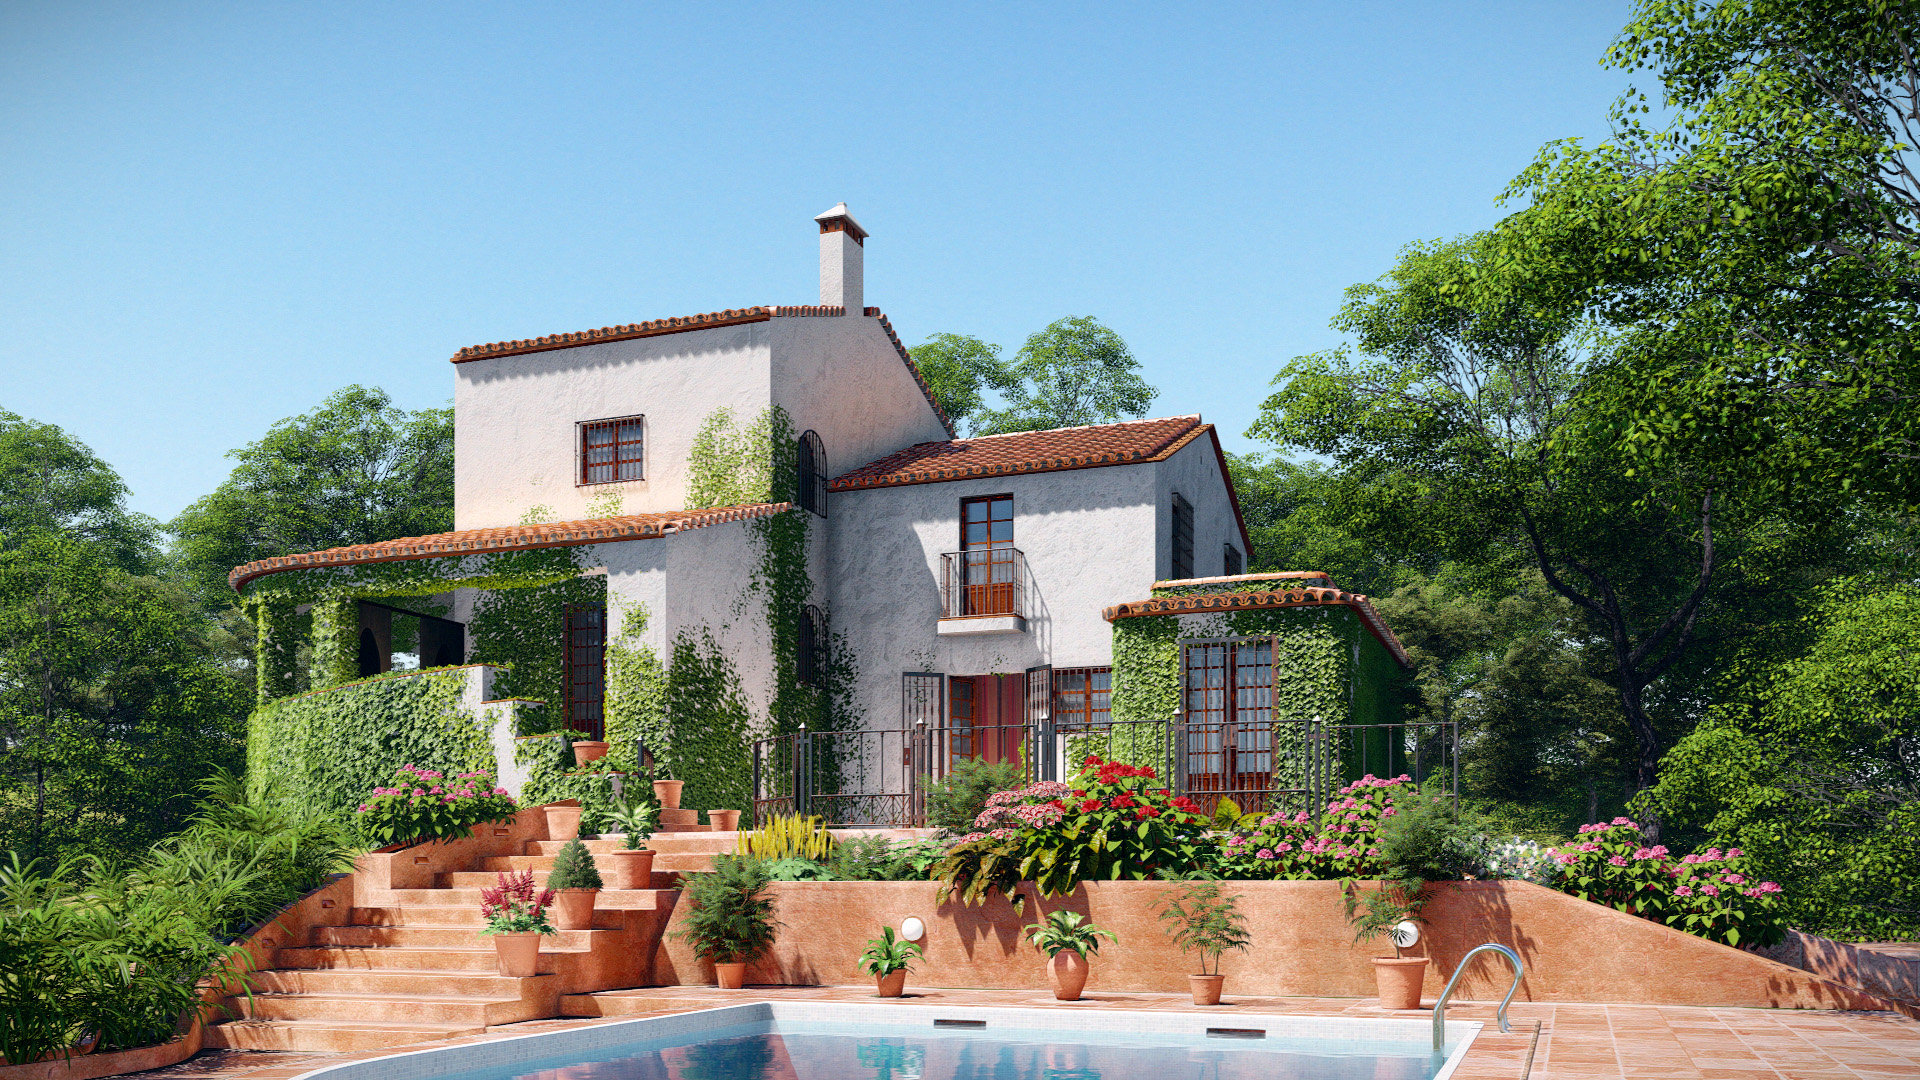
You can also cover models with leaves or add weathering, ageing and transparency. Even transform any object into thousands of leaves or add ivy to a wall… These tools are implemented through the Material Editor, so the workflow is logical but the effect is quite impressive indeed.
Here are some examples:
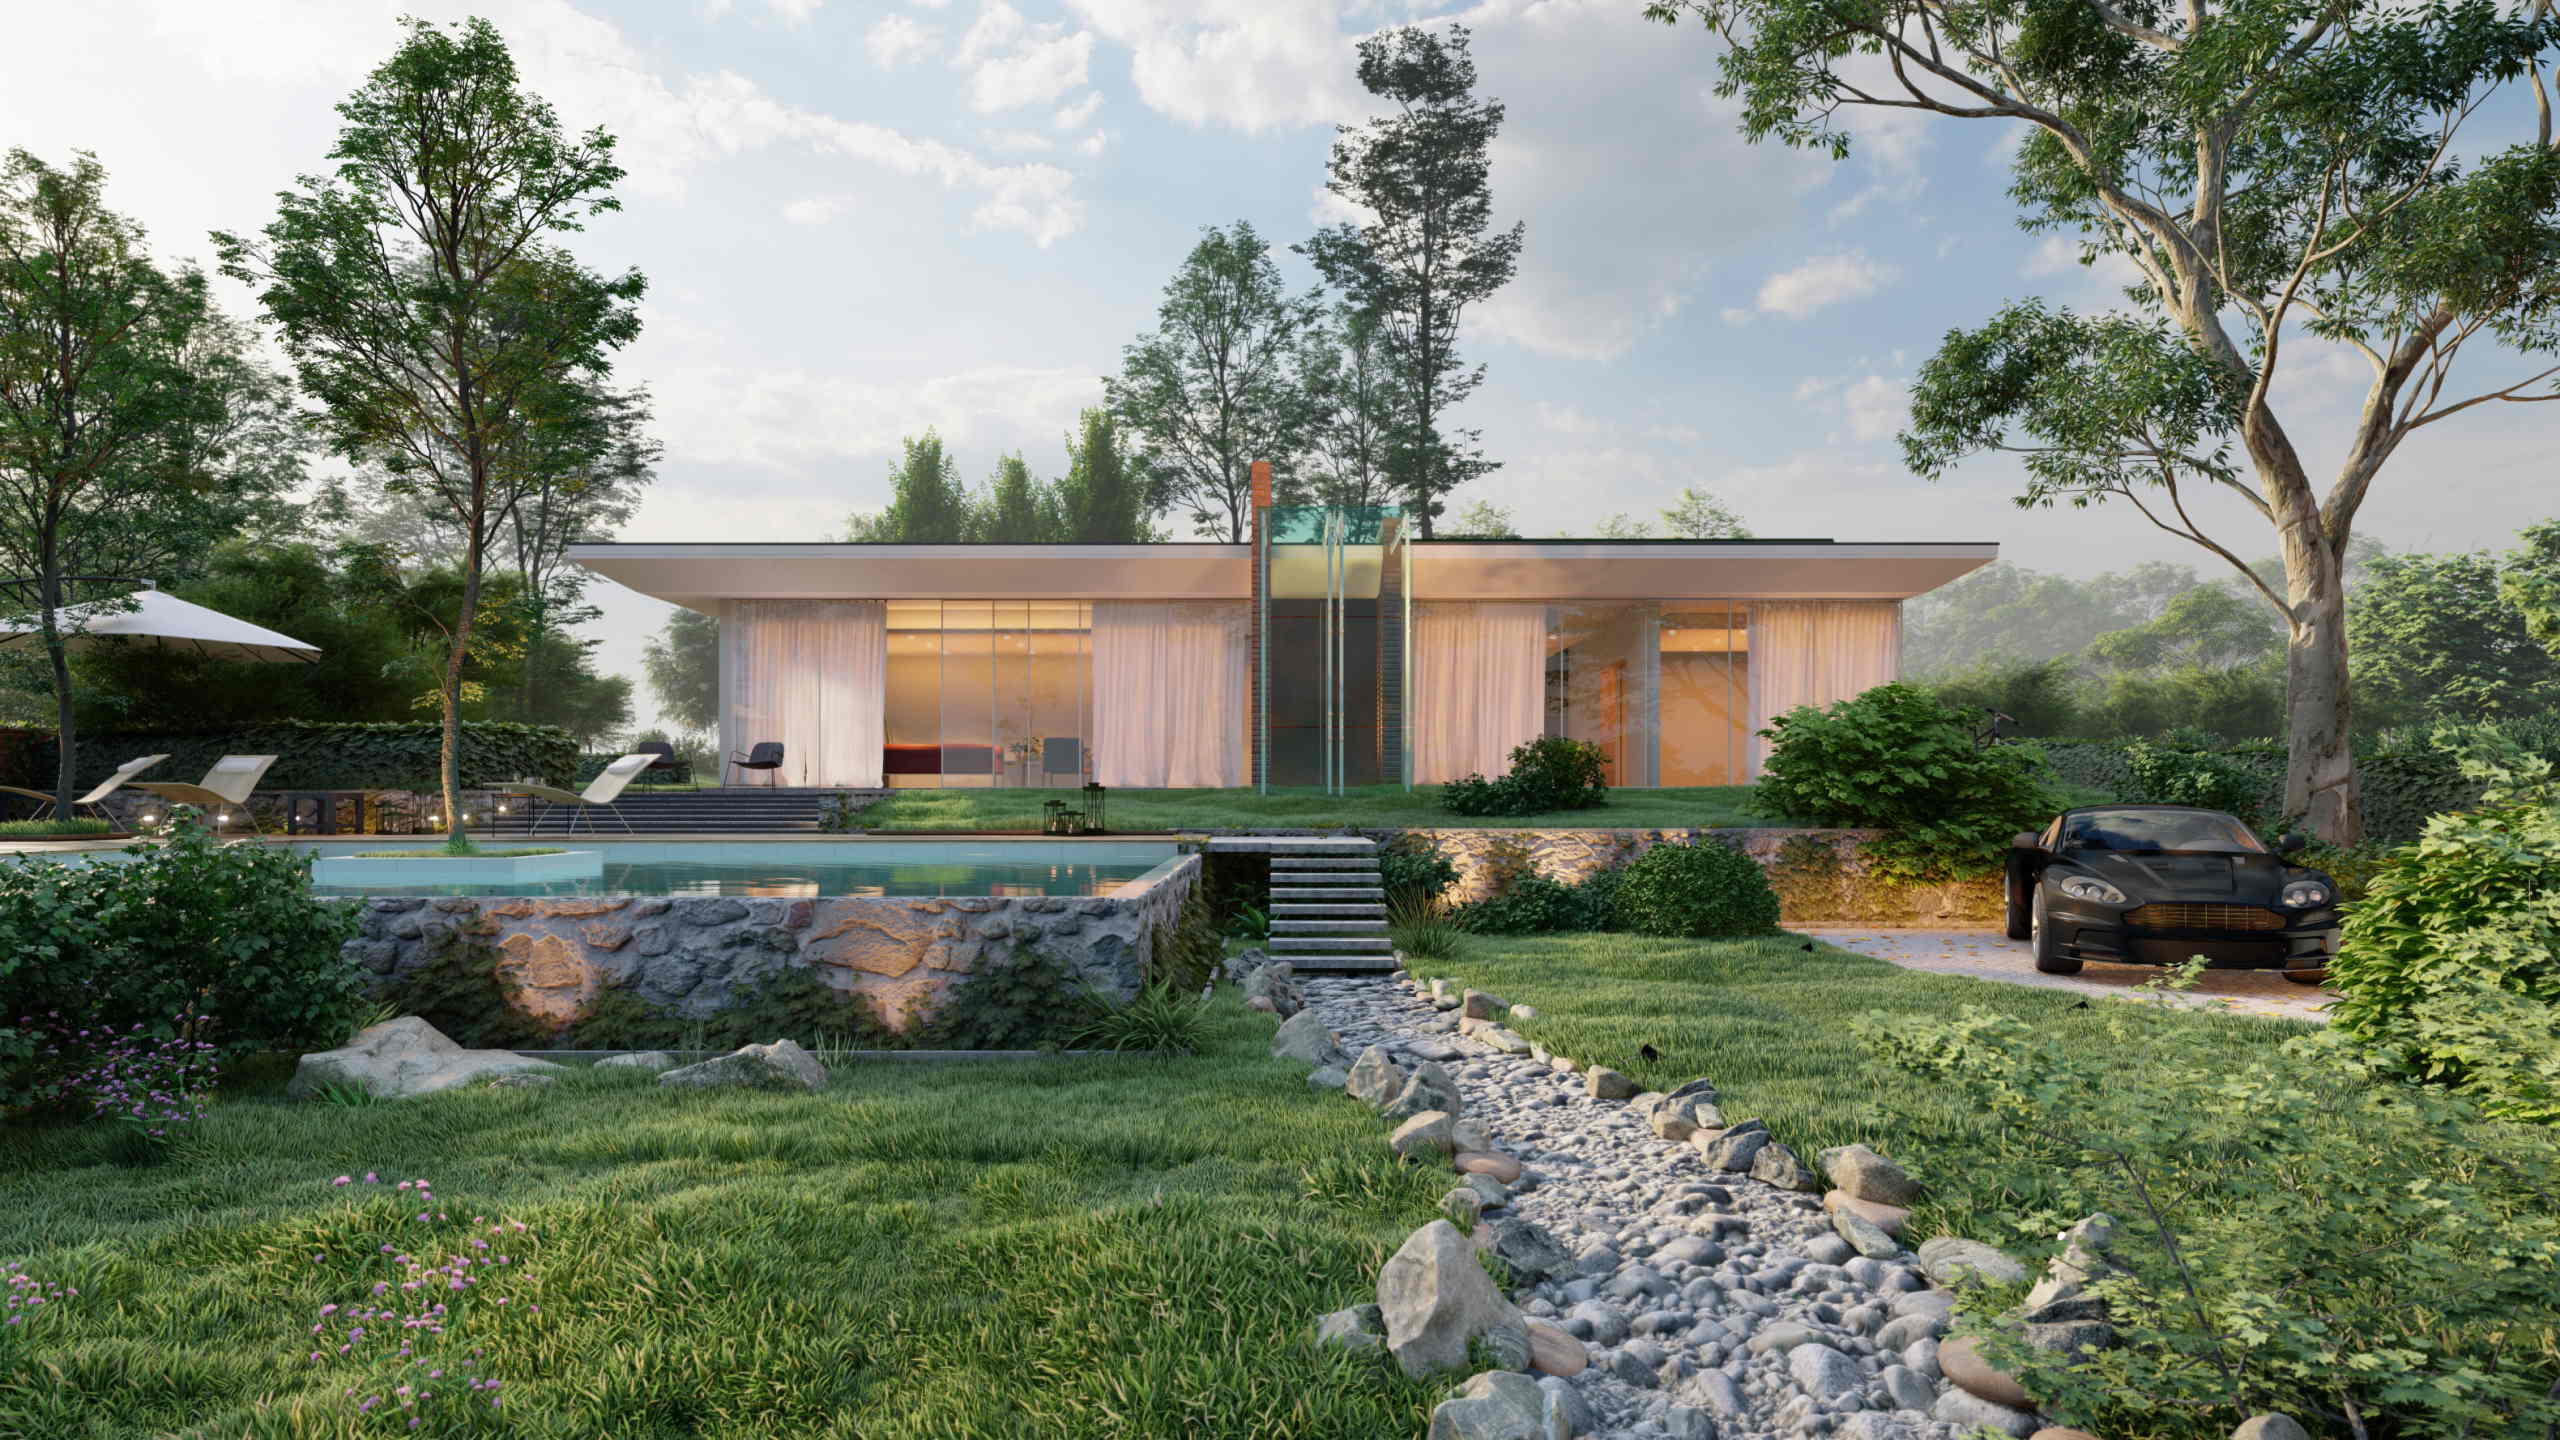
Boardroom
Pool Villa
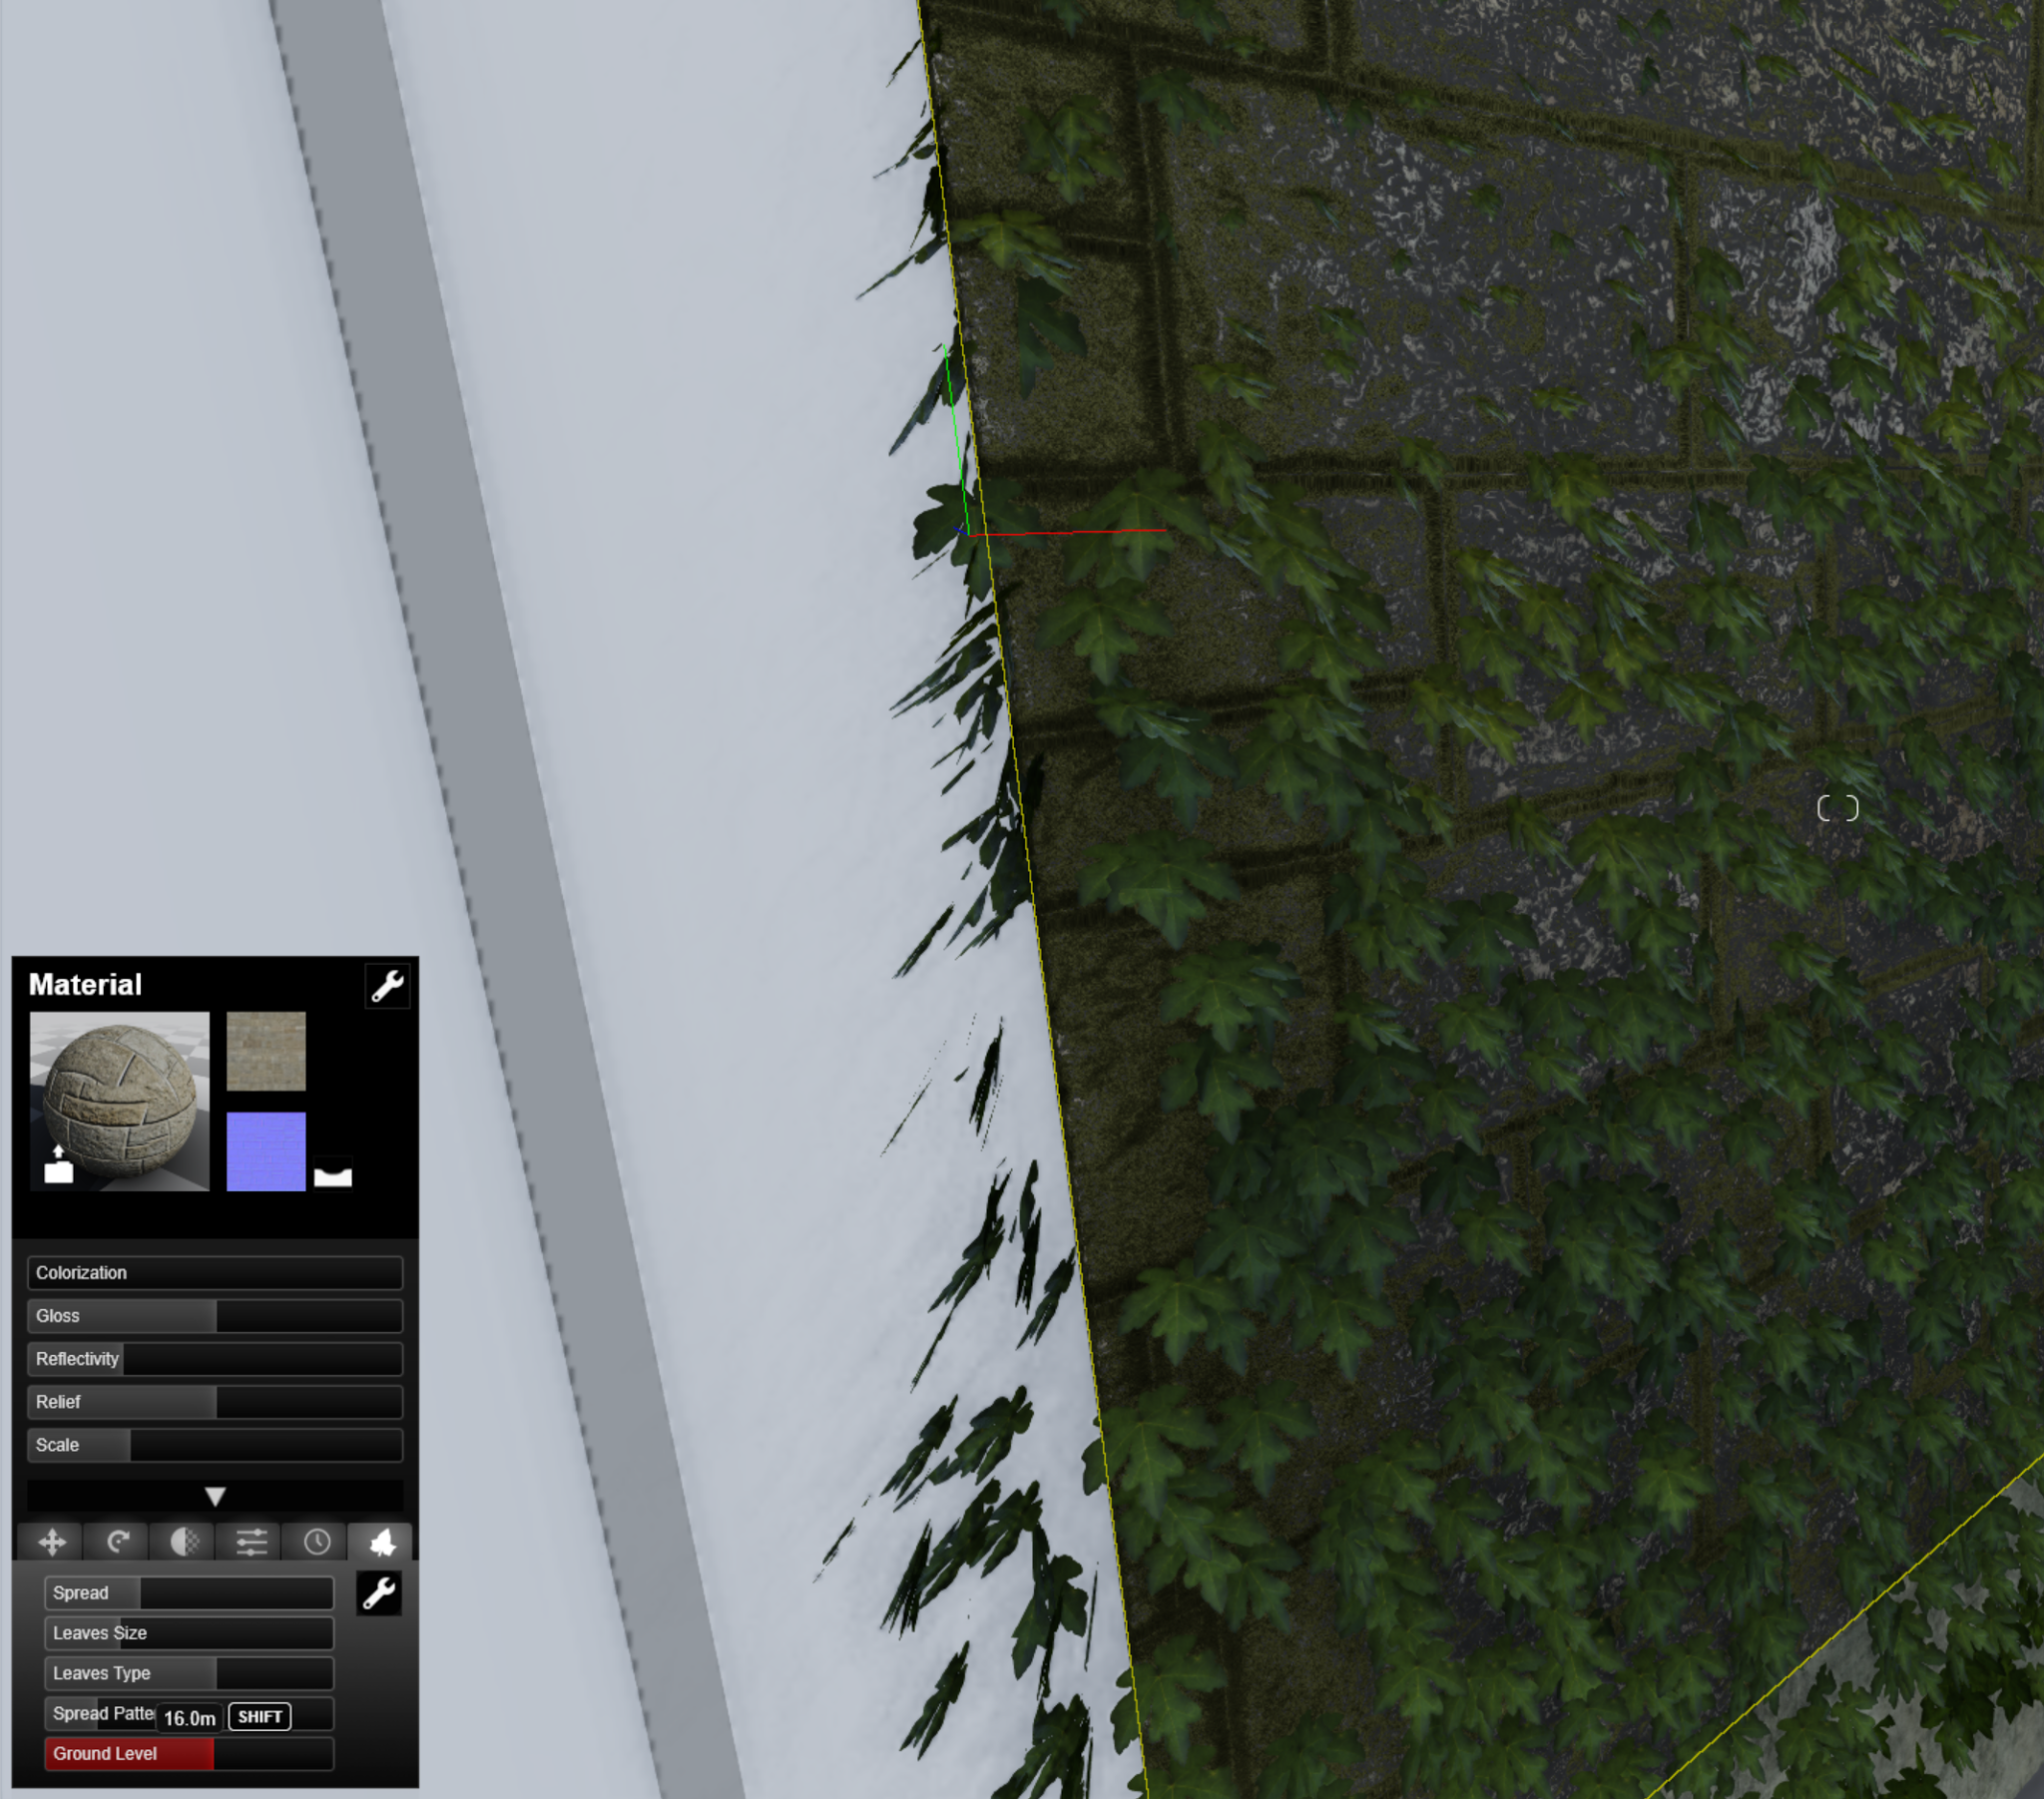
To get started with these tools:
Enter the Material editor
Select a object to change
Set a Material from theLumion Library, and double–click on it
In the editing pane, you will find the tools on the right…
Then, simply drag the sliders until you have the desired look and feel
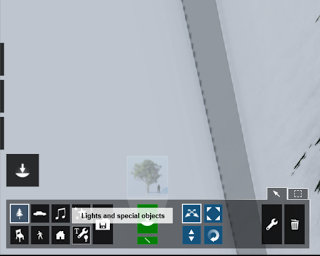
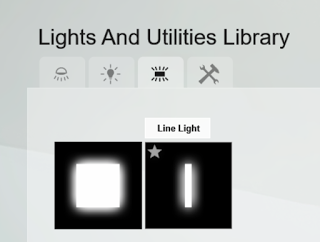
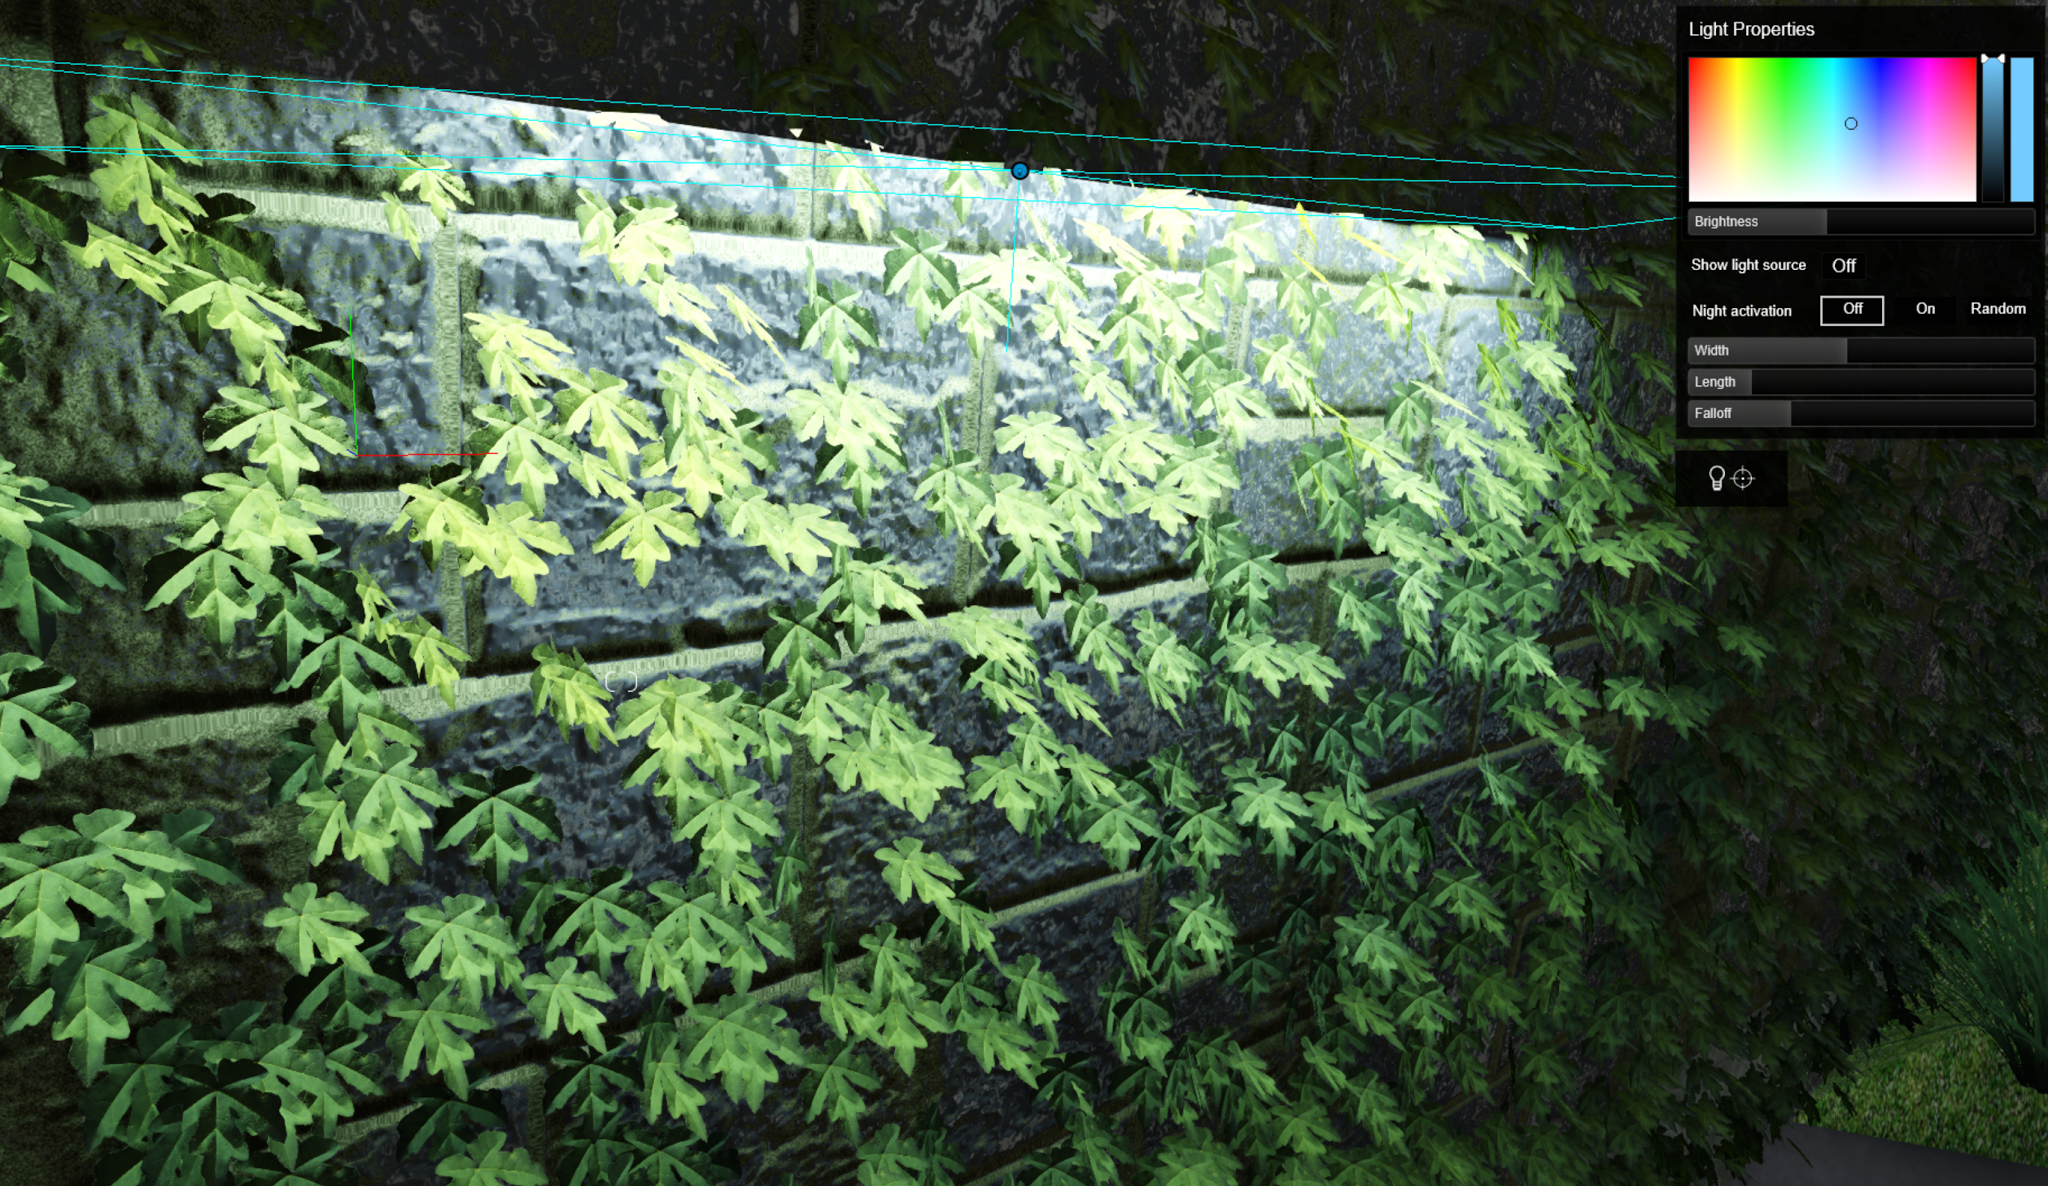
Light strips
Sometimes, the available Lighting tools in presentation software can be quite limiting. Happily, in Lumion7 you can now add light strips or area lighting, meaning you can go beyond simply ‘spot lights’. I really enjoy adding these new lights, because as usual they can be edited with sliders, and you can view theeffect in real–time… there is no need to wait for a lengthy rendering and then realise the lights were switched off 🙂
To get started with the new Light types, open the Object pane:
Then select the Area Lights tab:
Place the light and then modify the sliders until you have the desired effect:
MyLumion
You can use Lumion to share a navigable panorama to anyone who owns a smartphone. It is incredibly simple and powerful and is one of the features I hinted at earlier in the article. It is something that allows you to put your design on display in a new way, and get valuable client feedback and engagement. Then, you can quickly iterate the design and send them a new link.
We have used this to create sets of views for various stakeholders, but the key thing is really how easy and quick it is. You don’t have to print something or even save an image and find it on your hard disk. You can do all of this creation and sharing in just a few clicks. We have found it to be a real game–changer.
Summary There is no software program available that can automatically interpret a client’s design brief, provide suitable visualisations, interpret client feedback, and iterate this process while learning at each step. A good Designer can do this. But with the right tools, parts of that process become much easier. As a designer, you will be able to interpret the brief and interpret client feedback. With Lumion, you can quickly and easily present your design, in context, and in a multitude of rich, realistic, immersive ways. By thus improving the way you communicate and iterate your designs, you designs themselves will improve. And your client satisfaction level will soar…
So I recommend that you give Lumion a try. And be ready to be surprised 🙂
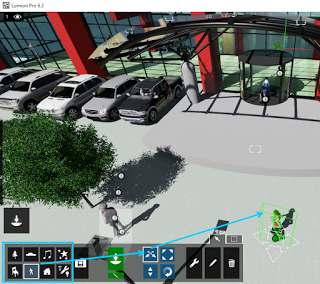
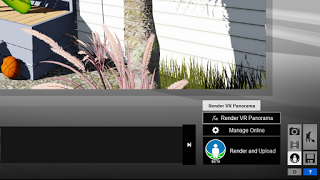
Guide 1: Using Lumion in Virtual Reality Workflows Lumion VR Lumion VR viewer is no longer supported, instead you can render static images for viewing on a variety of VR platforms. I will provide some notes on how you can do this below.
Using A Mobile App like PlainVR
Here’s how:
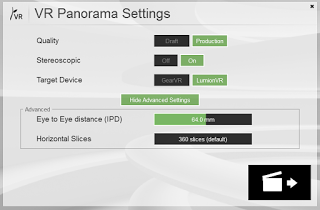
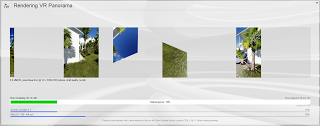
Render VR Panorama images (these will be 360 degree jpg files). You can use default 64mm eye to eye and 360 slices
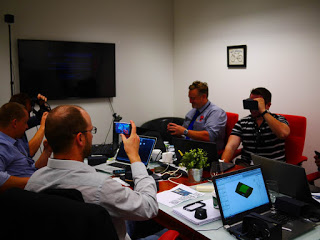
Photo:Virtual Built Pty Ltd using Lumion VR to PlainVR for builders in a Revit training session
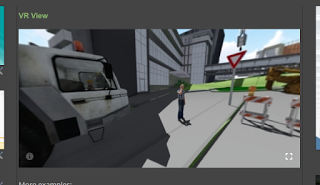
Embedding VR to a Website with VR View
Google has kindly provided a web service for rendering images in VR, its called VR View. After creating your stereoscopic image, you can follow these steps to embed it into your site:
Note: in Blogger, after you add an ampersand character to the code, it converts it to some other characters. basically, you can’t ‘edit’ after you input the code, if you publish it directly it won’t replace to & and it works…
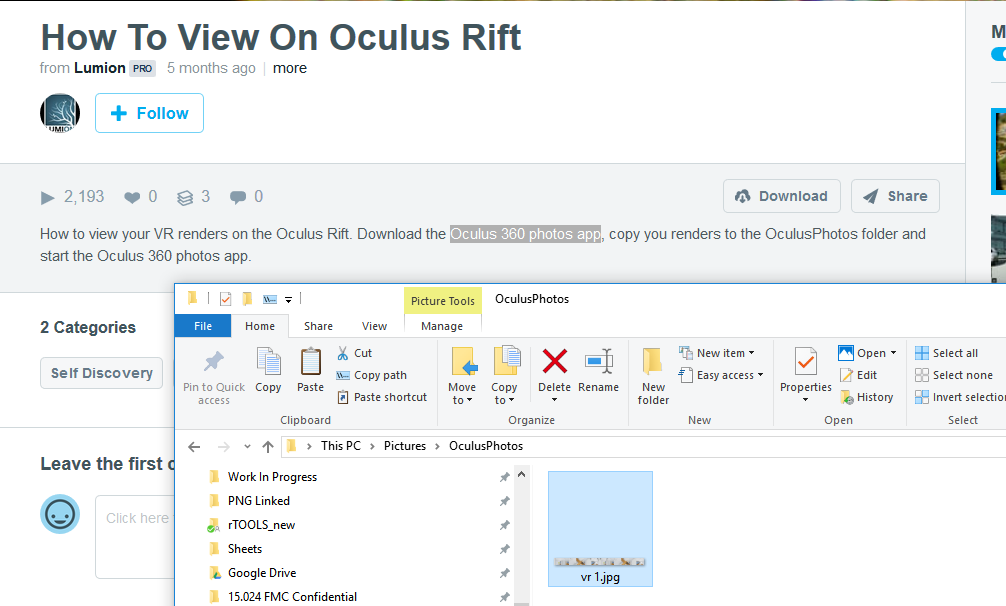
Using Oculus with Lumion
To do this:
Render a 360 jpg file from Lumionthen
View it in a panorama viewing app, such as Oculus Photos
Guide 3: Installation and Links
If you would like to get started using Lumion, here are some steps to get you started quickly:
Verify your computer Click here to see if your PC is suitable for Lumion Click here to see the general system requirements for Lumion. Click here to install the latest graphics card software and all available Windows updates.
Get the download manager
You will get a special email that lets you download the software… Lumion7 Viewer will be released later. An update e–mail with download information will be sent as soon as the viewer is released
Download Lumion
Double–click on the Download Manager to run it.
Follow the instructions to install Lumion. Click here if you have any problems.
Register your license
You can register your License Key to a forum account.
You can now get technical support on theLumion Support Forum
I love unique tools. In the BIM world, we are presented with a wide array of visualization software, each supposedly better than the last. But I am interested in something that has real power, that is truly unique, something that can give me and my work an edge over the competition. And Lumion is one of those unique, powerful tools.
It is fast, easy to use, and the visuals are so immediately pleasing. In just a few minutes, you can go from a Revit model with links and topography, into a beautiful 3D environment. There is a huge library of People, Trees and Vehicles included with Lumion that can be placed immediately into the scene. The more time you spend working up the scene, the better and more realistic it looks.
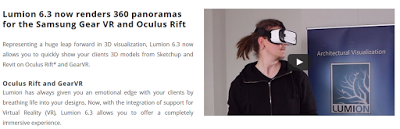
During the preparation of this article, Lumion 6.3 was released. I have made an effort to discuss key points from that new release here. The big new feature of 6.3 is that Lumion now supports Samsung Gear VR and Oculus Rift! Find out more at this link.
So that’s the quick summary, but how does Lumion integrate with a real Revit environment? What considerations are there when working on federated models? What tips and tricks did I discover along the way? Read on to find out…
This review is divided into the following major sections:
Real World Use
Summary of New Features
Basic Use
Specific Tips and Workflows
Learn More
Real World Use
If you want a quick overview of what can be achieved, check out this Showcase page on the Lumion website.
Test System
Lumion uses a live rendering engine, so effects and animations all essentially occur in real time. This means that you need a decent computer, with a good graphics card, if you want to get the most out of Lumion. I tested Lumion on my 2 year old workstation, with these specs:
Intel Core i7-4930K (6 cores, 12 HyperThreaded) CPU
64gb RAM
NVIDIA Quadro K4000, 3gb GDDR5, driver 353.62
Samsung SSD 840 EVO 500GB + 3tb secondary drive
The above specs were more than acceptable for my use, but you may find that a newer gaming graphics card would compensate for a current mid-range system with less RAM.
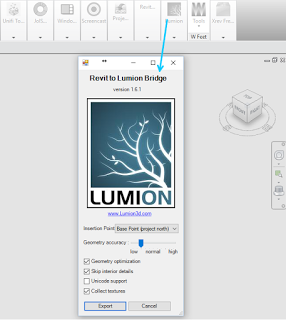
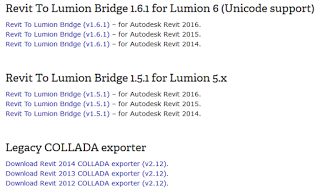
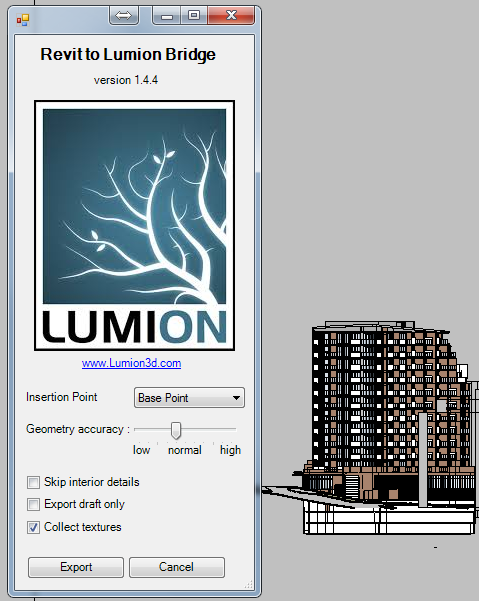
From Revit
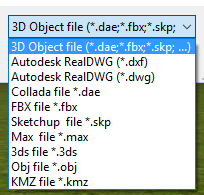
Lumion imports a number of native 3D formats, including FBX and DWG. However, there is also a Revit export addin (called the Revit to Lumion Bridge) available that gives better optimization to the exported 3D data. I found the addin very quick to use, even on a large site with multiple buildings. After exporting into one container DAE file, you then use the Import option in Lumion to bring that model into the current Scene.
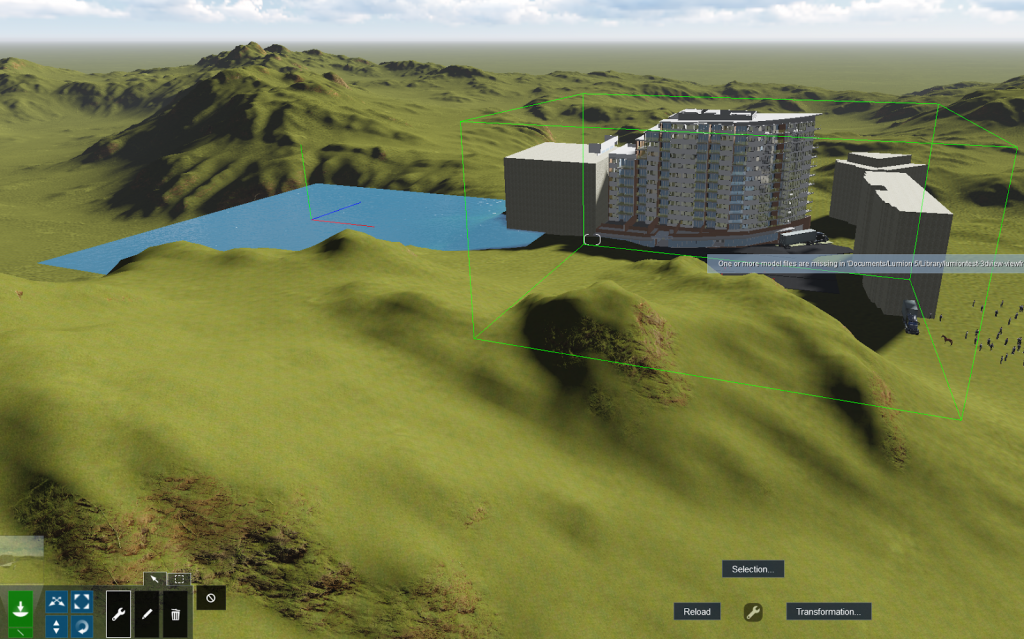
If you have some well developed Topography in Revit already, you probably just want to ‘feather’ the edges of the Lumion Terrain. A Lumion scene is made up of a number of parts, but it always has a base Lumion land surface (that could be flat or modelled to really any land form), and then you typically have a model imported from some other software, following which you would usually add content and entourage to the scene, such as People, Trees and Vehicles.
After you have imported a model and integrated into it into the scene, I feel that it is very rewarding to add some content to the scene immediately. The large library of content allows you to quickly get a ‘look and feel’ happening that will help drive the artistic process from this point forward.
I say “artistic process”, because that is actually how Lumion makes me feel – like an artist, not like a boring BIM technician. And that is a good thing! Rather than wrestling with the usual mind-draining, complicated Revit modelling tasks, Lumion is like a breath of fresh air. The payoff is immediate, unlike some other rendering workflows that often require many hours of material mapping before anything remotely aesthetic can be generated.
From Navisworks via FBX
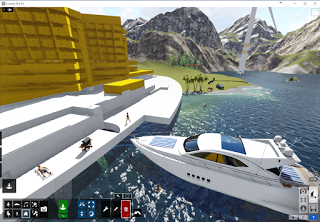
I thought it might be interesting to try and play with a relatively basic building form or mass, and see how Lumion can make even basic geometry look quite impressive. To start with, I used a model in Navisworks of Room spaces (which were exported from Revit via NWC). Then I exported these Room masses from Navisworks to FBX.
The resulting FBX file was 167mb.
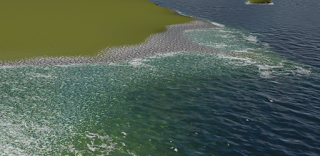
I opted to try the Mountains in Spring scene template. The water in Lumion is nothing short of beautiful. Its almost too good to try and demonstrate with a screen capture, but I’m going to try anyway… Keep in mind that as you navigate in Lumion, the water is moving and rippling and lapping away at the smooth stones. Amazing!
In just a few minutes, I had trees, a power boat, a sunbaking man, and even a fish, horse, and offshore wind turnbine placed in the scene. Lumion has this potential for rapid, beautiful scene development that is unparalleled in my experience.
Modifying Placed Objects
The Lumion interface is clean and uncluttered. Sometimes, you will ‘discover’ how something works in Lumion, and it will just make sense. For example, if you are trying to move a Person and can’t select them, keep in mind that you should pick the object Category from the bottom-left corner of the window, and then you will be able to modify objects of that Category.
Modifying the Environment
I was impressed with the fact that the sun height is extremely easy to modify, to get things looking just right, as the screencast below shows:
Key points to remember
Some of the features added in Lumion 6.0.1 and 6.3 are focused a lot on improving the image quality, which means you are getting the very best output from the scene creation work that you undertake. Another key differentiating feature of Lumion is the overall ease-of-use. It does not feel like a complicated piece of software, and it allows you to get up and running quickly. Then, as you learn more about Lumion, you can progressively discover the additional features that are just below the surface of the main user interface.
Summary of New Features
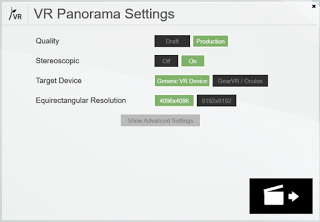
Lumion 6.3 now supports the rendering of VR panoramas for Gear VR and Oculus, and it is very simple to use. First, press the MyLumion button, Set a Viewpoint, then click Render VR Panorama:
For Oculus Rift, choose LumionVR to render an LVR file:
You can watch as the renderer works its way through the left eye and right eye:
Finally, open that file in the LumionVR viewer (included with your Lumion 6.3 installation) and interact with the scene using the Oculus Rift.
There are also some key aesthetic additions that became available during the releases of Lumion 6 through 6.3, and the imagery below gives you an idea of what each effect can accomplish once applied to your projects.
Hyperlight 2
OmniShadow
PureGlass
SpeedRay Reflections
Basic Use Download and Installation details
Download size: 6.26gb
Installed size: 14.6gb
First Launch
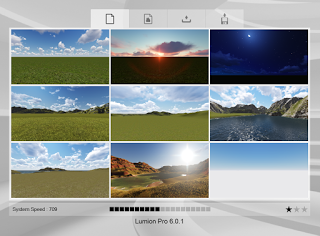
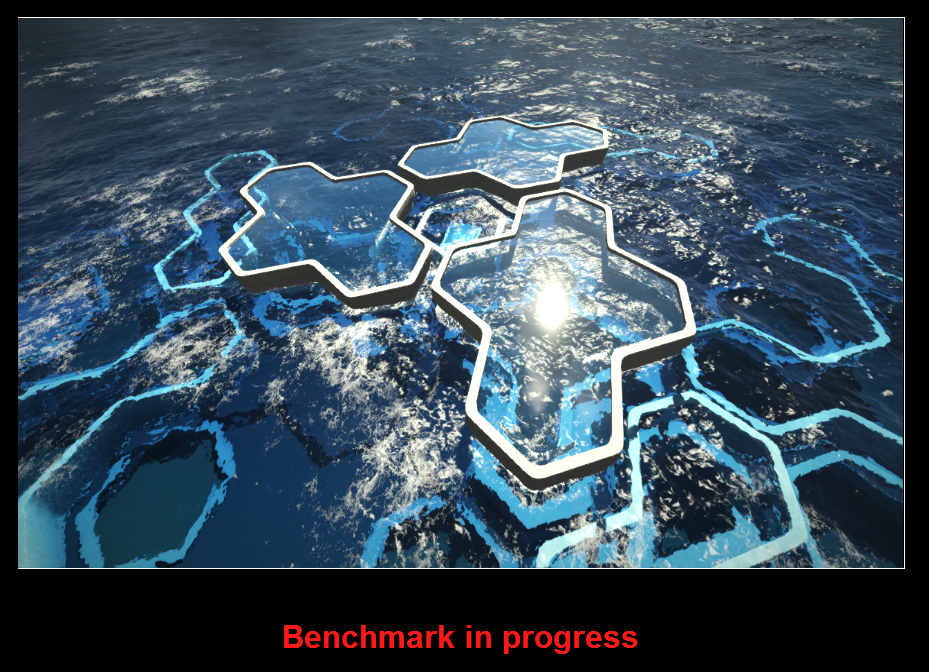
On first launch, Lumion will benchmark your system so that it can self-configure the best performance settings for your particular hardware.
After the benchmark you will be presented with this Start screen, which will allow you to quickly create projects for a variety of different scenes and enviroments:
Specific Tips and Workflows
We allwork in different ways. And we all have our own artistic style. So when considering how to best integrate Lumion with an existing design and presentation workflows, there will obviously be some variations. But essentially, you will take models from a content creation suite (such as Revit) into Lumion, and then perform various tasks such as site modelling and adding entourage, after which you will tune various presentation style settings and export to a video or still image.
You can read a real world example of how UK architectural practice Lovelock Mitchell has made Lumion a part of their day-to-day design pipeline at this link. I could certainly identify with this comment that Michael Chevasco made in the article: “If you like the visualization side of architecture like I do, then you might find experimenting with Lumion artistically rewarding, for example, positioning the sun just right to create a certain mood, or the getting the wind to blow through the grass in a scene. I enjoy those things and Lumion makes it easy.”
Run applicable installer, such as RevitToLumionBridge_Revit2015.exe
Restart Revit
The addin will now be available on the Add-Ins ribbon
Export and Import to Lumion:
Open a Revit project
Go to a 3D view
Run the Exporter
Go to Lumion
New Scene based on Template of your choice (I chose ‘Hills’)
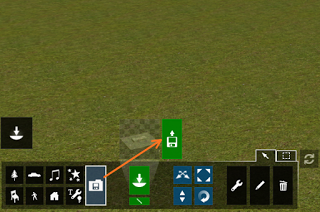
Import using this button:
Name your import and tick the box
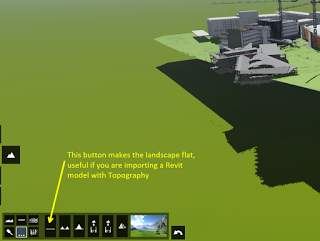
Tip: Make landscape flat:
You may want to ‘flatten’ an existing landscape prior to matching Revit topography with Lumion terrain. The image below shows which button to use:
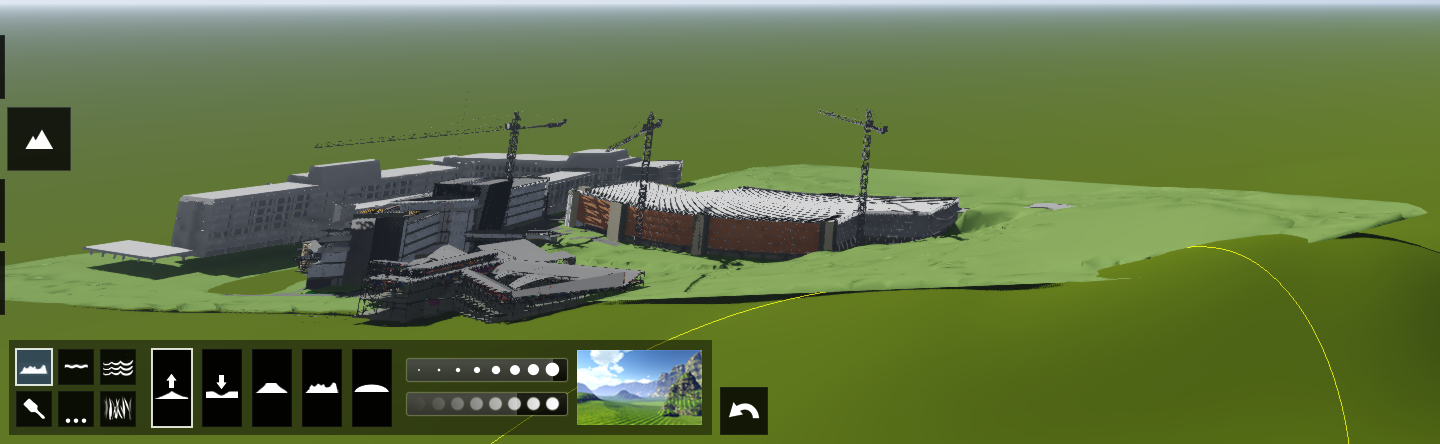
Use large terrain brush to quickly match Lumion surface with Revit topography:
In times past, I had this dream that Revit would be the sole answer to every single architectural and modelling question. Due to the proliferation of excellent addins and addons, I now realise that Revit is positioning itself as the operating system of the BIM environment. It has a solid parametric, data and intelligence engine, which can be extended in many ways through the expansive API. One area in which Revit has sometimes wavered is in pure visualization, particularly of the real-time and photorealistic variety. Using RPC and Realistic display modes within Revit can achieve a certain result, but here are some questions:
Is using an additional presentation package, like Lumion, worth it?
Will it result in a better visual result?
Will the performance be acceptable?
I received a review copy of Lumion 5.3, and tested it using Revit 2015 Update 7. As usual, I have reviewed the software, but at the same time I am sharing practical tips and guidance on how to get up and running with Revit and Lumion.
To start with, let’s consider whether Lumion can really add value to your current design and development pipeline. You may be thinking “I don’t have a clue how to make a fly-through animation“, but that is where Lumion lives. It makes it easy for you to take your BIM geometry, and put it into a real, living environment. In a sense, it is a ‘complete’ visual presentation package, as it includes things like environments, backgrounds, materials, weather effects, water, entourage, vehicles, people, trees, landscape, furniture, terrain modelling, and it is all in a package that allows you to modify, manipulate and tweak basically everything in real-time. It has a clean UI and extremely fast rendering capability. For output and deliverables, you can easily export still images or rendered videos of the scenes that you have composed.
You might be thinking “I don’t have time to learn yet another modelling tool“, but if you spend any time at all in post production software like Photoshop, 3ds Max, After Effects or something similar, then Lumion does not represent a steep learning curve. The interface is relatively unobtrusive and simple to understand. The Lumion addin allows for building models to be exported from Revit, but it also allows models to be updated and reloaded into the Lumion scene. As one person put it, “Use Lumion and Revit together and you will enjoy the synergy.”
You can check out a very concise ‘getting started’ style video here:
To put it simply, when you pair a powerful and parametric building design tool like Revit, with a free-flowing, smooth, flexible presentation software like Lumion, you have a very formidable design and presentation pipeline at your disposal. So, let’s learn a bit more about Lumion…
This remainder of the review has been divided into the following 5 sections:
Download, Installation and Deployment
Workflow (BIM friendliness)
Performance
Quality of Output
Real-world applications and Case Studies
Download, Installation and Deployment: Installing the Main application
You will receive an activation email, with a unique download link
Download and run the ‘download manager’
Copy the activation code from your email to the download
It will now automatically download Lumion, usually to your Downloads folder (about 4.94gb)
You should copy the installation .exe and .bin files to some safe location – these are what you will use to install Lumion on other PCs
The installer should run automatically – all you need to do is set the install path
Start Menu – Run Lumion 5.3
Agree to the Licence Agreement
Lumion will now run some benchmarks and initialize itself
Once the next screen appears, you will get a ‘system speed’ rating
Note: I was expecting to see a Revit addin automatically installed… but I have since realised that this is an additional step… see below.
Examples of cards with about 2,000 PassMark points: GeForce GTX 745, Quadro K4000M, GeForce GTX 570M or faster.
Harddrive: 20GB of disk space
Using Lumion and Lumion Pro via Remote Desktop or similar virtual desktop solutions is not supported.
Lumion and Lumion Pro require an internet connection.
Workflow (BIM friendliness)
There are a number of ways to move data from Revit to Lumion, such as using DAE format via Exporter, or FBX via built-in export. The dedicated DAE exporter addin from Revit is the recommended method.
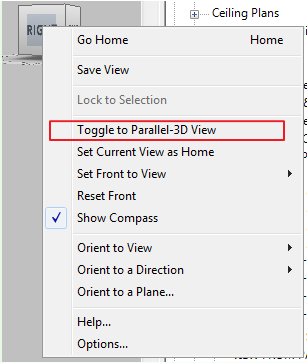
The Exporter addin (Revit to Lumion Bridge) works in orthographic 3D views and takes all visibility filters for the view into account. If you try to export from a Perspective view, the Lumion export addin will be disabled. However, in Revit 2015 R2 you can easily convert a Perspective 3D view into an orthographic or Parallel-3D View to allow export to proceed. Here’s how:
Ensure that a Crop Region is applied and Visible, and the view is “unlocked”.
Then, right-click on the View Cube and switch to Parallel-3D view, like this:
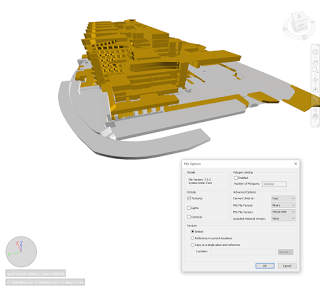
Then, run the exporter. The UI is relatively easy to follow:
I tested using ‘normal’ accuracy, and the file size result was like this:
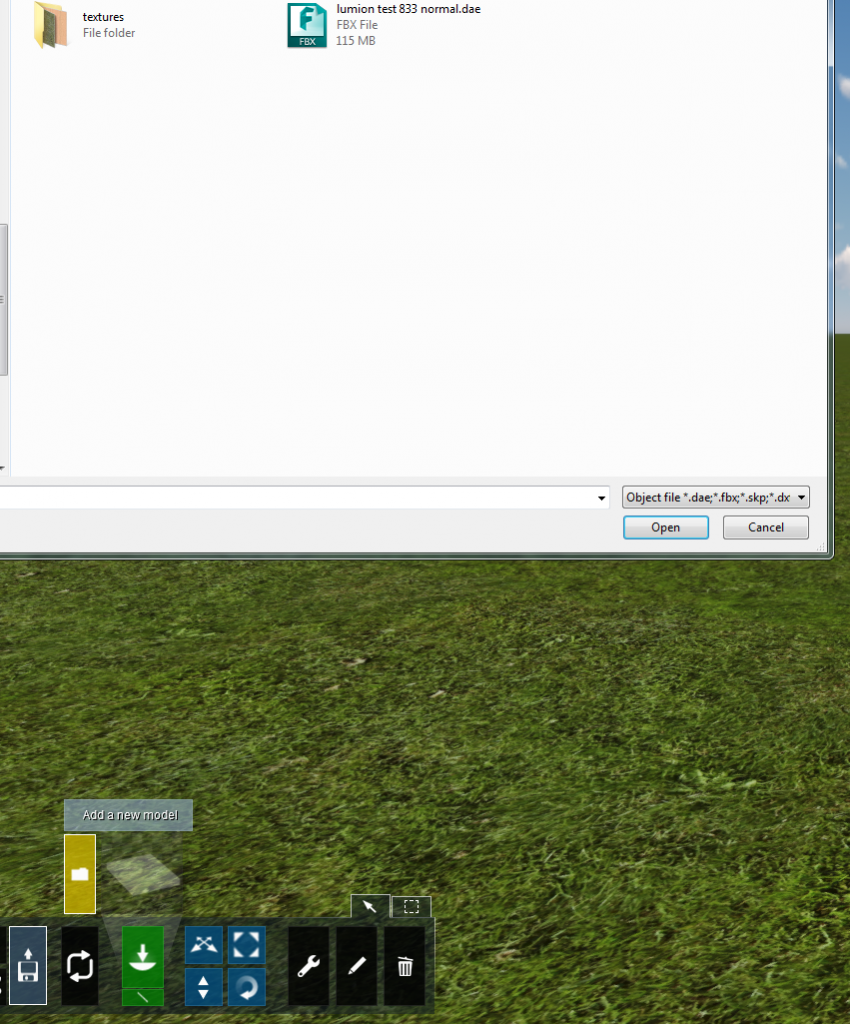
You can then easily open or create a scene in Lumion, and then import the model you just exported from Revit:
Navigation
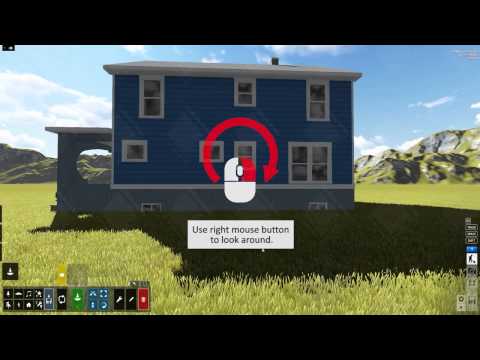
Once in Lumion, you can use the WASD keys to walk around, and QE keys to move up and down. If you hold the right mouse button and drag, this will change your view direction. Holding Shift will speed up your movement. It is quite a fluid navigation system. F1/F2/F3/F4 turns shadows on and off and makes other quality vs performance changes.
Click the category (people, transport, landscape etc)
Click Change Object to select desired model
Click to place in the scene
To bring in external models, like DAE or FBX exported from Revit, use the Import models option.
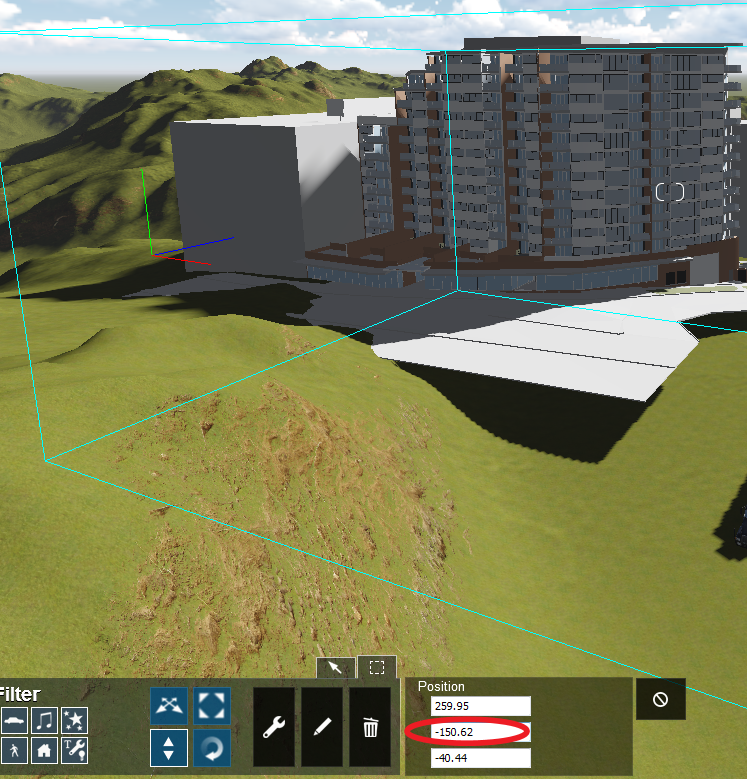
Depending on how your model heights were configured in Revit, you may need to move your model downwards in Lumion. In my case, I had to move the model downwards in the Y-axis by about 150m (yes, Lumion understands the vertical to be the Y axis, not the Z):
To update the model, just re-export the DAE file from Revit. You can reload by: going to Import mode, selecting the spanner for ‘context’ menu, selecting your Model and then clicking on the blue circle, which will open up the context menu with the reload option:
It is interesting to note that even new objects (ie. newly added to the Revit model) that have a Revit material name matching a currently overridden material in Lumion, will then adopt that Lumion material when the import is reloaded. Nice!
There is a brief tutorial video on the Lumion to Revit workflow here:
So, is Lumion able to do anything that Revit can’t do? In a word, yes. For example, it can handle things like sculpting large-scale terrain models very easily, as this demo shows:
Add to that: movie effects, ocean / water, the large model and material libraries, lighting effects, render quality, and the overall ability to transform a scene from a collection of polygons into something that more effectively represents the real world.
Performance
The Collada DAE export was very, very fast – under 1 minute for a 150mb Revit model. Accordingly, of all the file types that can be used to get data from Revit to Lumion, I would expect that the recommended and preferred method is via the DAE export in the free addin.
Quality of Output
Lumion is targeted at rapid, real-time, moving animations with models that may also be animated. So the result is usually something that looks very ‘alive’. Coming from an architectural background, you may initially be surprised at the overall ‘look’ of things and you might find it slightly cartoonish. However, I recommend that you give it a try and have a go at tweaking a few of the display settings.
It is very easy to create a flythrough or fly around animation. Just start the movie tool with the film icon, then create a number of keyframes as you would with other animation tools. Then, you can easily export to mp4.
Real-world applications and Case Studies
I tested using a medium rise model:
Once the model was imported, it was very easy to select entire materials and replace them with more appealing versions:
To delete models, you can remove them directly from the library and they will disappear from all scenes that they are currently placed in. However, you can also delete the model only in the scene you are currently working on, and it will remain available in the library for use in other scenes:
Children´s hospital with more than 15,000 plants and trees
Summary of Lumion 5.3
In review, let’s consider some of the questions raised at the beginning:
Q. Is using an additional presentation package, like Lumion, worth it? A. Yes, it would be very difficult for plain Revit to deliver the same speed, quality, and content
Q. Will it result in a better visual result? A. When it comes to real-time scene export, a Lumion visualization can be much more alive and animated than a Revit equivalent. You can also easily deliver your scene as a selection of high quality images, or as a rendered video.
Q. Will the performance be acceptable? A. Yes, provided you have a decent CPU and graphics card (refer to requirements above)
Summary of each section:
Download, Installation and Deployment – 7/10, necessary to manually install addin
Workflow (BIM friendliness) – 8/10, support for updating changed models
Performance – 8/10, much improved in more recent versions and fast export to DAE
Quality of Output – 9/10, smooth and appropriate for the visual style
Real-world applications and Case Studies – 9/10,
(see links above to see how companies are using Lumion)
My overall software score for Lumion 5.3 is 9/10.Its definitely worth a look if you do any kind of presentation work with 3D models!
In a future post, I want to look at the large-model workflow from Infraworks to Lumion via FBX. Other links, tips and resources
Important notice:
If you migrate your work from earlier Lumion versions take into account that the material system has been changed in Lumion 5. This requires you to re-apply the materials to your objects.
Tips
If you select option “Skip Interior Details” then these Revit Categories are skipped:
Casework
CommunicationDevices
DataDevices
DuctTerminal
ElectricalEquipment
ElectricalFixtures
FireAlarmDevices
Furniture
FurnitureSystems
GenericModel
LightingDevices
LightingFixtures
MechanicalEquipment
NurseCallDevices
PlumbingFixtures
SecurityDevices
SpecialityEquipment
TelephoneDevices
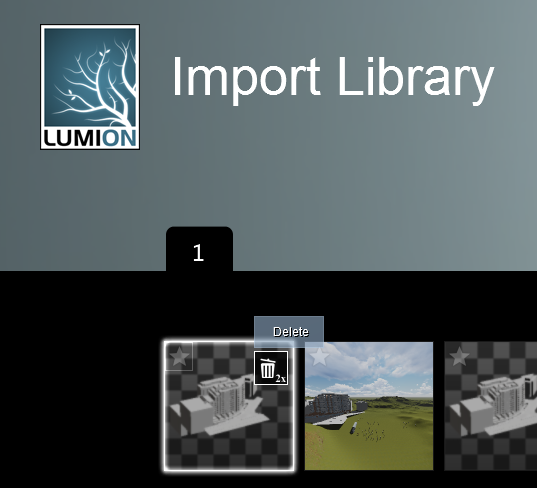
How to delete objects? You delete imported objects by using the Imported Objects Library. It cannot be deleted from the Library if you have a scene open and using that object, so first clear and start a new empty scene.
Then in Build Mode click on Import button –> Change Import Object –> locate your object to delete and doubleclick the Rubbish bin. That will permanently remove the object from the library and the files.
from here
Editorial note: “In the interests of editorial disclosure, I would like to note that this review was completed with some financial consideration from the developers of Lumion. Luke Johnson”
Information related to older versions
I have been familiar with Lumion for some time. A full scale Lumion review has been on my radar for a while, but like anything, it takes time to have a proper look at a piece of software.
My past experiences with Lumion had been hampered by less-than-stellar hardware. You really do need a decent workstation to have a fluid and productive time with Lumion. In my case, my new workstation at Virtual Built has 64gb of RAM, a 6 core (12 hyperthreaded) processor, and a Quadro K4000 video card.
I’ve had a chance to work with Lumion rendering software tonight and a Revit model. Lumion is very impressive. http://t.co/UiUJSIxUd6
— Brian Myers (@BIMfacts) August 10, 2013
I have previously posted about the future of real-time visualization tools. Lumion appears to be developing a bit of a following. Have you used it? How did you implement it?
If you want to see a project go from Revit to Lumion (also this thread):
A free version for non-commercial use is available from this page. The free version will apparently be updated to version 2 in January 2012 (only a few days of that month to go…)
The company line:
Lumion® is a real-time 3D visualization tool for architects, urban planners and designers.
It’s perfectly suited for creating videos, still renderings and live demonstrations with a quick turnaround.
Lumion offers excellent graphics in combination with a fast and efficient workflow, saving you time, effort and money.
It is in fact so easy to create awesome still renderings and videos with Lumion® that it almost feels like cheating.