As software and standards mature and even become archaic, they inevitably attract baggage along the way. Years of technical debt amassed by well-intentioned developers and product managers will be paid for by us and our children.

This is particularly evident when we start talking about the Id of Revit elements, and the IFC GUID syntax. As most of you are aware, Revit carries a number of different identifying attributes for each and every element. Here is a basic list:

  • Element Id – the numerical form of a Revit Id, you can interact directly with this using the Select By Id command in Revit
  • UniqueId – “A stable unique identifier for an element within the document.” This is not a correctly formed UUID, but rather a concatenation of a standard UUID for the Revit EpisodeId (session based), along with the Revit element Id. From Jeremy’s post: similar to the standard GUID format, but has 8 additional characters at the end. These 8 additional hexadecimal characters are large enough to store 4 bytes or a 32 bit number, which is exactly the size of a Revit element id.
  • DwfGuid (Export Guid) – this is a correctly formed UUID in .NET / standard format
  • IfcGuid – identical to DwfGuid, but encoded differently according to IFC rules created in the mid-90s. At the time, it was deemed worthwhile to ‘compress’ the IFC Guid to the shorter form we still have to deal with today.

It would be nice if Revit and IFC shared a single common unique identifying syntax, but unfortunately this is not the case.

The above Ids do actually bear some predictable relationship to each other. The UniqueId is formed by Revit joining the EpisodeId and the encoded Element Id, the Dwf or Export Guid is created by an algorithm that has a number of conditional rules, and the Dwf Guid can be converted to the backwards-compatible IfcGuid format through a different algorithm, originally created in C. Those algorithms can be sourced in various places (see links in Further Reading below).

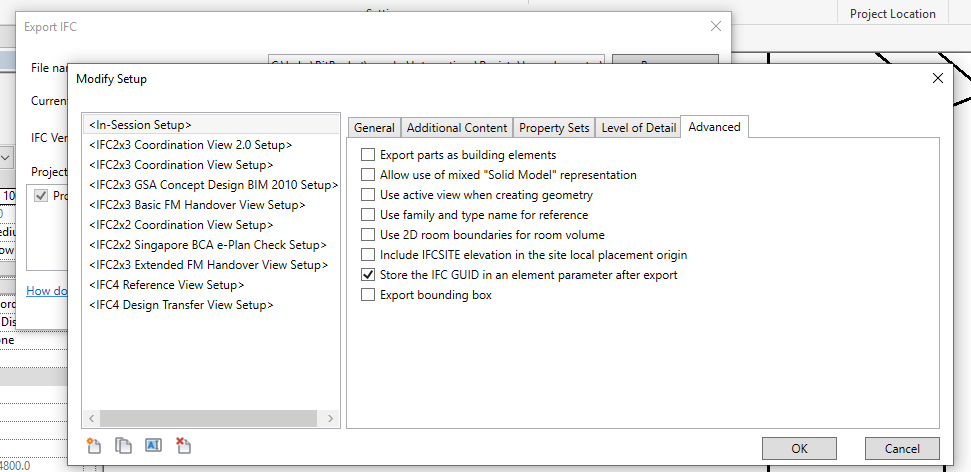
Also, some of these get exposed in different ways – if you create Element-bound BCF files, they will typically show the IFC Guid syntax. Further, if you export an IFC file from Revit and tick the option on the Exporter, it will write the IfcGuid to a parameter on the element.

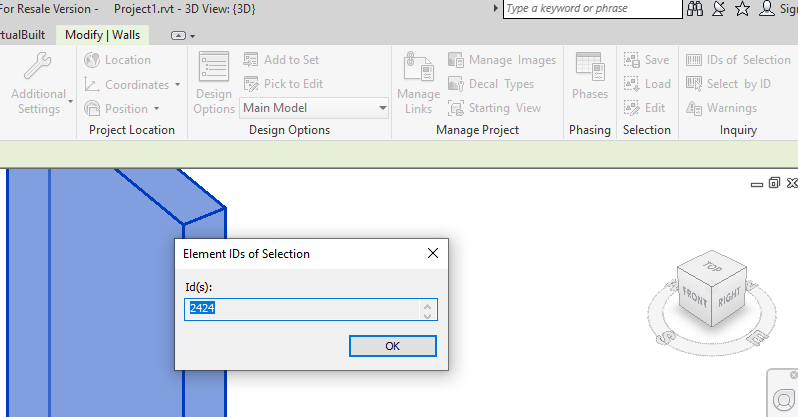
You can query the Element Id directly in Revit (Modify ribbon, Inquiry panel, IDs of Selection):

However, for the purpose of this post, let’s assume you are using Dynamo with IronPython, and you want to query all 4 Ids from an element.

We at least need to import the Revit API and the Revit IFC API:

clr.AddReference("RevitAPI")
import Autodesk 
from Autodesk.Revit.DB import *
clr.AddReference('RevitAPIIFC')
from Autodesk.Revit.DB.IFC import *


Following this, we can use the various Dynamo and Python commands to access the Ids:

elementIds, uniqueIds, DwfGuids, IfcGuids, successlist = [], [], [], [], []
for i in e:
    try:
        elementIds.append(i.Id)
        uniqueIds.append(i.UniqueId)
        DwfGuids.append(ExportUtils.GetExportId(doc, ElementId(i.Id)))
        IfcGuids.append(ExporterIFCUtils.CreateSubElementGUID (UnwrapElement(i),0))
        successlist.append("Success")
    except:
        successlist.append("Failure")
OUT = elementIds, uniqueIds, DwfGuids, IfcGuids, successlist


Notice the commands and properties used:

  • Element Id – query the Element.Id member
  • Unique Id – query the Element.UniqueId member
  • Dwf or Export Guid – use the ExportUtils.GetExportId method
  • IfcGuid – use the ExporterIFCUtils.CreateSubElementGUID method (index 0 refers to the main element itself)


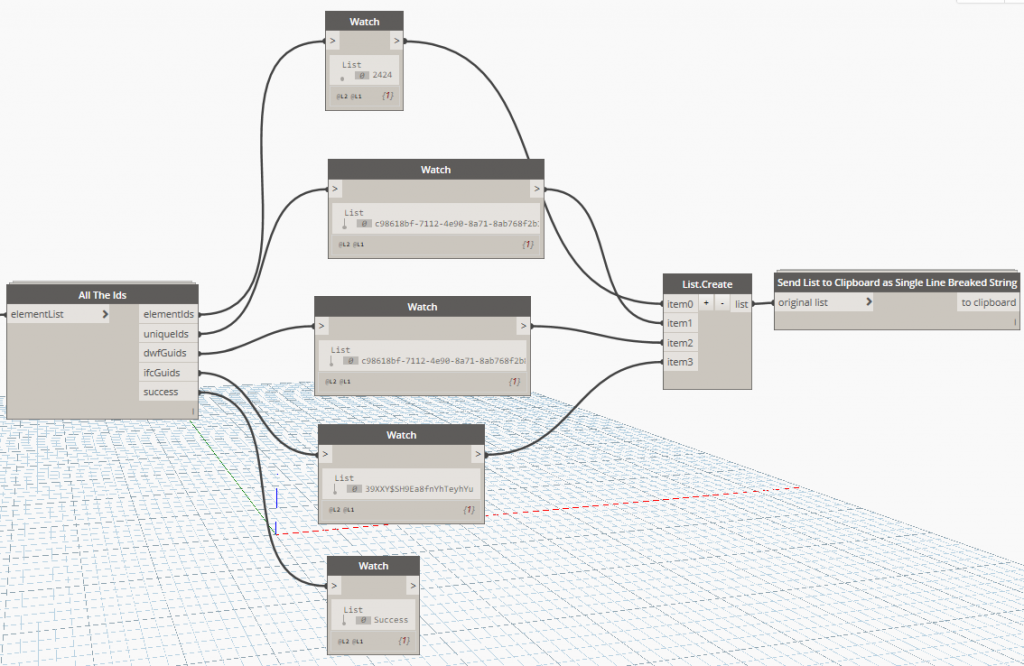
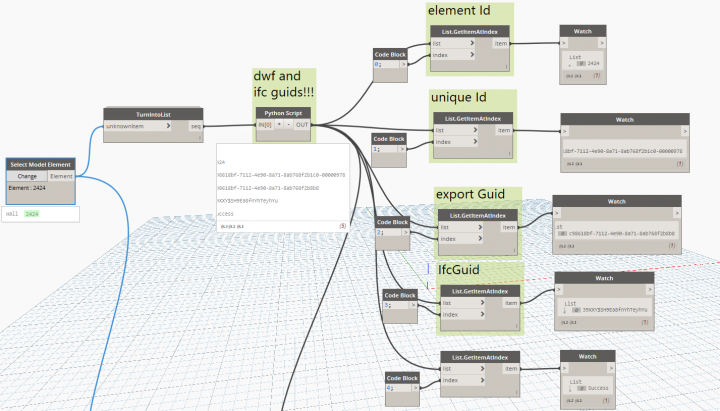
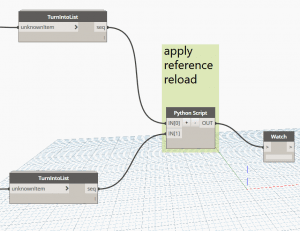
From here, I create a Dynamo node that eats Revit elements and gives us back these Id values:
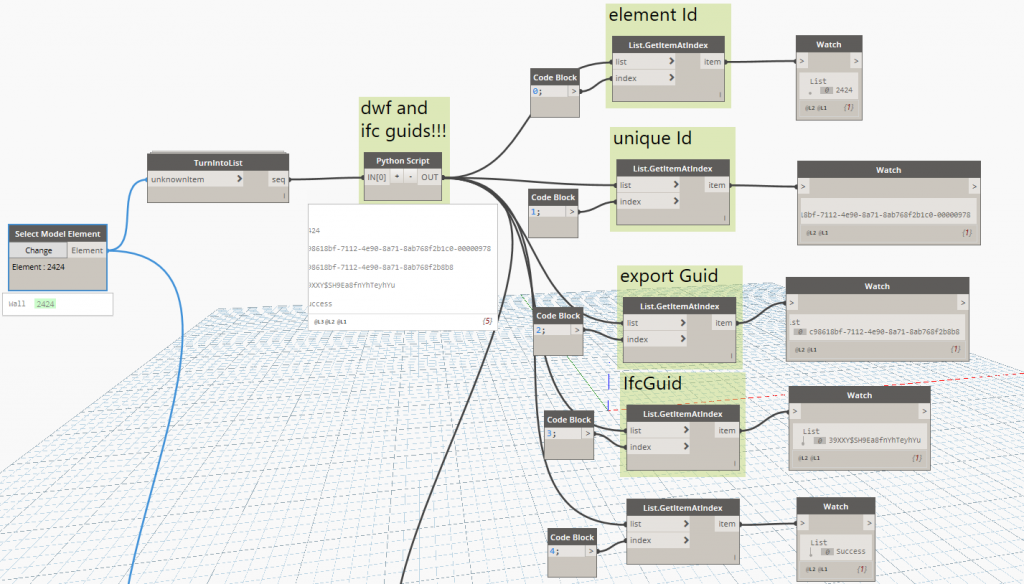
before node created


After “All The Ids” node created


This node will be published in the Bakery package on the package manager, and to Github.


Further, our VirtualBuiltApp platform has been developed to store and query multiple Ids for a single element.


Example output from the Dynamo / Python (initial test showed the Dwf Guid is still a .NET object, that probably should get converted to a string for consistency).

[2424]
['c98618bf-7112-4e90-8a71-8ab768f2b1c0-00000978']
[<System.Guid object at 0x0000000000000071 [c98618bf-7112-4e90-8a71-8ab768f2b8b8]>]
['39XXY$SH9Ea8fnYhTeyhYu']


I added str() to the Python:


Final test showing the 4 different Id values for a single object:

2424
'c98618bf-7112-4e90-8a71-8ab768f2b1c0-00000978'
'c98618bf-7112-4e90-8a71-8ab768f2b8b8'
'39XXY$SH9Ea8fnYhTeyhYu'


Further reading:

I’m sure you are aware that intellectually Revit shared coordinates take minutes to explain, but emotionally they take years to master 🙂

I’ve been looking for a way to check and validate coordinates using the Revit API. One method I implemented in VirtualBuiltApp is to gather Grid Intersection coordinates and compare those, but obviously you need a federated model with links to achieve that comparison.

One interesting fact to note is this:

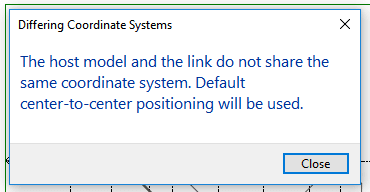
  • two Revit models can Report functionally identical shared coordinates (same translation and true north rotation), and you can still receive “The host model and the link do not share the same coordinate system. Default center-to-center positioning will be used”. hashtag sadface, hashtag why-revit-why

If we put this another way:

  • if two models don’t have some related history (created from the same file), or
  • if Acquire or Publish Coordinates has not occurred between those models, then
  • the Shared Coordinate error will appear — even if they report identical Spot Coordinates and True North Rotation

If you are wondering what the Revit API actually does support in terms of Shared Coordinate setup and validation, here is the best bit of Revit API Shared Coordinates information I can share:

A GUID-based relationship is set up between the files. Setting up the same relationship has been possible via the API via Document.AcquireCoordinates() for a few releases.

With 2018’s SiteLocation.IsCompatibleWith() it is also possible to identify if two coordinate systems are the same.

This is part of a long thread between Dale Bartlett, Jeremy Tammik, and the Revit development team.

Also, keep in mind that BIM 360 Design (Revit Cloud Worksharing) does not support Publish Coordinates. Only Acquire Coordinates can be used in that environment.

I previously posted about how to quickly repath links based on some control mechanisms. Enter BIM 360, and the wild world of Revit cloud worksharing… I expect that it will be commonplace now for existing projects and datasets to move across to BIM360 ‘mid project’. But that creates some interesting problems, like creating folders, dealing with the initiation process, and replacing local Revit Links with their cloud versions.

This post is focused on that process of changing all of the Revit link paths to link to the BIM 360 models. Unfortunately, the previous method I used (TransmissionData, like eTransmit) is not available for cloud hosted models. So how do we automate this process?

We went about it this way:

  1. Initiate all Revit models on the BIM 360 Document Management cloud (manually, for now)
  2. Create one federated model on the BIM 360 cloud that links in all the other cloud hosted Revit models. You might do this one manually, using Reload From in the Manage Links dialog box.
  3. Once you have that one ‘super host model’, use a batch process to harvest all of the cloud model data
  4. Using the harvested data, create a script that implements a Reload From method to batch reload local models from their cloud counterpart

On the journey to solving step 3, I experimented with a few different methods. I discovered that you need to use the ExternalResource class to get information about BIM 360 cloud models (not ExternalReference).

I also realised that I had to deal with Reference Information, which appears to be a .NET dictionary per link that stores some funky Forge IDs and so on. But I want to store all this data in our VirtualBuiltApp BIM Management system, so I had to serialise the Reference Information to a string that could be stored in a database VARCHAR field (or push to Excel if you are still doing things the old way). Dimitar Venkov gave me a few tips about using JSON with IronPython in Dynamo (thanks mate!), so after that all the harvesting pieces were in place!

Here is some of the harvesting and JSON code. Notice that I played around with using a container class to pass data between Dynamo nodes. In the end, JSON string was the answer:

 data = []
for u in unwraps:
    data.append(u.GetExternalResourceReference(linkresource))

class dummy(object):
    def ToString(self):
        return 'container'
container = dummy()

sdicts = []

for y in data:
    dictinfo = ExternalResourceReference.GetReferenceInformation(y)
    container.dictinfo = dictinfo
    infos.append(container)
    shortnames.append(ExternalResourceReference.GetResourceShortDisplayName(y))
    versionstatus.append(ExternalResourceReference.GetResourceVersionStatus(y))
    insessionpaths.append(y.InSessionPath)
    serverids.append(y.ServerId)
    versions.append(y.Version)
    sdicts.append(json.dumps(dict(dictinfo)))

The next step was to create the ‘batch reload from’ tool. Now that we had the necessary data, we just had to use it to grab the matching cloud path information (from our database) and apply it to each Revit link.

I created a node that essentially built a new reference path from the JSON and other data that we had harvested. Here is some of that code:

 des = []
for x in referencesInfo:
    des.append(json.loads((x)))
newdicts = []
for y in des:
    newdicts.append(Dictionary[str, str](y))

serverGuids = []
for g in serverIdsIn:
    tempguid = Guid(g)
    serverGuids.append(tempguid)

newrefs = []
for z in range(len(referencesInfo)):
    serverIdIn = serverGuids[z]
    referenceInfo = newdicts[z]
    versionInfo = versionsInfo[z]
    sessionPathIn = sessionsPathIn[z]
    tempRef = ExternalResourceReference(serverIdIn, referenceInfo, versionInfo, sessionPathIn)
    newrefs.append(tempRef)

OUT = newrefs

The final step was to get a RevitLinkType and a matching ReferenceInformation and apply them to each other. I stored the data in our cloud based BIM Management Application, VirtualBuiltApp. Then I could easily just pull the data into Dynamo with a suitable database connector, and match up the RevitLinkType in the current file with its associated cloud identity. For that genuine 90s feel, you could use Excel to store the data as it is just a JSON string and some other strings:

Here is the key bit of code that actually changes the link path (without all of my other error checking bits and pieces):

     try:
        newCloudPath = newCloudPaths[l]
        reloaded = fileToChange.LoadFrom(newCloudPath, defaultconfig)
        successlist.append(reloaded.LoadResult)
        TransactionManager.Instance.ForceCloseTransaction()
    except:
        successlist.append("Failure, not top level link or workset closed")

To actually implement the script and get productive, I opened 4 instances of Revit, and then used this process in each instance:

  1. Open the Revit file from BIM 360, with Specify… all worksets closed
  2. Unload all links
  3. Open all worksets
  4. Run the Reloader Script
  5. Confirm link status in Manage Links
  6. Optional: Add ‘bim 360 links loaded’ text to Start View (just for tracking purposes)
  7. Optional: Add comment to VirtualBuiltApp (optional, for tracking purposes)
  8. Close and Sync

In this way I can have 4 or more sessions operating concurrently, fixing all the link paths automatically, and I just need to gently monitor the process.

One nice thing is that I set the script up to immediately Unload a link after it had obtained and applied the new Path information. This means that the Revit instance does not get bogged down with many gigs of link data in memory, and in fact this is way faster than trying to use Manage Links for a similar process.

Ideally I would like to fully automate this, to the point where it opens each file, runs the script, and syncs. Unfortunately, time didn’t allow me to get all the code together for that (for now).

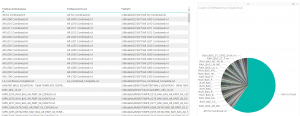
Finally, because we are using our custom built schema and validation tools, we can easily create visuals like this:

Modified versions of the Dynamo graphs can be found on the Bakery Github here:

dyn folder

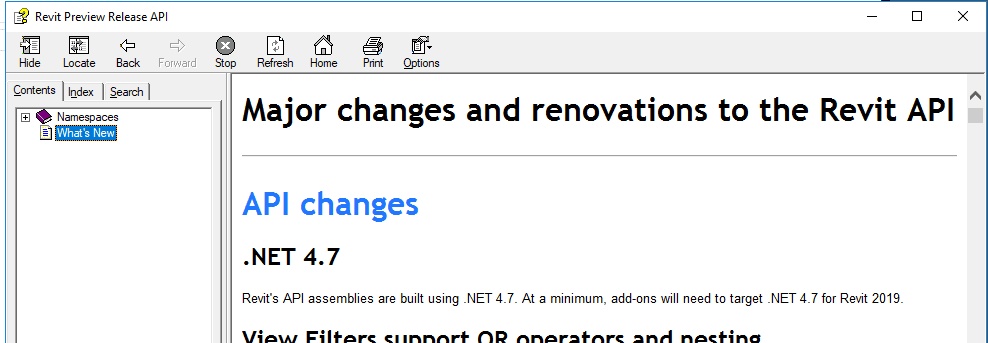
After a new version of Revit comes out, we all take some time to catch up. Revit API developers often have to get up and running really quickly so they can upgrade their apps for Revit 2019 compatibility. The first few things you will need are: the Revit 2019 SDK and help file, RevitLookup installed, and an understanding of What’s New in the Revit 2019 API.

To install RevitLookup for Revit 2019, head over to this page and grab the latest version, currently 2019.0.0.1. Put RevitLookup.addin and RevitLookup.dll into one of your Revit Addins folders, like:

%appdata%\Roaming\Autodesk\Revit\Addins\2019\

To install the Revit SDK, follow these steps:

  • Install Revit 2019 (or access the install media)
  • Look in the installation folder
  • In the Utilities subfolder, you will find the Revit 2019 SDK installer – RevitSDK.exe

This will basically unzip a whole heap of Revit API samples and goodness into a folder of your choosing. The key thing I look for initially is the RevitAPI.chm help file. I put this somewhere I can get to it easily (like OneDrive).

Until http://www.revitapidocs.com/ is updated for Revit 2019, the help files is the best way to access information about the Revit 2019 API.


Useful links, mostly from Jeremy over at The Builder Coder:

My Revit API 2019 Notes:

  • Building site export removed from API and Revit 2019
  • Project browser organisation for schedules added
  • Can now read the Phase Map parameter for the link. The phase map is a correspondence between phases in the host document and phases in the linked document…