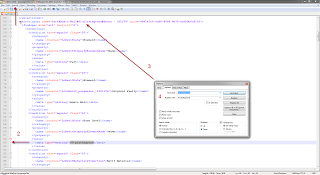
Daniel Gijsbers uses Notepad++ to do some quick editing and creation of similar Navisworks search sets:

“Let’s create a couple of searchsets that will find the same parts but on different levels.”
He notes that you should import-export-import to make sure GUIDs are not duplicated.
Read the whole post:
Navisworks searchset creation
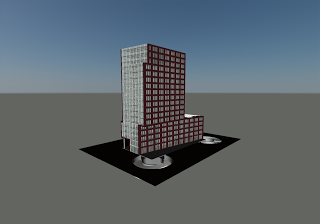
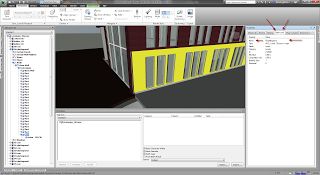
First let’s take this model:
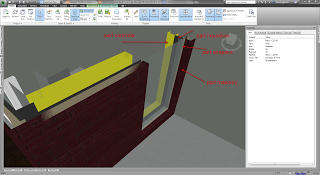
The exterior walls this model are compound walls and have been split up in parts. In the picture below I have zoomed in on a window.
We want a planning where the different parts appear at different times. Basically we want the concrete first, insulation next and masory last.
First let’s make one searchset that finds all concrete parts from the compound wall
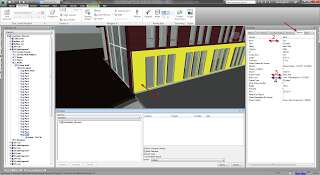
Select an element which you would like to find with a searchset and take a look at the properties. Take a look at the selection tree and see where you have something selected. Make sure it’s not geometry when you are working with revit files. There are much more interesting properties when you set the selection resolution to first or last object.
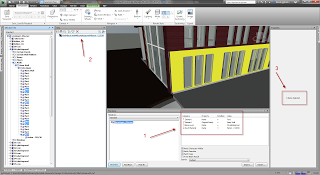
I tend to find most interesting properties on the element tab of the property window. For this purpose the property by arrow 2 and 3 are good. I have put a blue arrow #4 at the property for base level. I recommend not using this one because an other one is much more usefull. I do need a property that has a value for base level just not this one. The ID number of the level screws up the searchsets. Instead go to the property tab: Base level. This tab also has a property called name but this value does not have the ID number of the level in it’s name. Later you’ll see why that’s better.
At arrow one you see the searchset definition: I have created 4 criteria (technically you could probably do without criteria number 1)
- At arrow two I give the searchset a name. I tend to use the values of the criteria seperated by a # for the name. This should give you a rough idea of what the searchset is for.
Now we have our first searchset. Ofcourse you could use the interface, switch some properties of the previous searchset and save the new search. This gets tedious quiet quickly…
On the sets window there is an export searchsets to xml button.
Next go to http://notepad-plus-plus.org/download/
If you don’t have install rights on your machine than you can also put this on a usb drive and run it from there. You’ll have to look around a bit on how to do that but it’s fairly simple.
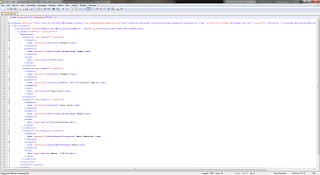
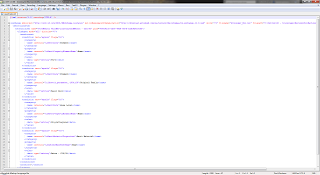
Let’s take a look at the xml code:
Most likely you will be most interested in all the things that are coloured black!
Also click on the words between < > they will highlight
Notice the line numbers on the left:
line 1 to 3 ignore those. leave them in.
Line 4 is important. Notice the word selectionsetS
Selectionsets can contain multiple selectionset (no S)
Line 5 the selectionset stores it’s name from Navisworks here. This line is important
Line 6 Defines where to search in which models in Navisworks
- Put your cursor behind and press enter.
- Put your cursors at the first position on line 56
- Start dragging a selection from line 56 to line 5
- ctrl c
- Put your cursor at the first position on line 56
- ctrl v as many times as you need
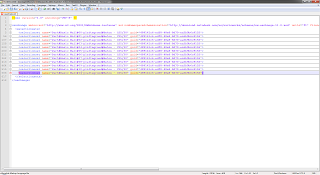
- Go to notepath++ menu view collapse level 4 or 3 ( I want the selection sets to look like this image below
- go to view
- search and replace
- put your cursor somewhere in the second searchset. (that’s between line 56 and 89)
- let it search for the value you want to replace
- click on replace
- save as: Part#Basic Wall#plattegrond#Beton – C25/30
- save as: Part#Basic Wall#plattegrond#Isolatie
- Find and Replace the material names. You should be able to use replace all
- Save the file again
- Go to Navisworks
- Delete the existing searchset
- Import the searchsets, one at the time… (same button)
- Create a folder structure of you liking. I tend to use Revit categories as folder names
- Put the searchsets in
- Export the searchsets again
- delete all searchsets
- Import the file you just exported, WHY?
