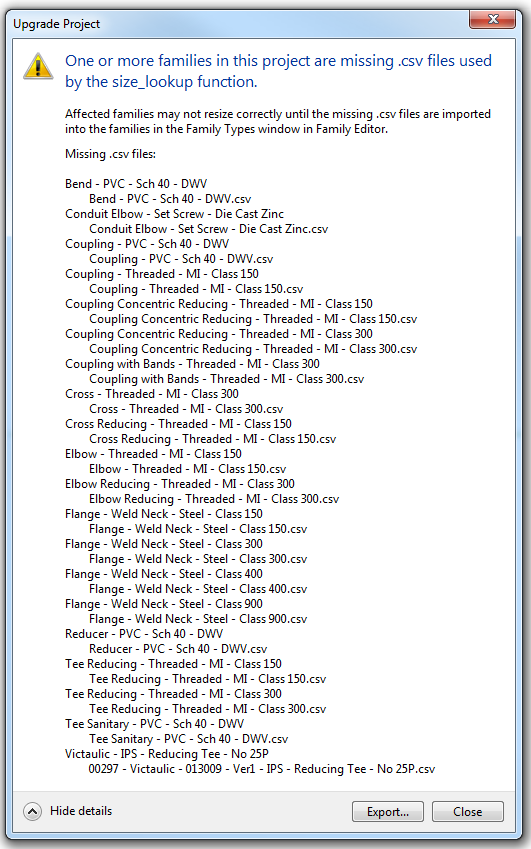
So, you have received a RTE or RVT file (along with related CSV lookup tables) and want to upgrade it without getting the “One or more families in this project are missing .csv files” error…
For example, you may download a Piping Template (like this one from AUGI), and it comes with CSV files but you don’t know where to put them? Or you have received some other MEP template file from the wild, and you would like to upgrade and use it?
The thing with MEP content is that some of it is based on, or related to, Lookup Tables. These are text (CSV) files that contain type data, essentially making it easy to create and manage types without having to always use the Family Editor to do so. However, if these are missing, you will get an error message when you attempt to open or upgrade a project that needs them:
To fix this, you need to copy the required CSV files into the Pipe and Conduit subfolders of the Lookup Tables folder that matches the version of Revit that you are upgrading TO.
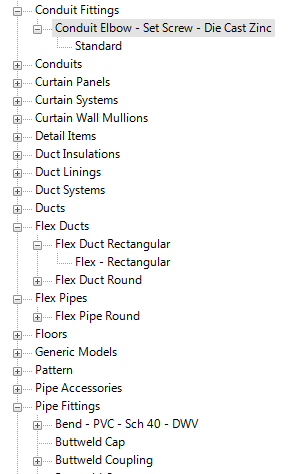
The key Project Browser tree entries are Conduit Fittings and Pipe Fittings:
If you have a Suite installed, you may find that these CSV files are duplicated in various locations, to provide support files for 3dsMax and Navisworks. Some of these paths are shown here:
You can browse to the above paths, and start to put together a “consolidated” or “combined” CSV Lookup Table folder, that you may want to maintain in a network location. Once you have collected all of the necessary CSVs, here is how you “install” them:
- Determine location to put the CSV files into (usually it will be near your Family Templates folder, a few example paths are provided below)
- Create a master folder of all required CSV files (you could maintain a consolidated folder in a network location)
- Copy these CSV files to the Pipe and Conduit folder locations (you shouldn’t need to restart Revit).
- Open the MEP RVT or template file that you wish to upgrade
- Any CSV files that are still missing are the ones you need to find, and put in the Pipe and Conduit subfolders as per steps 1-3.
You could script some of the above steps to aid in deployment.
Revit 2014 Lookup Tables default location:
C:ProgramDataAutodeskRVT 2014Lookup TablesPipe
C:ProgramDataAutodeskRVT 2014Lookup TablesConduit
Revit 2015 Lookup Tables default location:
C:ProgramDataAutodeskRVT 2015Lookup TablesPipe
C:ProgramDataAutodeskRVT 2015Lookup TablesConduit
NOTE: Massive amounts of CSV lookup tables in the default directory may result in slow Revit performance, particularly when starting Revit.
If you want to import Lookup Tables directly into families (and you are perhaps experiencing errors with nested families), this PDF may be of interest.
Finally, you can actually modify Lookup Table location using the revit.ini file, as described here. You could therefore point your Revit installations to a network location containing all of the required CSV files for your firm.
You can download content from Seek and other places online. Sometimes you will find a CSV file, sometimes you may have to export one as per the video below:
There is some related info at:
http://revitoped.blogspot.com.au/2008/10/revit-mep-lookup-tables.html
Feel free to comment if you have any other tips related to Lookup Tables…


