Autodesk have published an add-in for Revit 2013 that automates the upgrading of RFA, template and RVT files.Go here.

File Upgrader will batch upgrade previous versions of Revit files to the Revit 2013 format. The tool is intended to help upgrade family contents, template files as well as project files. Every time users open a Revit file which was saved in a previous version of Revit, a standard dialog is displayed in the Revit user interface stating that the file is being upgraded. During the display of this dialog, Revit tries to upgrade the document to the current version. This slows down the process of opening a file. To save time opening older file versions during each of the subsequent attempts to open the file, users can manually open each of the Revit files and save it to the current version. This can be time consuming if there is a large set of files to upgrade across various folders and sub-folders. The File Upgrader tool saves time and manual labor by automating this process. This plug-in was first published as an ADN Plugin of the Month: http://labs.autodesk.com/utilities/ADN_plugins. The plug-in has been provided with the complete source code needed to build the application, with the intention of encouraging users of Autodesk software to use programming to tailor the products they use to their specific business needs.

via
Autodesk File Upgrader on Exchange

Let us know if this tool does the job for you…

*Note – this is version 1.0 of the application…

Additional info from the documentation provided below:

Usage
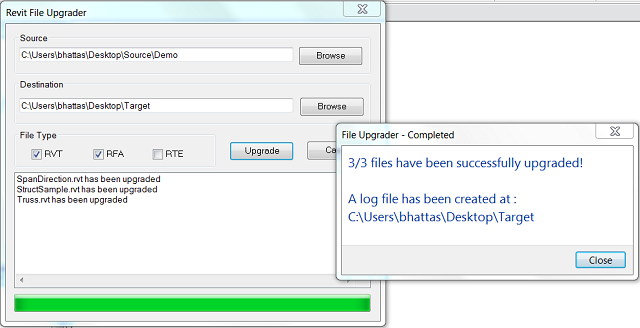
Inside your Revit-based application, go to “Add-ins” tab ⇒ “Upgrader” panel ⇒ “File Upgrader” to start the command. Clicking this button starts the command and launches the “Revit File Upgrader” dialog.

Under the “Source” text box, specify the location of the folder where previous versions of Revit files resides. Similarly, in the “Destination” box, specify the folder where the upgraded filers will be saved.

Check the file types you would like to upgrade; you can upgrade .rvt, .rfa, and .rte files. By default, .rvt and .rfa are checked.

Press the “Upgrade” button to start the upgrade.

Once upgrade starts, Revit will open a file one by one, and save in the destination folder. The progress can be monitored in the list box at the lower part of the dialog.

After the upgrade process is completed, a dialog box is displayed with the total count of succeeded files over total number of files confirming the completion of upgrade. The status messages are also save as a log file, UpgraderLog.txt, in the destination folder.

For some reason, if the files fail the automatic upgrade process, the users can check the log file, and manually open the files and save them to the current version after resolving the conflicts/errors using the Revit user interface.

The tool handles nested folders. It also handles catalog files (.txt files) if it exists, copying them to the destination folder.

While using this tool, please ensure that the target folder is not nested inside the source folder.

Known Issues
This plug-in only works when there is an active document in Revit.

After running the plug-in, the last document remains open in the Revit’s User Interface. The file is saved, but the user will have to manually close it.

These are due to the current limitation of API. We hope to address it in future.
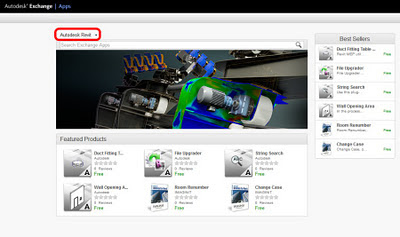
Go to http://apps.exchange.autodesk.com/ and click Autodesk Revit on the drop-down list.  A number of free add-ins are already available.

Autodesk Exchange has been active for AutoCAD for a while now, but it looks like this will become a somewhat ‘official’ delivery method for add-ins in the future (think Autodesk Seek for add-ins…)

Direct link:

Autodesk Exchange for Revit

We run a Small Business Server box and it primarily provides our email via Exchange Server 2003.

Recently, our ISP indicated that our server was relaying or forwarding spam messages. I have tried a number of different things to correct this, and I would like to share a few of the steps of I have taken.

  1. Ensure that Exchange SMTP is not acting as an open relay. You can run a test at http://www.spamhelp.org/shopenrelay/
  2. Use SMTP Authentication (if you are forwarding mail through an SMTP smart host).
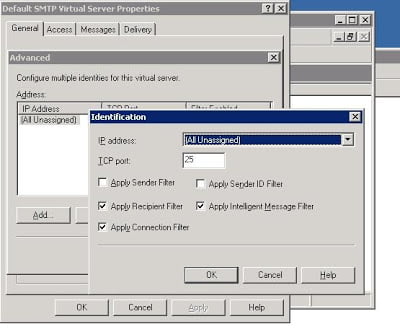
  3. Enable Recipient Filtering on the SMTP Virtual Server. Link here. KB Article here.
  4. Enable SMTP Tarpit Time. Link here.
  5. Enable Connection Filtering on the SMTP Virtual Server. You might use something like the Spamhaus ZEN list to start with.
  6. Enable Message Logging (so that you can get an idea of where spam is coming from).
  7. Disable Non Delivery Reports (NDRs). How to here.
  8. Don’t allow anonymous access to your Default SMTP Server.
  9. Run trojan/virus scans on your server and on your Client PCs (including remote Clients).
  10. Install and run the Exchange Best Practices Analyzer.


On a slightly unrelated note, some nefarious characters kept trying to login to our server via Remote Desktop. I have defended against these attacks by using a program called 2x SecureRDP. This ‘filters’ incoming RDP connections and stops repetitive RDP attacks before they occure.

I hope some of this information has been useful to you.