When it comes to Revit visualization during early design phases, in the past you had to pick from one of these options to add Entourage to your presentation:
- Use some placeholder geometric family,
- Use RPC and re-Render the view everytime you want an output, or
- Export or Render a view as an image file and then open it in Photoshop to add extra Entourage.
But now, there is another way…
This new way allows you to leverage your current RPC library and modify the visual style or “look” of the Entourage families. In turn, this makes the use of your current RPC content much more flexible, and more applicable to the constantly changing, day-to-day design iterations (and visualizations) that Architects and Designers are required to produce.
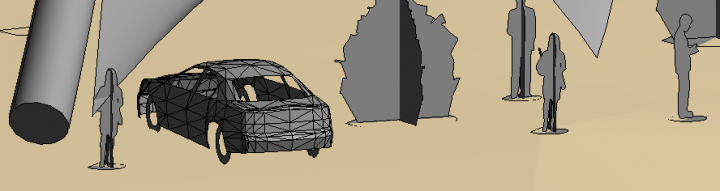
In other words, we can take something that looks a bit like this:

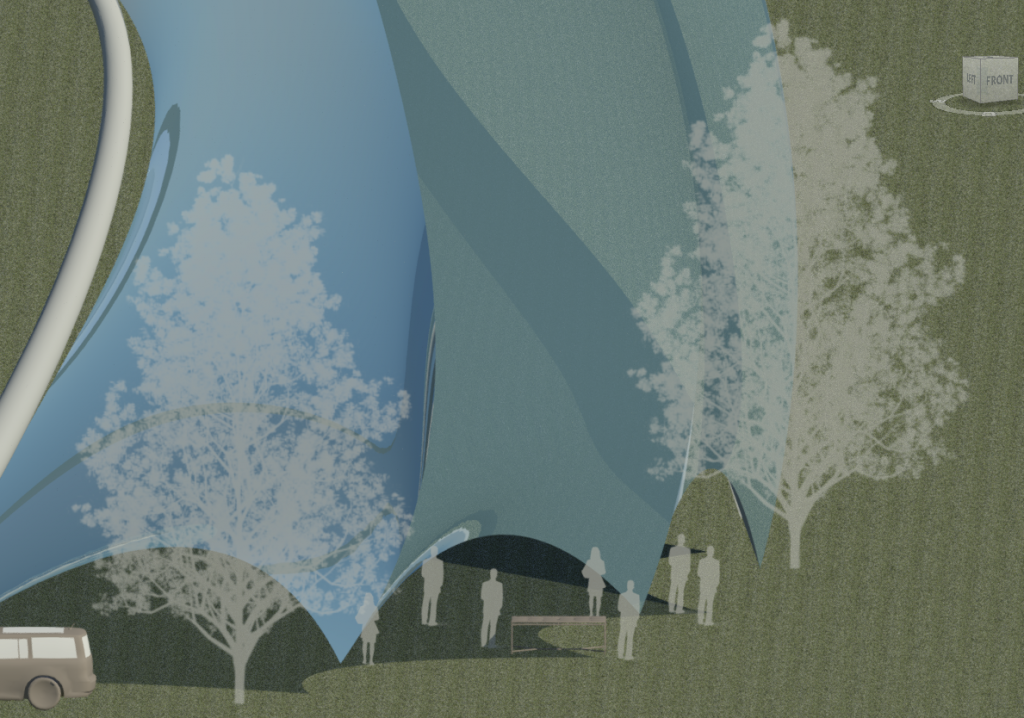
And make it into something a bit more like this (Stylized Textures mode):
Archvision are the guys behind RPC technology – that’s the tech that allows you to add photorealistic people, trees and entourage to your Revit renderings. Recently, they released a new addin for Revit called Entourage Workshop (I previously posted about this back in November 2014). It is built to work with content downloaded using Archvision Dashboard, which is a paid offering that can manage, search, download, create and load photo realistic families into your Revit model.
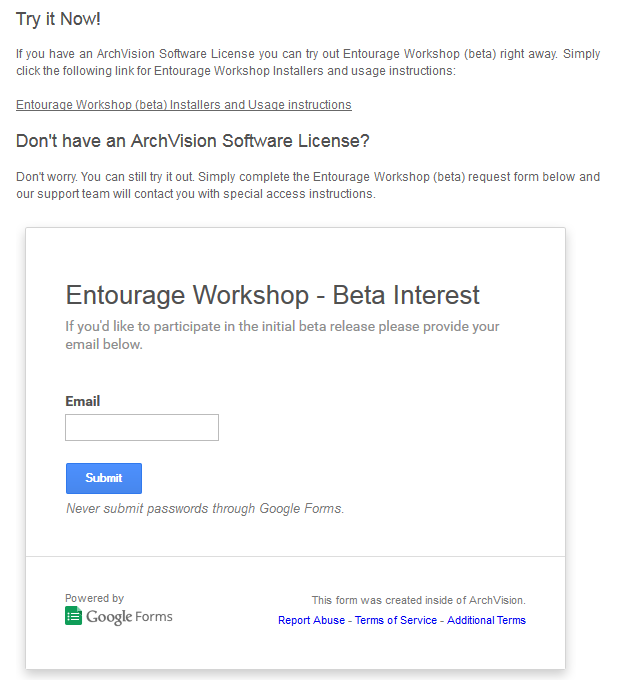
I recently had a web meeting with Archvision CEO Randall Stevens, and we agreed to make you all aware of a special opportunity related to Entourage Workshop. Basically, Archvision is willing to give you access to their very powerful Dashboard, along with Beta access to the Entourage Workshop. All you need to do is go to this page, scroll down to Don’t have an ArchVision Software License? and enter your email address. The guys over at ArchVision will then issue you a temporary license of Dashboard to use while you try out Entourage Workshop.
Now here is something to keep in mind… the more you use the Dashboard and beta Entourage Workshop features, the more likely it is that you will be able to retain your ‘free’ access for a longer period. If you don’t use your license, you may lose it 🙂
How to apply styles to your Entourage in Revit:
- Install Archvision Dashboard and Entourage Workshop
- Open a project
- Place some RPC using Archvision Dashboard
- Start the Entourage Workshop addin from the Archvision ribbon
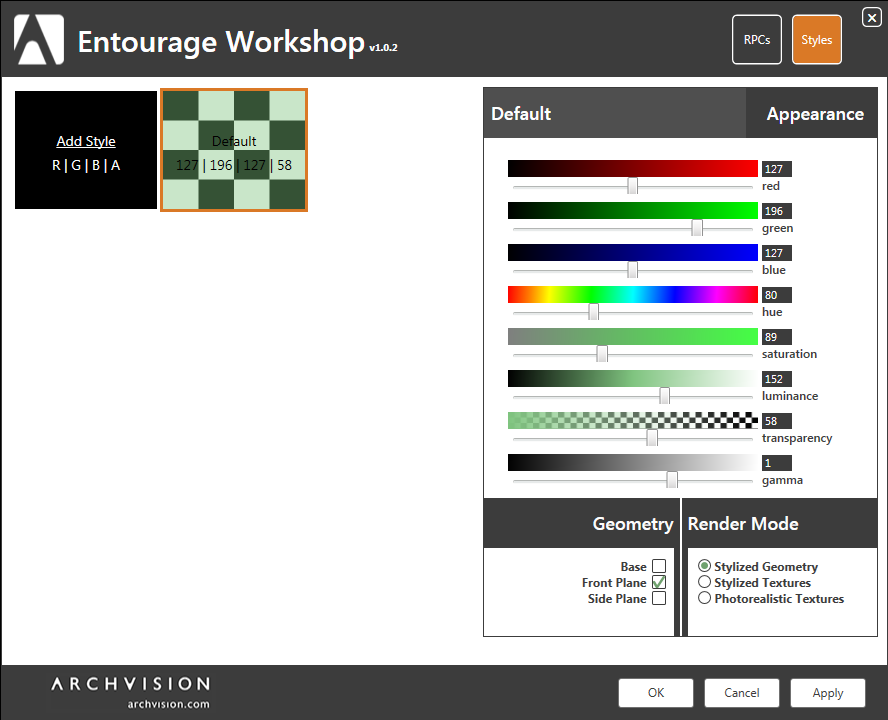
- Click the Styles button at top and add a new style
- After you add style, click in the Name area at the top of the color sliders and give it a descriptive name, then click Apply
- Click on the RPCs button at top and apply that style to selected Entourage families in your current project
- Switch to a Revit view and change to an appropriate display mode (Shaded, Consistent Colors, Realistic etc)
Short list of tips, tricks and features:
- you can now have non-rendered but still “stylistic” presentation views using RPC Entourage (Shaded Mode, Consistent Colors etc)
- it won’t work without a Archvision Dashboard license
- “Gamma” slider gives a level of brightness control directly over Entourage RPC that was not available before
- Geometry tick boxes – you can easily turn off base and one side view of the ‘placeholder’ representation
- In the UI you need Apply after making the Style, then apply to items after pressing the RPCs button
- Silhouette textures will face the Camera. This is when you take a rendered photo representation and override it with Transparency, effectively ‘ghosting’ it
- If you want to create Style definitions and pass your Styles.xml file to someone else you can do that too. The Styles.xml file should reside in your local profile AppDataRoamingArchVisionEntourage Workshop directory. The easy way to get there is to type %appdata% in your Windows Explorer and it will jump to the roaming directory where you can then browse to ArchVision and then Entourage Workshop.
- If you do use a silhouette style, you can trial various Line colours for the Entourage by Overriding the Projection lines by category or element
- If the Photorealistic Textures radio button is used, then only Transparency and Gamma modifiers will apply
- Some current limitations:
– the ‘placeholder’ geometry does not automatically face the camera (although the rendered representation does, and you can still manually rotate the family to get it facing the direction you like
– only works on Entourage that is RPC based (not geometric)
– does not work with Autodesk Cloud Rendering (yet)
– currently it only modifies Entourage Category representations
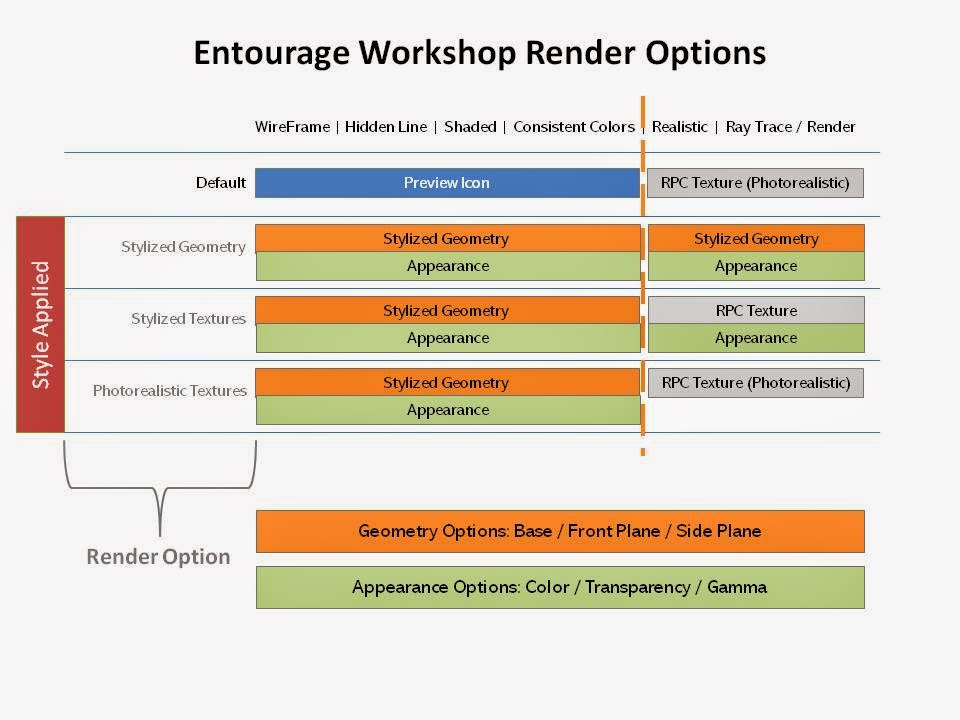
Here is a matrix that describes how the various Revit display modes are affected by the Render Mode options in the Style definition:
Here is a demo video:
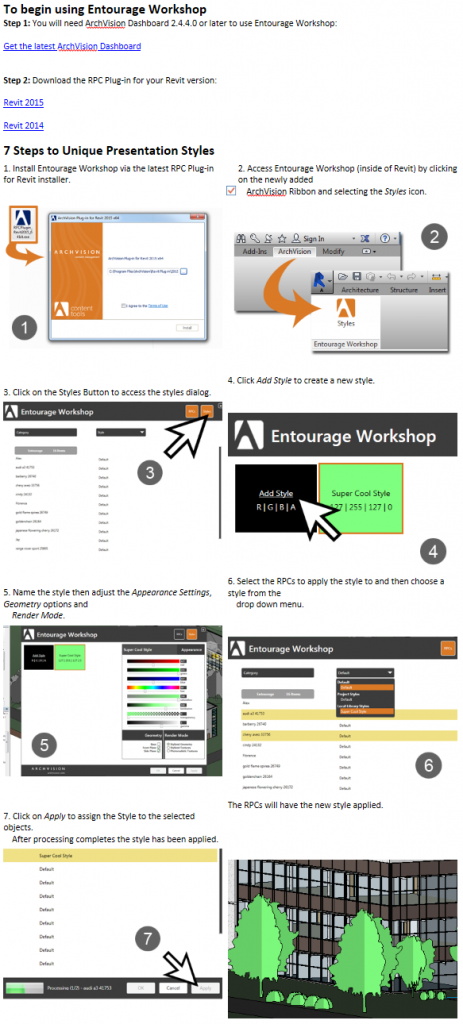
And here is a step-by-step from Archvision to use as a guide to get you started:
")


