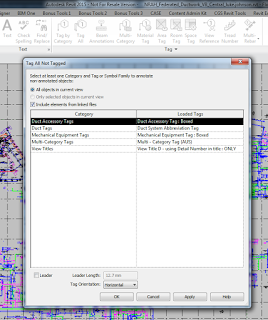
Let’s say you want to tag Duct Accessories in a linked Revit model. That’s easy, because Revit can Tag All… Linked Elements by Category. Just tick the box in the dialog below:

But what if you only want to Tag certain Duct Accessories, like those that actually have a value in a given parameter? What we need to do is limit the view to only showing what you want to tag, and then run the Tag All Not Tagged command as above.
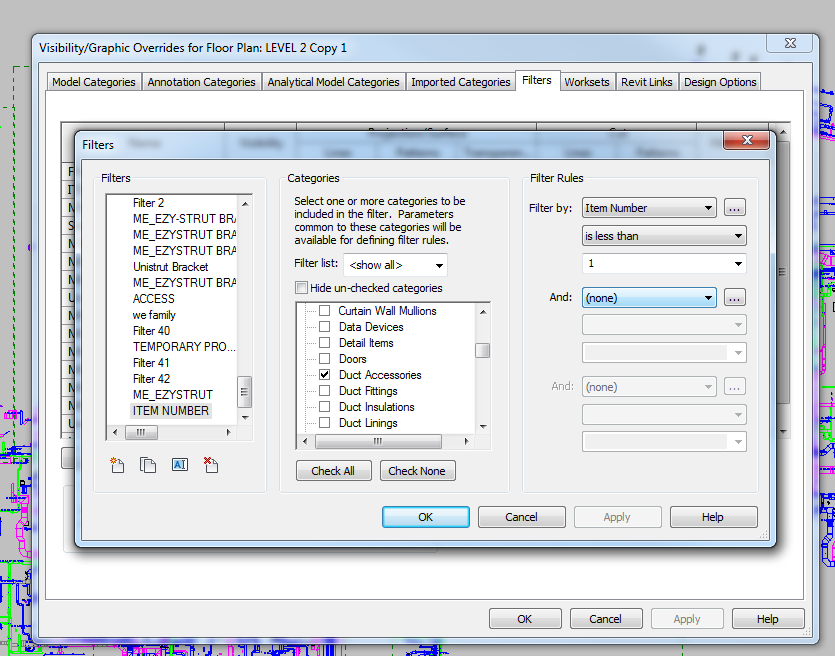
Here’s how:

  1. Duplicate the view you are working in
  2. Hide all unnecessary Links
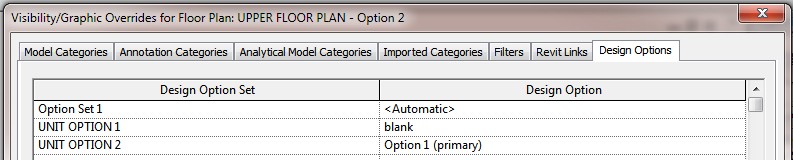
  3. Use View Filters to hide the elements you don’t need, by using the parameter you actually want, something like this:
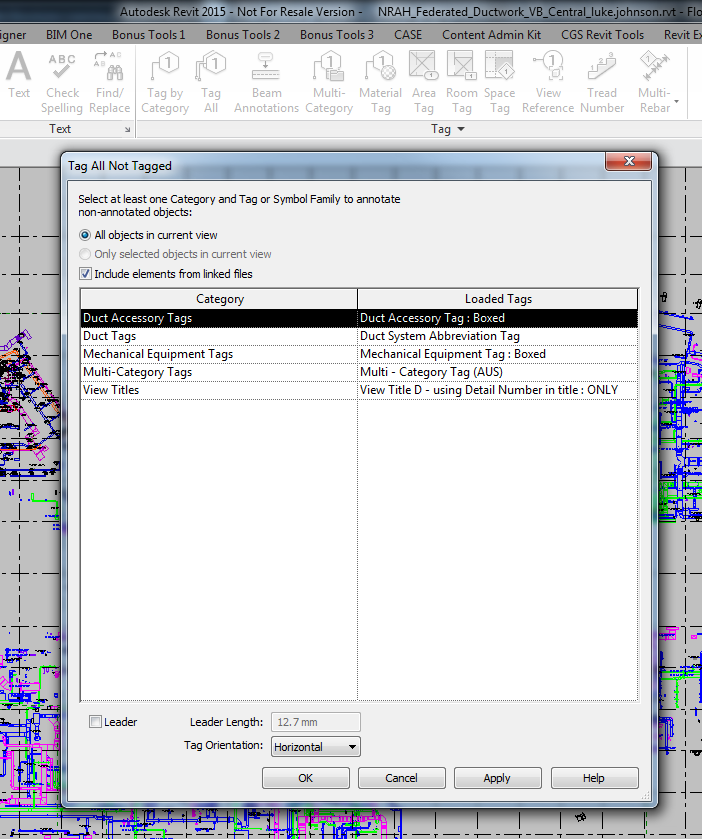
  4. After you have hidden off these elements, run the Tag All command in this view
  5. Select all of those new tags (right-click on one of them, Select All Instances – Visible in View)
  6. Copy
  7. Switch back to the original view and Paste Aligned to Current View

So What does Revit Want? For you to think about how it works, and then use it accordingly. In this case, we realised “hey, Revit tags only what it sees…” Then, we can develop the workflow above to solve the problem.

    Aaron Maller is one of the top Revit guys in the world.  In a recent blog post, he provides some handouts for download – this is basically stuff about Links and Groups for the Advanced user – very interesting!

    So here they are!
    Sample Data Sets

    Class Handout

    via
    Malleristic Revitation: Class Materials- Autodesk TA event- Dallas

    Here is the problem – I have two linked files, set as separate options in the same Option Set. If any of the Room elements overlap in the two linked files when placed in the host file, and I have the view set to a Secondary option, the Room Tag fails:
    None of the created elements are visible in Floor Plan: UPPER FLOOR PLAN – Option 2 View. You may want to check the active view, its Parameters, and Visibility settings, as well as any Plan Regions and their settings.

    If I move the link in the secondary option AWAY (geographically) from the link in the primary option, the Room Tags work fine.

    The workaround that I am currently using is this:

    1. Place the two link files in different Option SETS.  In this way, both the Revit links can be a ‘primary option’.
    2. Make a ‘blank’ option in each of the Option Sets.
    3. In a plan view, set the Visibility / Graphics such that the link you want to see is selected, and in the other Option Set ‘blank’ is selected.
    4. You should now be able to tag these Room elements through to both of the links in the different Option Sets. 

      EDIT:
      If the above doesn’t work for you, do this:

      1. In a plan view, move the link you want to tag ‘away’ from the other link a known amount.
      2. Tag the Rooms in the link in the new location, then
      3. Move the link back into the correct place.  Revit will prompt to move the Room Tags for you…