There is plenty of information available about Component Stairs in Revit 2013.  I thought I would collect some of the better resources and post them here.

This first link is a little bit outside-the-square, but it relates to teaching a class of people who don’t know how Revit 2013 stairs work.  Check it out:
Teaching the new Stair Assemblies in Autodesk Revit Architecture 2013 – ASCENT Blog

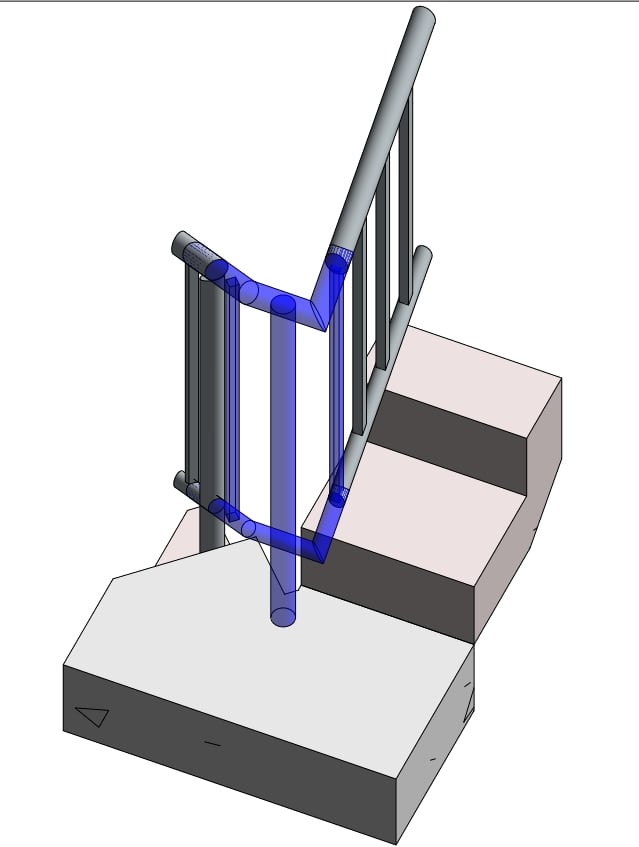
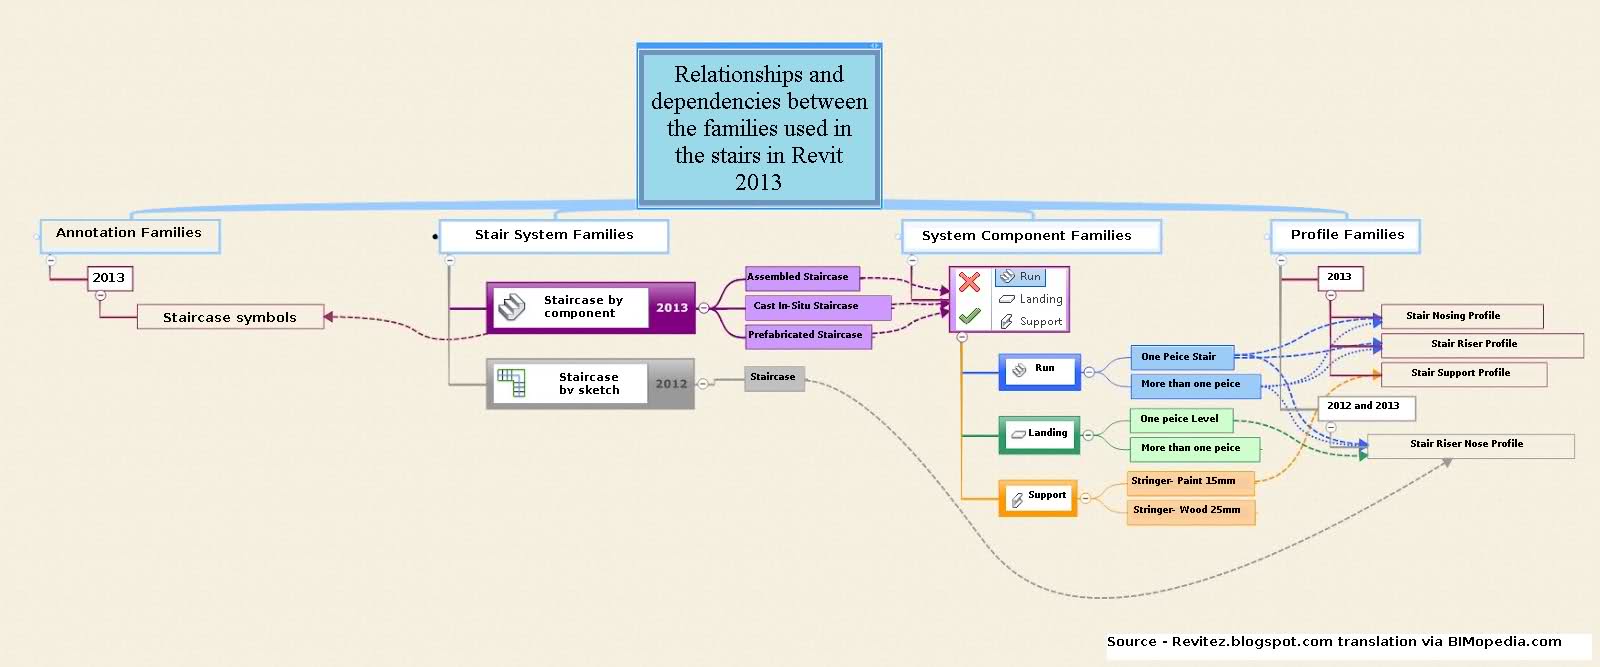
How do all the 2013 Stair families relate to each other?
Graphic Flowchart – new Stair Families in Revit 2013

How do the stair paths work?
Stair Path Annotations in Revit 2013

Now, some videos:


 via
Autodesk Revit Architecture 2013 — Component-based Stairs – YouTube

MasterGraphicsInc:

Case Inc:

Microdesk:

Index to AutodeskBuilding videos:
REVIT Structure Learning Curve: Revit 2013 Stair Video Tutorials

2013 Stairs and Railings – WikiHelp VIDEO INDEX

If you still can’t make a stair that you like, make one in-place 😉
In-place and Component families of Stair and Railing Category

Here is a little gift to all my readers.  The link below allows you to download a 2012 version RVT project that contains In-place and Component versions of families that are of the Category ‘Stairs’ and ‘Railings’.
Download link

Revit does not allow this to happen out-of-the-box, so you can be sure that this hack is not best practice, and it won’t be supported by Autodesk.  Use at your own risk!

Having said that, if you know what you are doing, these families could be quite useful to you.

Revit Family Stair Category

RFA Railing Category

Stairs and railings in Revit can be extremely frustrating.
In fact, I’m often annoyed that I can’t even model a Railing in-place, as the Railing category isn’t available for in-place families!
So, how do you make an unusual ‘custom’ railing connection work?
In 10 steps:
  1. Create a 3D view with section box around the connection you would like to resolve
  2. Export this 3D view to a DWG file.
  3. Create a new Generic Model family.
  4. Import the 3D DWG.
  5. Using the context you have now imported, model the rest of the baluster / railing connection.  I recommend that you use Reference Lines and then create Sweeps using ‘Pick Lines’.
  6. After you have modeled the custom 3D geometry in the Generic Model family, create a Baluster Post family.
  7. Load the Generic Model family into the Baluster Post family.
  8. Load the Baluster Post family into the Project.
  9. Apply your new custom Baluster Post to the Start / Corner / End post of the Railing you are trying to correct.
  10. In the Baluster Post family, rotate and move the Generic Model family around until it is in the right place and reload into the Project.
For a sample project showing one of these connections, open the following file:
For a sample Baluster Post family, download the following file:
I found this ‘section box’ technique in the book Mastering Revit Architecture 2011.