Models change rapidly at various stages of the project, and it can be useful to review model status between different revisions of the models.  What changed? Why?

There are a number of Model Compare tools out there, Navisworks has one built-in and there are addins for Revit. But what if you just want a quick visual check?

Here is one method using Revizto…

Using Two Instances of Revizto and the Issue Tracker to Compare Models

  1. Open two instances of Revizto and put them side by side on your screen (large monitor will help)
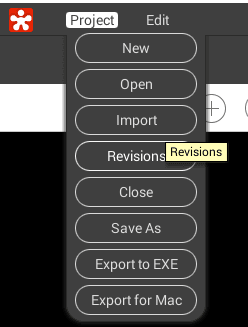
  2. On one of the instances, go to Project -> Revisions and open a previous version of your model

  3. You can now navigate between two different versions in these two instances
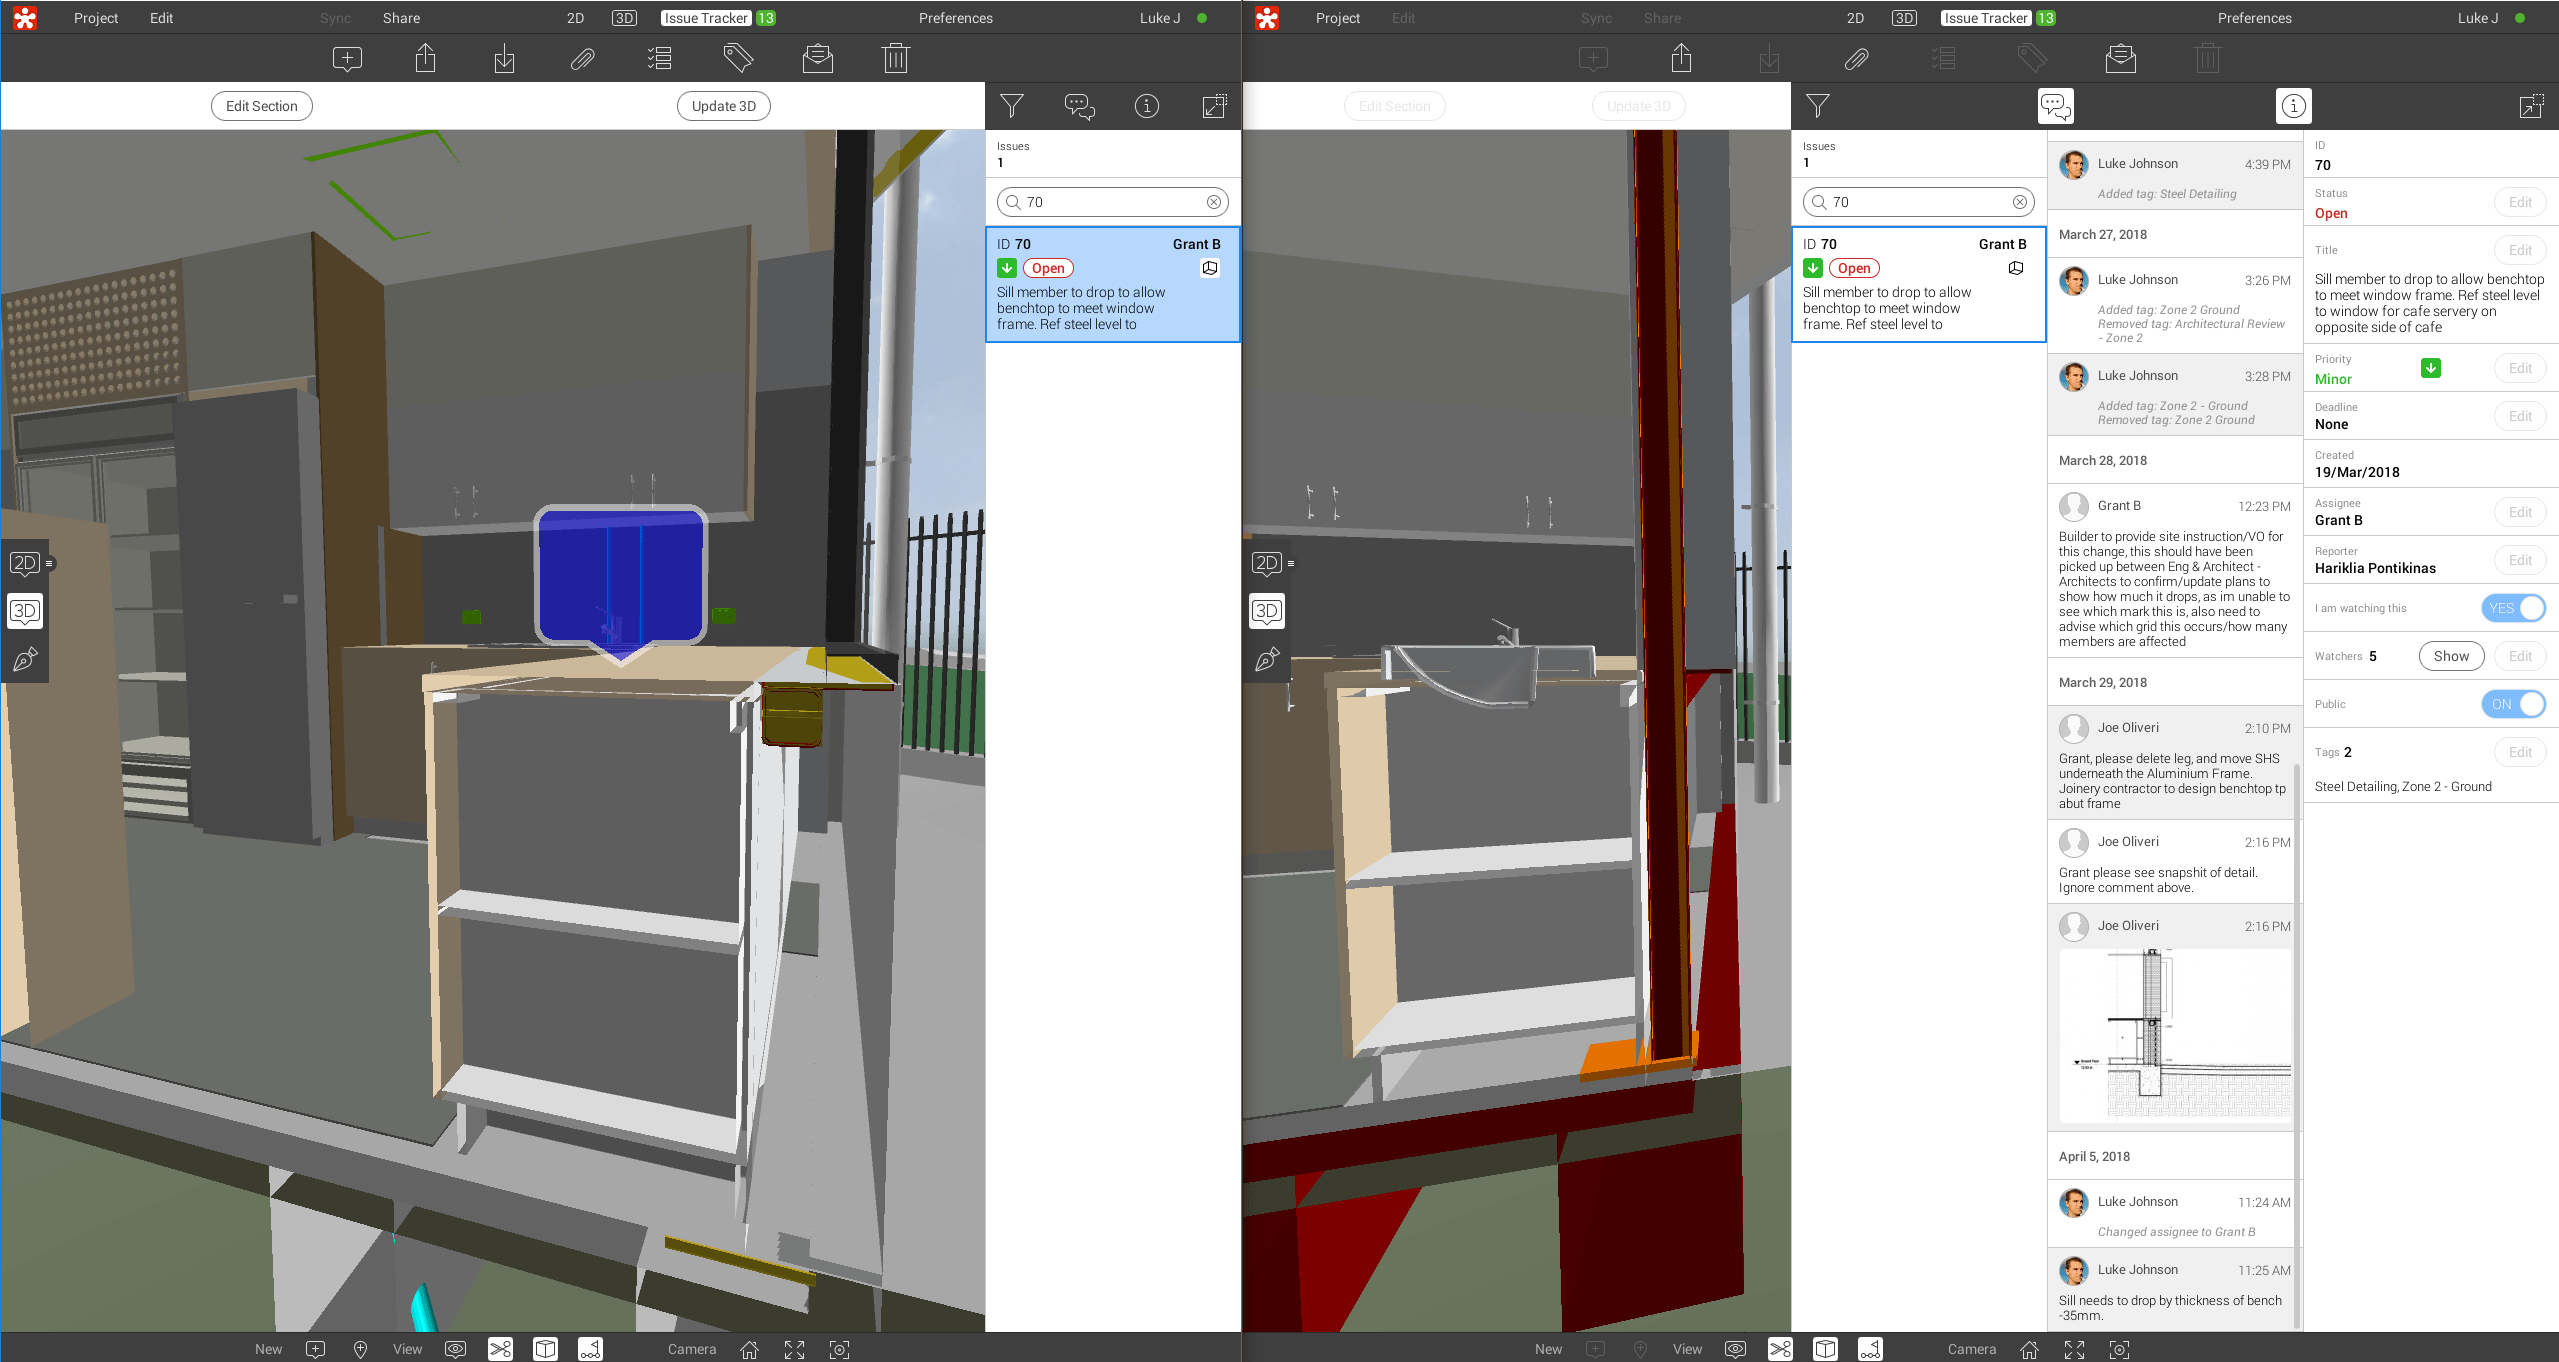
  4. The issue tracker data is always up to date, so you can use the Issue Tracker to co-locate yourself in each file and check the differences. Just click on the same issue in the Issue Tracker, and then click on 3D to visually compare the models. Obviously, you can also enter data and snapshots into the Issue Tracker as per usual, perhaps to comment on why a particular model changed between versions.

Another Idea…

Essentially, this idea was to launch two instances of Revizto and use the Camera Share tool to navigate the same model between them.  It was a bit more involved, and it requires you to have access to two different login accounts for Revizto, and two different login accounts for the current machine, and Revizto is installed ‘For Everybody’.

  1. Ensure you have psexec available
  2. Make a CMD with this text:
     psexec -u OtherWindowsUsername -p OtherWindowsUserPassword -d -i "C:\Program Files\Vizerra LLC\Revizto4\Viewer\Revizto.exe" /language ENU

    (needless to say that you should be careful to protect the password above)

  3. Open Revizto normally and login
  4. Run this CMD file, and in the new instance of Revizto you can login to a different Revizto account
  5. Open the same Revizto project in each
  6. You can now use the Camera Share tool to ‘drive’ both instances simultaneously. Pretty cool!
  7. In one of the instances, open a previous Revision of the model
  8. *This is where the idea fell down, as Camera Share no longer offered to share camera between two different versions of the model :)*  Evidently, it won’t let you navigate non-similar models at the same time.

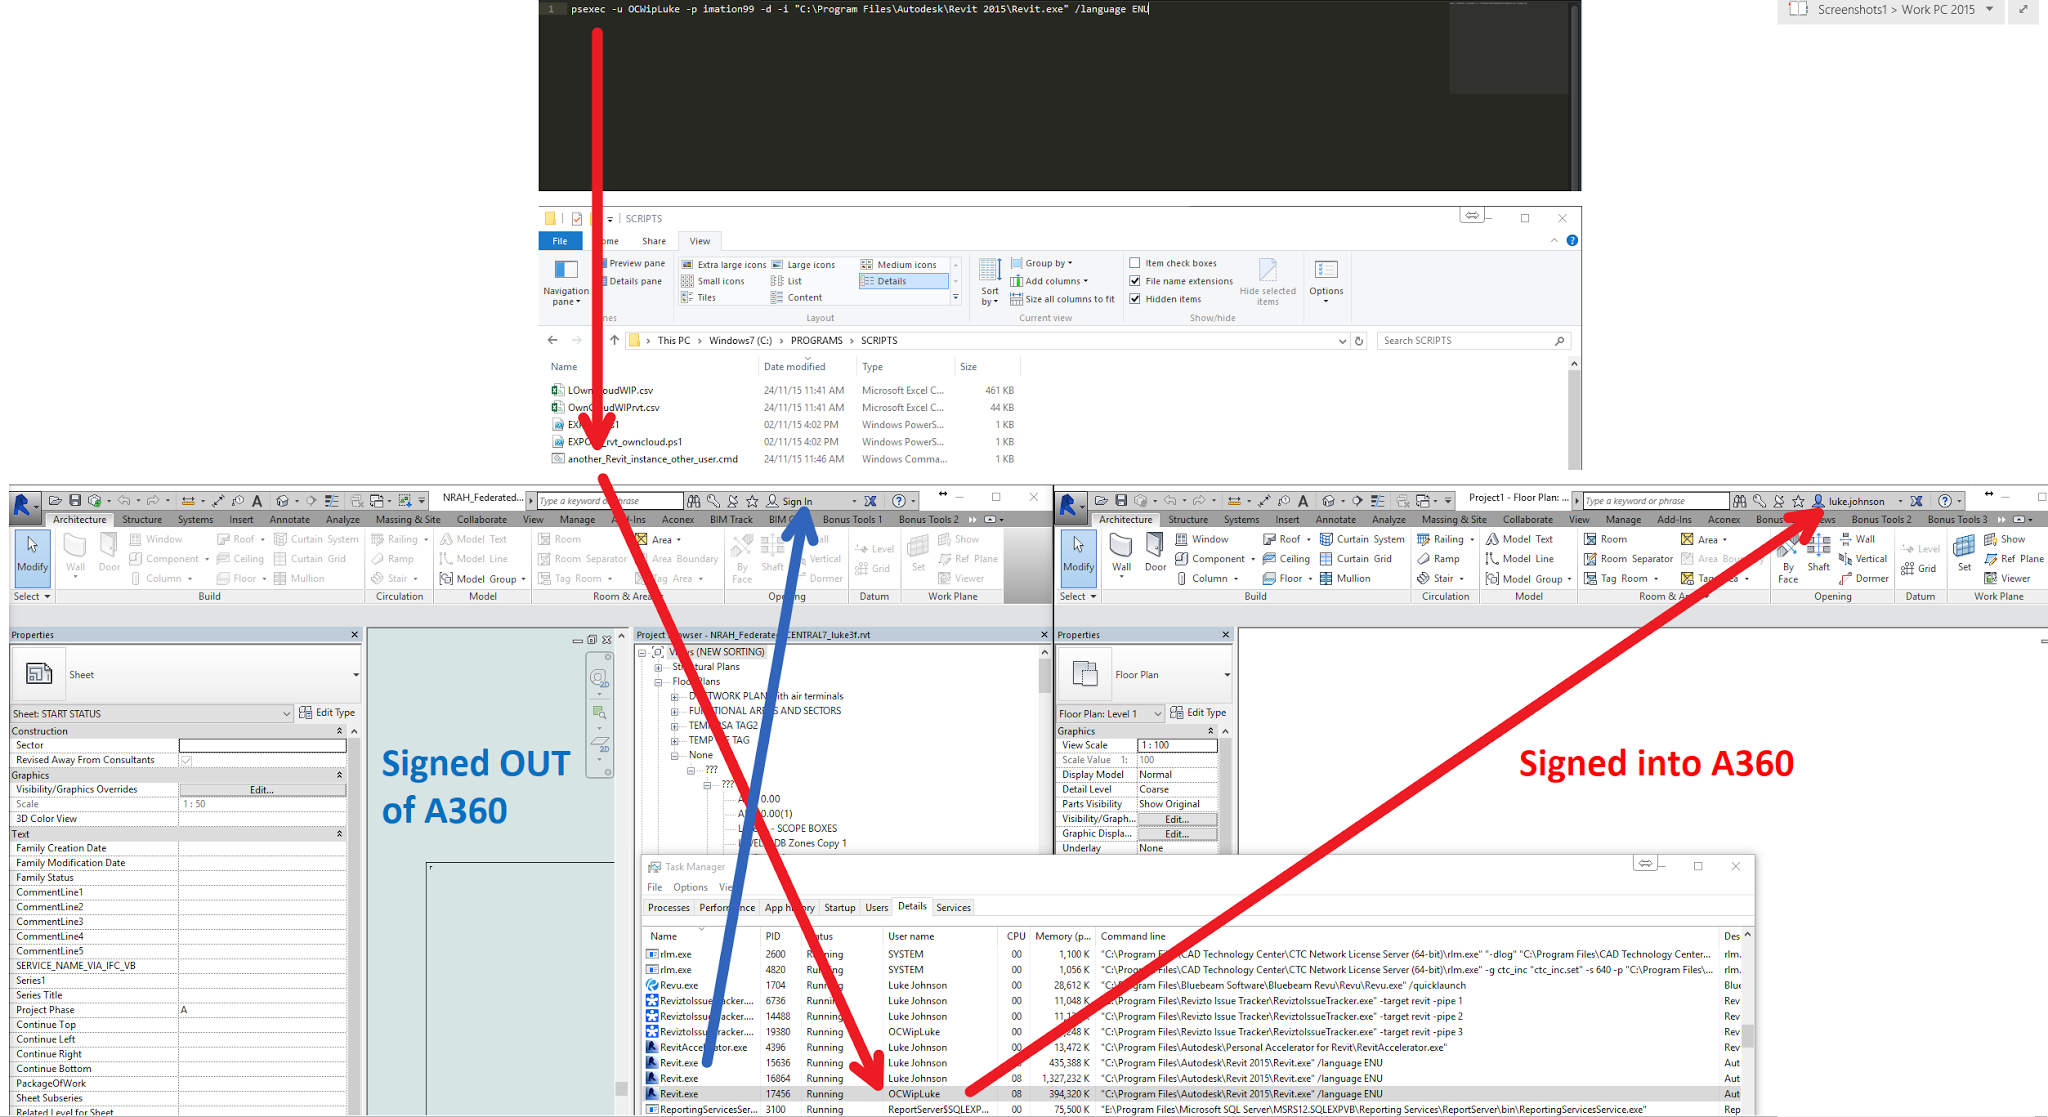
I re-tooled the steps above from my previous post about logging into multiple Autodesk logins at the same time:

How to Workaround A360 SSO issues by Running another Instance of Revit in Same Windows Session as different User

If you are using multiple instances of Revit, against one Central file, using different ‘pseudo’ usernames, you may have run into trouble because Autodesk single sign on (SSO) always keeps you logged out in that situation. As soon as you log in, all your Revit usernames get switched back to your SSO username.

Okay, so how can we work around this? Basically, by using psexec to launch Revit using another Windows user. This allows us to have SSO running in one ‘Windows user’ and SSO logged out in the other.

Steps:

  1. Ensure you have psexec available
  2. Make a CMD with this text (for Revit 2015):
    psexec -u OtherWindowsUsername -p OtherWindowsUserPassword -d -i “C:\Program Files\Autodesk\Revit 2015\Revit.exe” /language ENU
  3. Open Revit in current user and sign out of A360
  4. Run this CMD file, and in the new instance of Revit you can sign back into A360

The workaround and outcome is shown in the image below:

 As usual, there may be complications with this method (such as access to different network resources etc), so please use at your own risk 🙂

OwnCloud is a free file sharing and syncing software, and for the most part it works ok. I don’t think it really compares with a full featured, appliance based enterprise solution… but, its free. You may find it useful for sharing folders on a BIM project, but it can be prickly at times.

If you are using it and want to run multiple instances, perhaps to work with multiple folder structures or different OwnCloud permission accounts, you can do it this way (tested on Windows 7 and 10):

  1. Install OwnCloud and psexec
  2. Make a new local PC user account to run the instance.
    In Windows 10 this is by:
    Add, edit or remove other users” settings option from Start menu, then
    “I don’t have this person’s sign-in information”, then
    “Add a user without a Microsoft account”

    In Windows 7 it was the more traditional user management, which you can access from Computer Management – Local Users and Groups – Users – rightclick “New User”

  3. Set a password for this new user and give them Admin permissions (consider security of this in your environment…) You can set a password using Control Panel:
    User AccountsManage AccountsChange an AccountCreate Password
  4. Make a CMD with contents like this:
    psexec -u YourNewOwncloudUser -p YourNewOwncloudUserPassword -d -i “C:Program Files (x86)ownCloudowncloud.exe”
    This cmd will launch a new instance of OwnCloud executable under a different username using psexec…
  5. Go to %APPDATA%MicrosoftWindowsStart MenuProgramsStartup in Windows Explorer
  6. Make a shortcut to the CMD from step 4
  7. Double click the shortcut now to test it
  8. First run will give you the setup stages for OwnCloud (Server, Username, Password). You don’t ever need to use that user account you made for anything else, it is just there as a separate identity for the OwnCloud process
  9. Before adding folders to sync, you should add Read/Write permissions to a Folder on your pc to that new user you created in step 2, something like this:
  10. In Task Manager, it will look something like this:
  11.  

    Now, you have a new instance of OwnCloud, running at startup and syncing with different OwnCloud credentials to a folder on your PC.