Currently, exporting a flat 2D DWG file from AutoCAD or Navisworks to Revizto will probably yield the following message:
However, you can simply take these steps to work around the issue:
- Open the DWG file
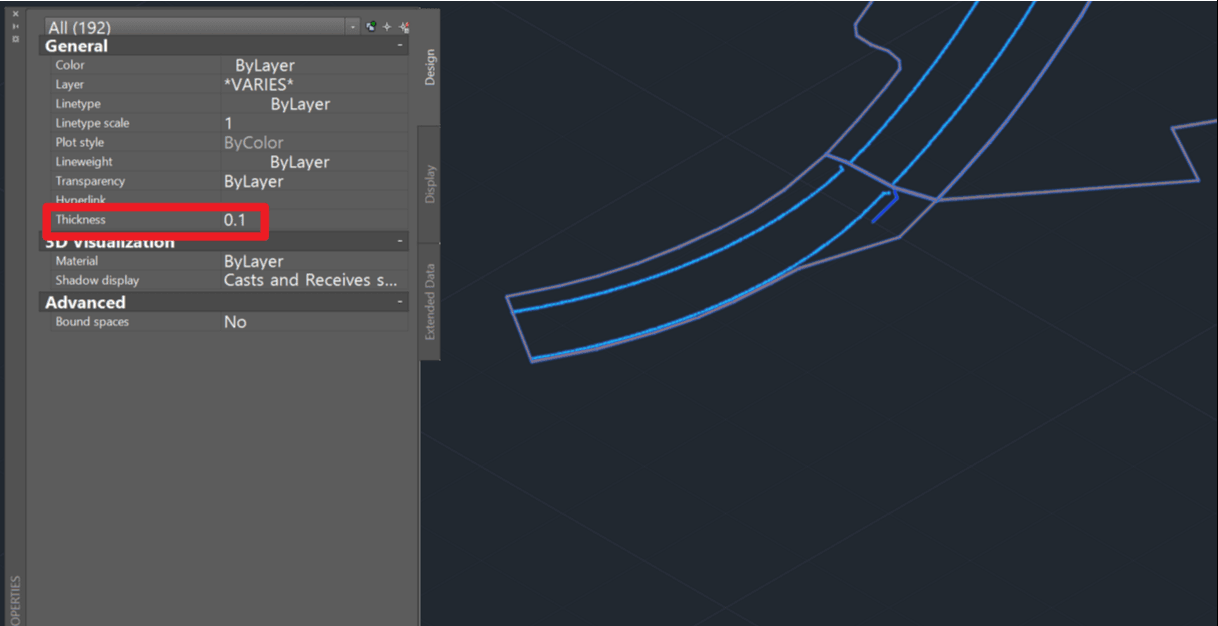
- Select all objects
- Change the Thickness to something small but non-zero (like 0.1)
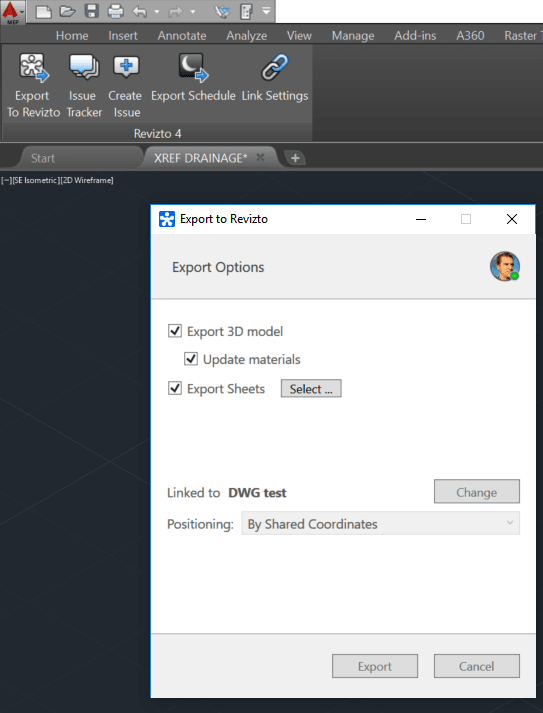
- Export the model to Revizto (either directly or via Navisworks)
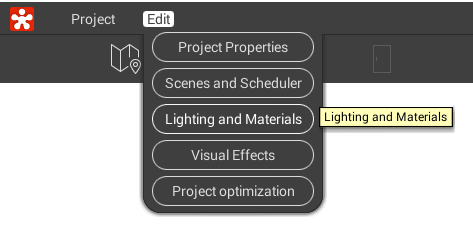
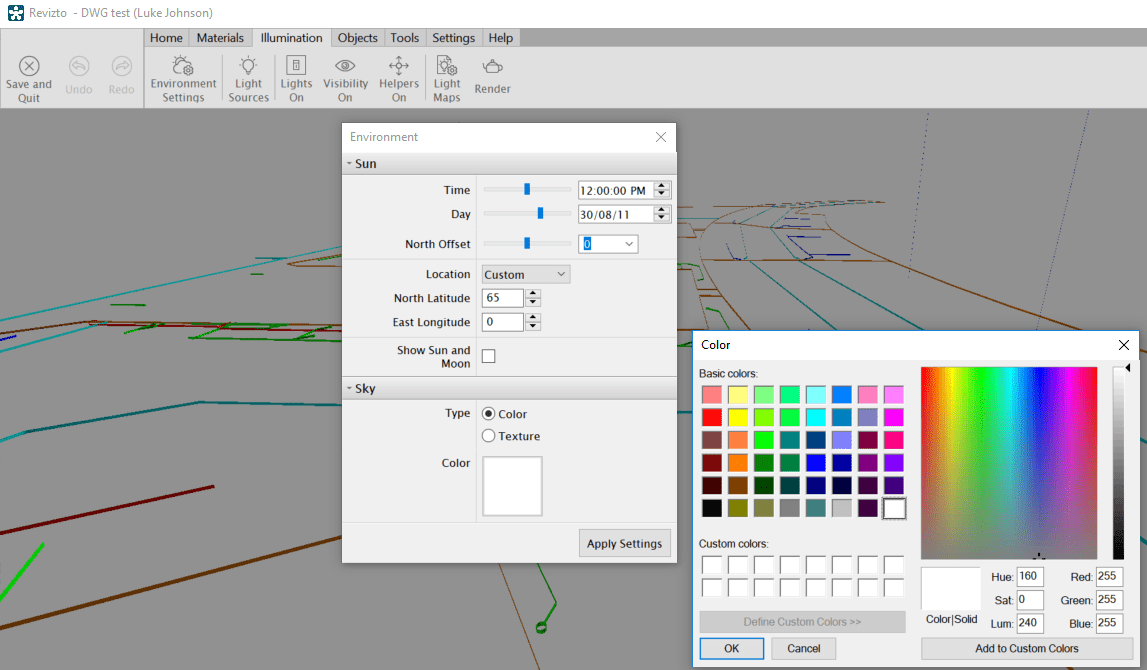
- Once in Revizto, you may want to change the background of your Scene to all-white or some solid colour. Just click on Edit -> Lighting and Materials
- In the Editor, click on Illumination -> Environment Settings and change the Sky Type to Color
- Finally, click Save and Quit
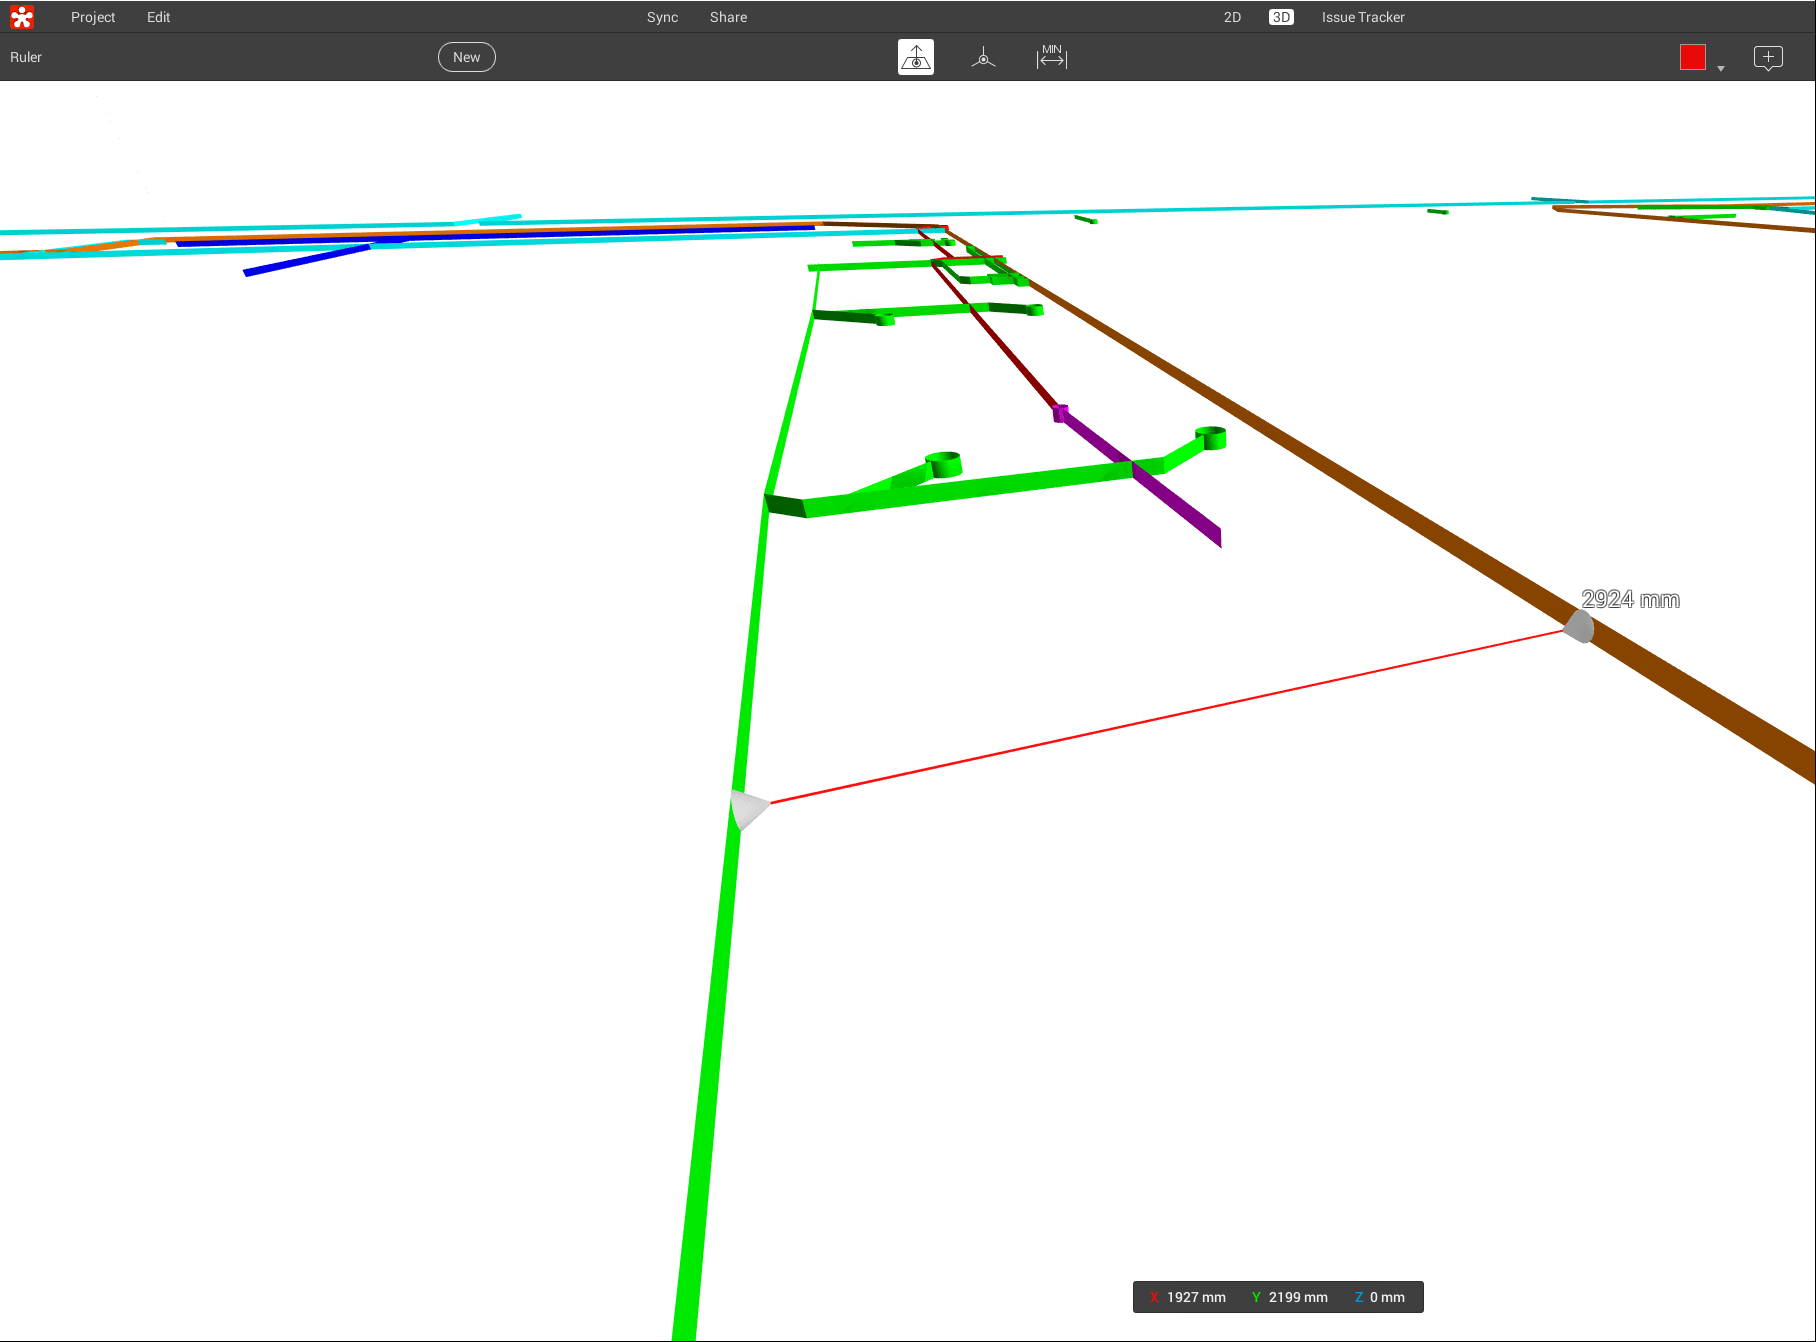
In Revizto Viewer, you can now see your DWG file as thin surfaces where there used to be 2D lines. This also means that you can use the measure tool:
You can use a similar method to the above (change Thickness to non-zero) while using a 2D DWG file, to:
- export from AutoCAD to Navisworks as ‘3D’ elements
- export an FBX from AutoCAD as 3D


 Attached Files
