This is awesome. Let’s say you have a project with heaps of families in it, and you want to save them to individual files. There is an API add on that does exactly this. How do you get it and use it?
First of all, download this file (Chapter 24) from the Sybex resource page for the book Mastering Revit Architecture 2011.
Now:
- This is a ZIP file, so unzip the file.
- Browse in the contents to:
c24ExampleApplicationExampleApplicationbinDebug
- Copy everything from this folder to:
C:Revit Projects
- Copy the two .addin files from the c24 folder to the correct location as shown below:
* For a specific user:
o For Windows XP – C:Documents and SettingsApplication DataAutodeskRevitAddins2011
o For Vista/Windows 7 – C:UsersAppDataRoamingAutodeskRevitAddins2011
* For all users:
o For Windows XP – C:Documents and SettingsAll UsersApplication DataAutodeskRevitAddins2011
o For Vista/Windows 7 – C:ProgramDataAutodeskRevitAddins2011
Refer to this post at The Building Coder for more information.
- Restart Revit 2011
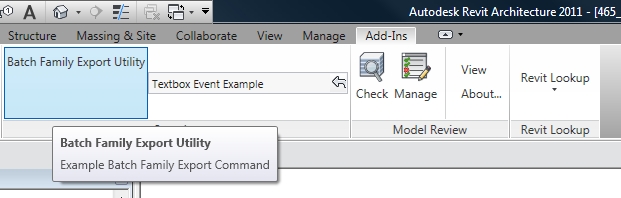
Now, on the Add-Ins ribbon, there will be a new section for the Revit Family Export Utility:
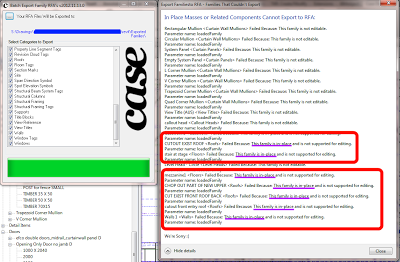
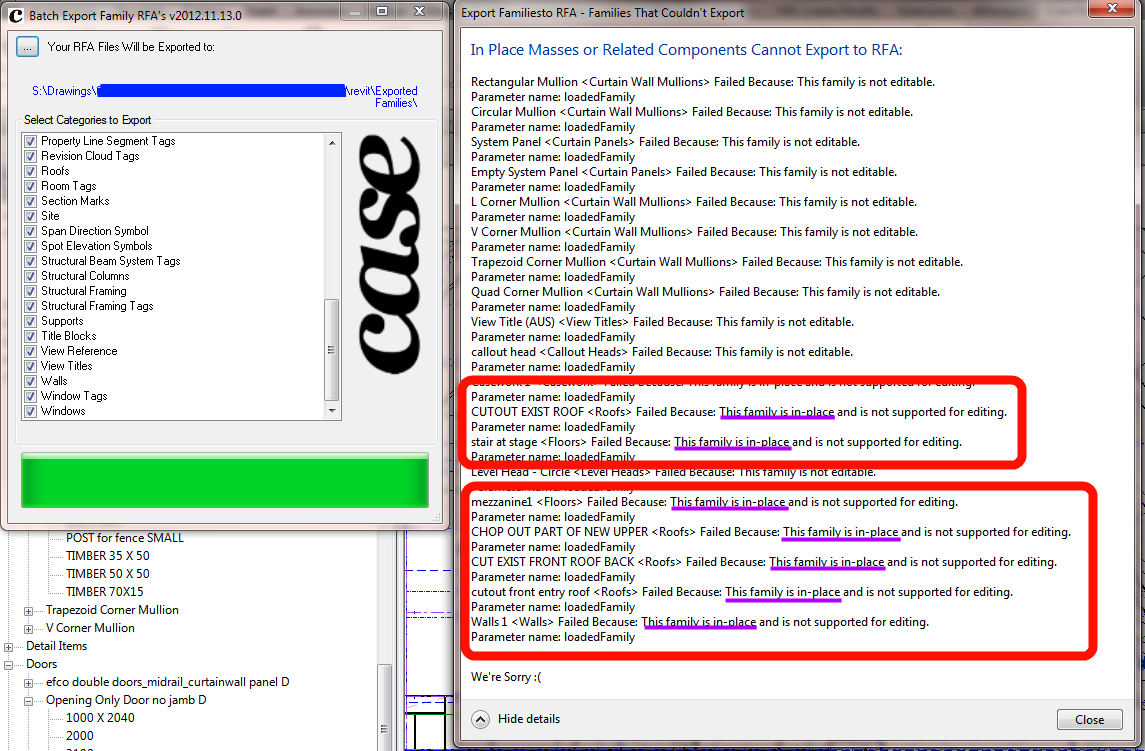
When you run this with a Project open, it will prompt you for a directory, and then it will save all the families from the current Project to .rfa family files, and it will put them into appropriate directories (by Category) for you!
This is a very cool tool – thanks to Don Rudder for his great chapter in the book, and for this excellent API demonstration.
Consider some ways you could use this:
- Load a bunch of families into a project and get this tool to sort them into appropriate folders for you.
- You have an RVT but you do not have the RFA files for families loaded into the RVT – use this tool to get them all out quickly.
- Transfer all RFAs from one RVT to another by saving them out and then loading them all in at once.