I have been searching for a quick and easy way to compare exclusions between Group instances – and nothing really exists at this point.  So, I have developed a method to do this by using Revit and some schedules.  It doesn’t require add-ins, macros or extensions – but it does require full Revit 2014.

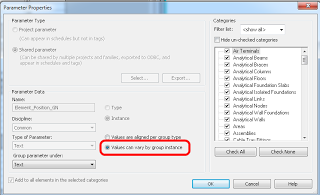
Part A – create a Shared Parameter, applied to all Categories, that can vary by Group instance

Part B – To automatically create selection sets for each group instance

  1. Open a new 3D view
  2. Edit the most complete version of the Group (the one with the least exclusions, ideally none)
  3. Select everything
  4. Save Selection set
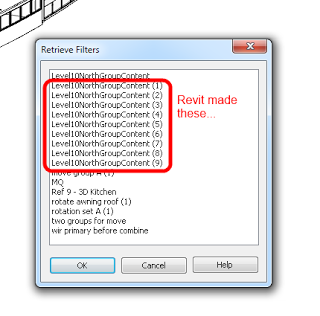
  5. Finish Group – Revit will automatically create a unique Selection Set for each Group instance

Part C – fill the parameter from Part A with appropriate values for each Group instance:

  1. Load one of the automatically created selection sets
  2. Determine what parameter value represents that Group instance (for example “Level 8”)
  3. Filter the Selection – you will need to untick Lines, Wall Openings and Curtain Wall Grids (these items do not accept parameters)
  4. Make Elements Editable
  5. Edit the Shared Parameter with the appropriate value and Apply (ie. “Level 8”)
  6. While the elements are still selected, save the filtered Selection Set
  7. Deselect everything
  8. Select the Group instance and Isolate it
  9. Load the Selection Set from step 6 and Temporary Hide
  10. Any elements left over will need to be selected and have the same parameter from step 2 applied to them
  11. Rinse and Repeat steps 1 to 10 for each Group instance you want to audit / compare.
Make a set of Schedules.  You will typically need at least these Schedule types (depending on what Categories exist in your Group):
  • Multicategory Schedule
  • Walls
  • Floors
  • Ceilings
  • Columns
Make sure the Schedules have at least these fields:
  • The Shared Parameter you created in Part A
  • Family and Type
  • Count field added and set to Calculate Totals
Filter the schedules – you can use the Shared Parameter you set up with an “is greater than” blank operator to show only elements that have something in that parameter.

Using Sorting to make things look right, you can end up with a schedule you can quickly scroll through to find differences in Model Groups:

Additionally, using Highlight in Model directly from the schedules will help you to figure out exactly what elements are missing or different.

EDIT Along similar lines, you can check out Dave Light’s post at:
Revit : Scheduling Apartments
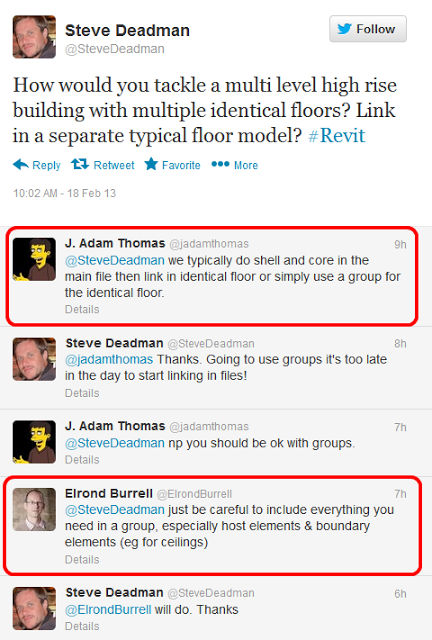
Groups or links?  Or something else?

via

EDIT – Some additional research:

1. Model groups for Floor Plates is a bad idea. Between Editability issues, Canvas editing mode, reconciliation issues, etc, its almost a given that the groups will eventually fail. Links- while more complicated- are much better suited for tall buildings and floor plates. Groups are also a lot heavier to work with, when you have something that large, and a large number of them.

2. As for how to model walls? i model the walls based on the intent of the walls. If its an exterior facade wall, and my intent is that the wall is 70 feet tall from the ground level, i model it 70 feet tall, from the ground level. If that happens to span 5 storeys so be it. A wall on the interior OF a floor? It DOESNT span multiple storeys. The only case you can make for interior walls spanning multiple storeys in revit, is really Shaft Walls. Even then, we dont do them this way, since groups for small things like Cores handle any alignment issues.

However, Navisworks isnt even a consideration. If youre doing any kind of real coordination in navisworks, youll be exporting to NWC in multiple segments anyway, so it doesnt even matter if you model the walls full height or storey by storey. Ive got an 11 floor building where the facade is modeled full height, and i still have everything (facade included) broken up in Navis Level by Level. Revt Section boxes and multiple export views make this a cinch.
via
Wall- Storey by storey or Multi-level – Page 2

The other issue with floor plates is it becomes too big of a group. Rooms (imho) are the perfect sizes for groups, so yes… We use Groups inside of Links. A few key things about groups:

1. They dont always check for item editability rights until you hit FINISH group…
2. Everything gets lost fi you cant succeed in finishing the group.
3. They break apart often if they have conflict resolutions

I did an AU class on using Links as a replacement for groups in taller buildings. The handouts are on my blog. I even talked about a slightly unconventional approach we use with a single floor plate and Design Options, which makes it so you only have one floor plate modeled, for all variations in upper floors. It works fine, as long as you dont try to use the upper plate models as Room Bounding. Its not an issue for us, since we put our rooms IN the Upper Plate model, for those floors. The only other drawback to it is it cant be Space Bounding (Room Bounding) for MEP, either. Room Bounding properties of linked files do not respect any option other than Primary, since Linked File Room Bounding is a File Type selection and DO is a view selection.
via
Best Practices for Groups in High-rise Tower Models