
Revit doesn’t like big numbers. There, I said it.
So when dealing with ‘world’ coordinates in a point cloud, sometimes things just don’t work too well. I thought I had this all solved recently by using the DXF, Center-to-Center, Acquire Coordinates workflow. However, I discovered that somewhere along the line, Revit still does break down with the large coordinates. I think this is happening in between Recap and the Revit point cloud rendering engine. I was getting something that looked like this:
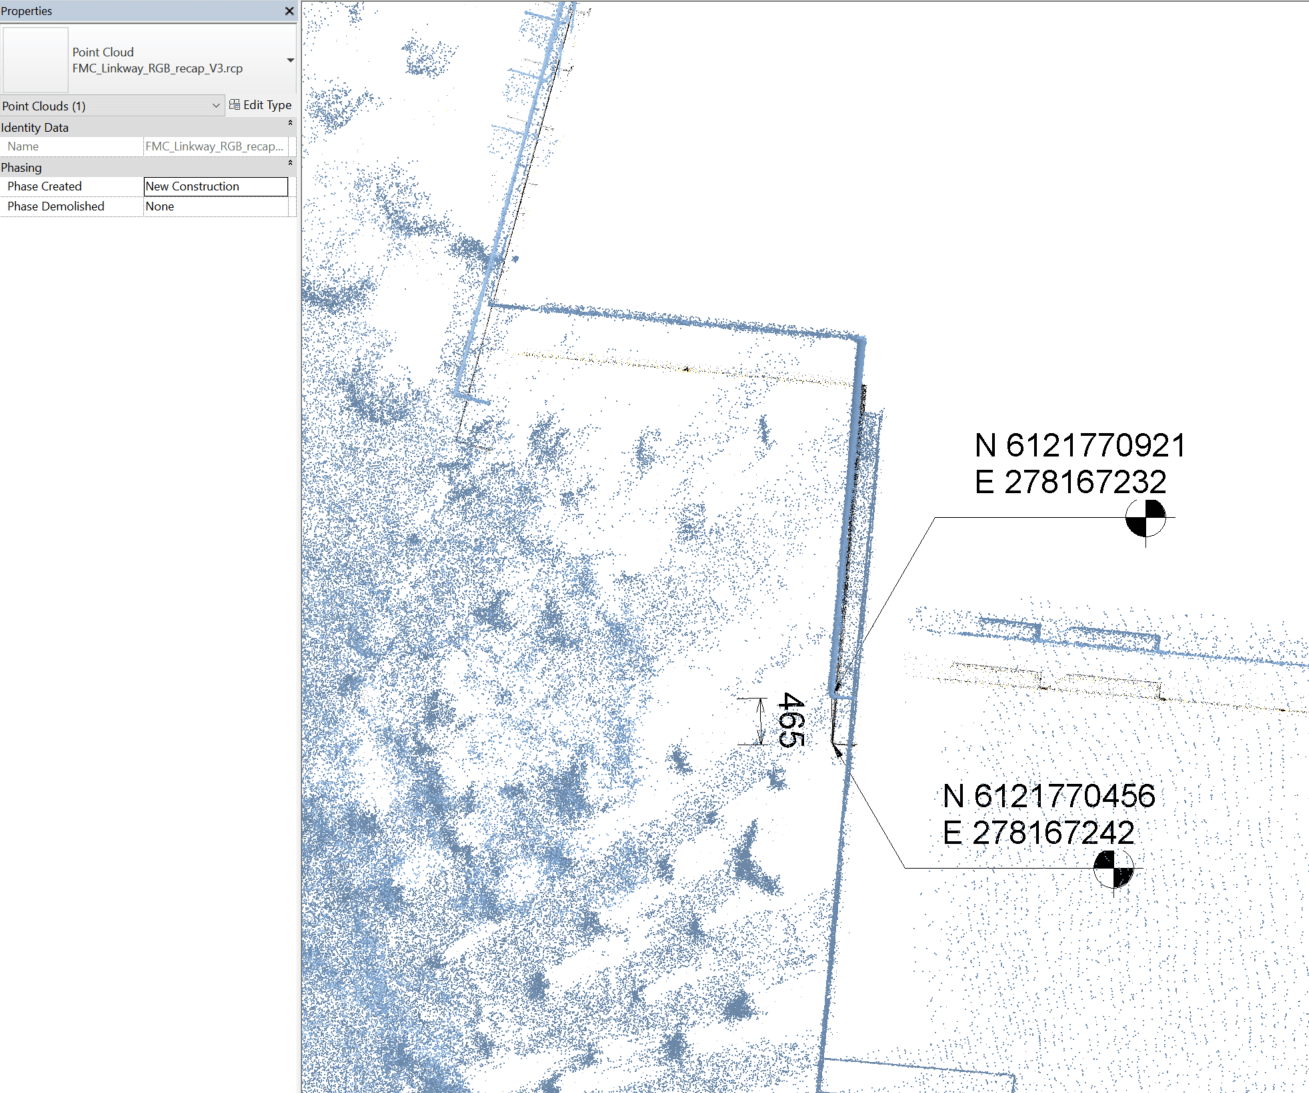
As you can see, the shared coordinate system is very large. In this situation, you can’t even move the point cloud into the correct location in Revit, it jumps in large increments when moving. Interestingly, Navisworks and AutoCAD both handle these large coordinates ok – appending the same data does not have the error shown above. So…
How do we fix this and make Revit happy?
Basically, we do a temporary truncation of the source data, get it into Revit, and then reinstate the appropriate coordinate system.
To truncate the data, have a look at your source point cloud information. In my case, I could identify 4 leading digits for the X and Y coordinates that were not significant:
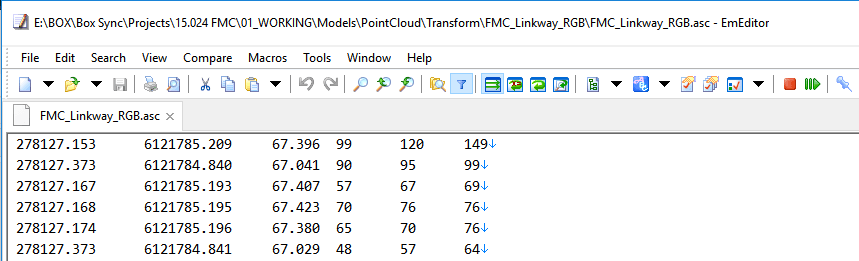
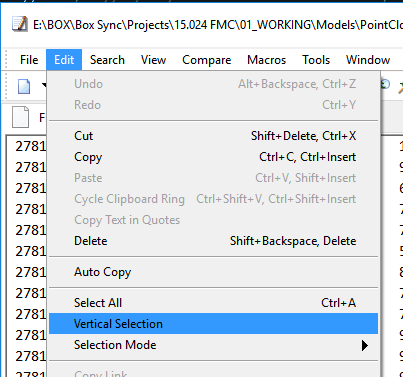
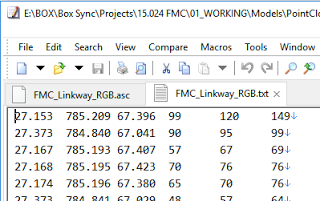
Using EmEditor (which handles large text files very well), and its Vertical Selection feature, I was able to delete the 2781 and 6181 digits from my source data.
In effect, this transformed everything by 278100m and 6121000m. Keep these numbers in mind for future reference…
Ok, with the simplified source data in hand, I followed these steps:
- Index a new RCP in Recap using the simplified data
- Open surveyor DXF file in AutoCAD and manually Move all the geometry. Move the objects by the values above (278100, 6121000) towards the origin. Save As – a new DWG file with modified coordinates.
- Link this modified DWG into Revit, Center-to-Center
- Acquire Coordinates from it
- Link the Point Cloud RCP By Shared Coordinates
- Everything lines up now that the large coordinate shift error has been avoided!
- Link in the original DXF and align it with the modified temporary DWG we were using
- You may need to temporarily neutralize coordinates (here or here), and…
- Now you can Acquire Coordinates from the original DXF and you will have reinstated the ‘world coordinates’, but the Revit point cloud rendering engine is now much happier.
Hope this helps you if you face a similar problem 🙂
Previous post:
What Revit Wants: Using a DXF to Locate a Point Cloud in Revit with Very Large Coordinates


