
Tag: vista
Beginning January 1, 2012, Autodesk will have formally ceased support of the Microsoft Windows Vista Operating System for all new (and upgraded versions) of its products and services released in 2012.
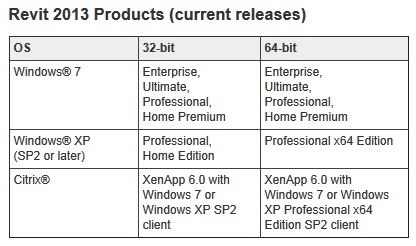
Currently shipping versions and previous versions of our software (delivered prior to January 1, 2012) will continue to be supported on this operating system.
Currently shipping versions and previous versions of our software (delivered prior to January 1, 2012) will continue to be supported on this operating system.
via
Autodesk – Microsoft Windows 7 and Windows Vista Compatibility – Microsoft Windows Vista Support FAQ
Pretty funny that XP is still supported… that OS has some legs!
(whispers) There is a secret way to enable a advanced user feature in Windows 7 and Vista, and it is extremely simple.
Just make a new folder, and give the folder the following name:
GodMode.{ED7BA470-8E54-465E-825C-99712043E01C}
You will find that when you open this folder, it is like a Super Control Panel.
Apparently this does not work in Vista 64 bit, but it does work in 32 bit.
Thanks to PC User magazine and William Archibald for writing this tip in a letter to the magazine.
Have you mastered file and folder navigation in Windows Vista yet? If you haven’t, here are a few simple tips, guaranteed to increase your productivity (well, hopefully 😉
- Use Vista ‘Links’.
What is it? It is a special list of shorcuts to your favourite locations. When you open Windows Explorer, these show up as ‘Favourite Links’ in the top-left area of the window. To add items to the list, simply drag and drop from the ‘Folders’ list into the ‘Favourite Links’ area (be careful not to drop items ‘on top’ of each other!) Once you have a good list of your favourite locations, its time to put them to good use, so… - Add your ‘Links’ to your Taskbar.
In Vista, simply right-click on your Taskbar, go to ‘Toolbars’ and click on ‘New Toolbar…’ In the resulting dialog, click on your ‘Links’ folder (you can get to it by going to your main ‘username’ folder, then you will see the ‘Links’ folder) and then click ‘Select Folder’. - Make your ‘Links’ visible in the Start Menu.
Click on the Start button, then right-click in a blank area and go to ‘Properties’. Click the ‘Customize…’ button, scroll down to ‘Personal folder’ and click on the ‘Display as a menu’ radio button. Click OK twice, and now your Personal Folder can expand to show your ‘Links’ directly from the Start Menu! - Use your Links in Revit.
You can add the ‘Links’ list to your Revit Places. Simply go to an ‘Open’ dialog in Revit, browse to your ‘Personal folder’ (this is the one that is usually your name), then drag the ‘Links’ across to the Places area in Revit. I then drag this to the top of the Places so I can quickly access the ‘Links’.
I’m sure there are other ways to use this ‘Links’ list. What are your Vista navigation tricks and methods? Feel free to comment. I hope this has been of some help to you all. Happy Reviting!
Check this out.
Whether you use Revit or not, I challenge you to find a faster way to access your frequently used folders.
However, since upgrading to Vista x64, I am struggling to find a good replacement!! I’ll let you know when I do…
We recently invested in some new workstations for our office. After doing some research, the following specification was settled on:
Gigabyte X58
Intel Core i7-975 Extreme Edition Processor, 3.33 GHz
12GB (6 X2GB) Corsair DDR3 (1600MHZ) 9,9,9,24 Matched Triple Kit, 1.65V, TR3X6G1600C9
Quadro FX-580, PCI-E 2.0, OEM, 512Mb, GDDR3, 128-Bit
WD Caviar Black 1000GB / 1TB SATA-II, 7200RPM, 32Mb
Genuine Microsoft Windows VISTA BUSINESS 64-Bit DVD OEM SP1
I am also running dual monitors, one being a Samsung 740B 17 inch monitor, and the other a beautiful Samsung 2443BW 24 inch HD monitor.
And Revit loves it!