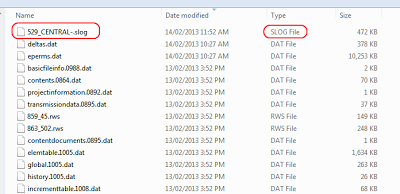
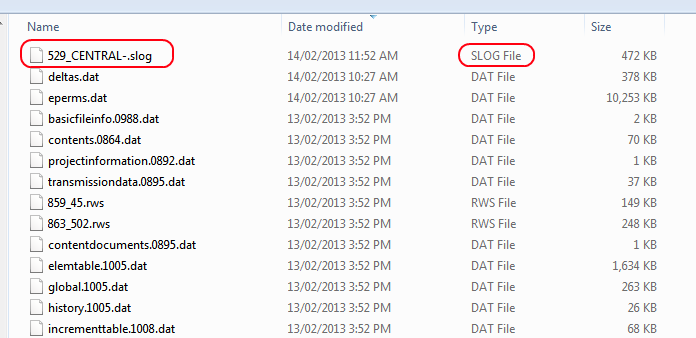
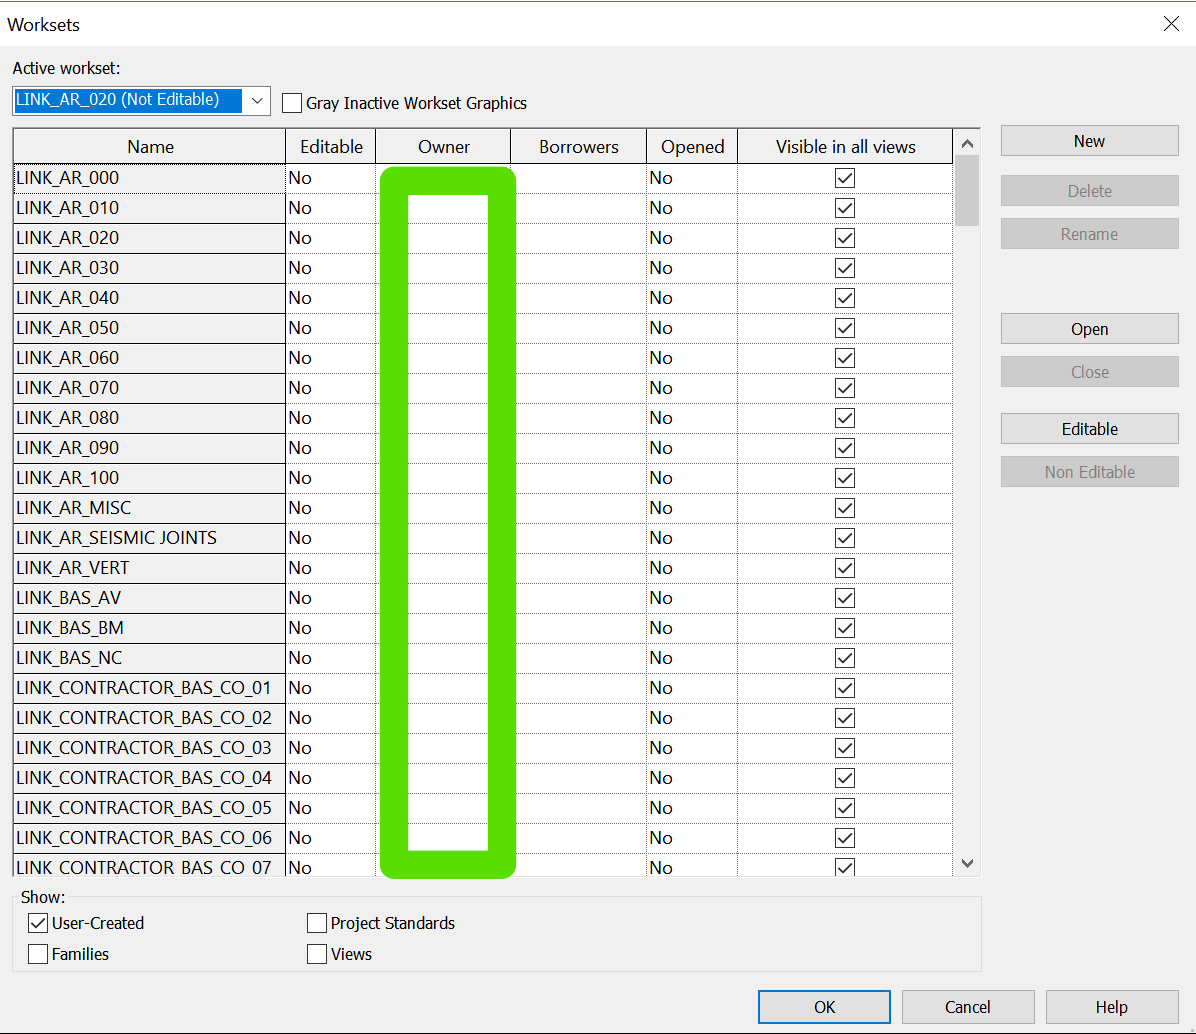
If you have gone through a process of saving Central models, and you have forgotten to ‘Synchronize with Central’ before closing them for the first time, you may find that your user has all User Created Worksets checked out in those files. A quick recap:

  • Workshared Revit files use a persons Revit user name (sometimes linked to an Autodesk SSO login) to determine if things are checked out
  • If someone has a User Workset checked out, you won’t be able to edit it until they Relinquish. (Note: you can Detach and recreate the file but that is dangerous if you have multiple people working on something)

Basically I had a bunch of Revit files that had all User Worksets from certain usernames checked out. They were upgraded and they were Central files. All that was needed was a simple Open and Relinquish. As I didn’t want to do this manually, I sourced some macro code from here and adapted it for my situation.

What does it do?

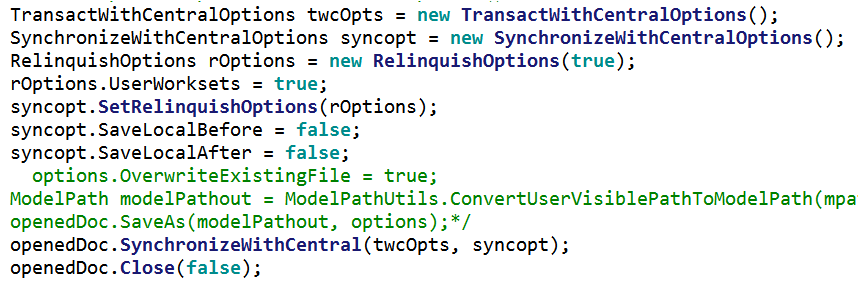
This Application level macro starts with a dialog box where you can select files. After you select them, it then loops over each file and Opens it, then does a Relinquish All Mine on User Created Worksets, and then it Syncs with Central and Closes the file. The key part of the code is here:

How to set it up?

First, get the code below. Copy and paste it into a new Application Macro in Revit.

 /*
  * Created by SharpDevelop.
  * User: lukes
  * Date: 1/10/2018
  * Time: 2:54 PM
  * 
  * To change this template use Tools | Options | Coding | Edit Standard Headers.
  */
 using System;
 using Autodesk.Revit.UI;
 using Autodesk.Revit.DB;
 using Autodesk.Revit.UI.Selection;
 using System.Collections.Generic;
 using System.Linq;
 using Autodesk.Revit.ApplicationServices;
 using System.IO;
 using System.Windows.Forms;
 
 namespace relinquish
 {
     [Autodesk.Revit.Attributes.Transaction(Autodesk.Revit.Attributes.TransactionMode.Manual)]
     [Autodesk.Revit.DB.Macros.AddInId("30EBC375-5A4C-4917-AB07-D7212C9ED3FA")]
     public partial class ThisApplication
     {
         private void Module_Startup(object sender, EventArgs e)
         {
 
         }
 
         private void Module_Shutdown(object sender, EventArgs e)
         {
 
         }
 
         #region Revit Macros generated code
         private void InternalStartup()
         {
             this.Startup += new System.EventHandler(Module_Startup);
             this.Shutdown += new System.EventHandler(Module_Shutdown);
         }
         #endregion
         public void RelinquishMineFromFiles()
         {
             
             
 OpenFileDialog theDialogRevit = new OpenFileDialog();
 theDialogRevit.Title = "Select Revit Project Files";
 theDialogRevit.Filter = "RVT files|*.rvt";
 theDialogRevit.FilterIndex = 1;
 theDialogRevit.InitialDirectory = @"C:\";
 theDialogRevit.Multiselect = true;
 if (theDialogRevit.ShowDialog() == DialogResult.OK)    
             
     {             
 /* string mpath = "";
         string mpathOnlyFilename = "";
         FolderBrowserDialog folderBrowserDialog1 = new FolderBrowserDialog();
         folderBrowserDialog1.Description = "Select Folder Where Revit Projects to be Saved in Local";
         folderBrowserDialog1.RootFolder = Environment.SpecialFolder.MyComputer;
         if (folderBrowserDialog1.ShowDialog() == DialogResult.OK)
         {
          mpath = folderBrowserDialog1.SelectedPath;*/
                 foreach (String projectPath in theDialogRevit.FileNames)
                 {
                  FileInfo filePath = new FileInfo(projectPath);
                         ModelPath mp = ModelPathUtils.ConvertUserVisiblePathToModelPath(filePath.FullName);
                         OpenOptions opt = new OpenOptions();
 /*                        opt.DetachFromCentralOption = DetachFromCentralOption.DetachAndDiscardWorksets;*/
                          WorksetConfiguration openConfig = new WorksetConfiguration(WorksetConfigurationOption.CloseAllWorksets);
                         // Set list of worksets for opening 
 /*                        openConfig.Open(worksetIds);
                         opt.SetOpenWorksetsConfiguration(openConfig);
                         mpathOnlyFilename = filePath.Name;*/
                         Document openedDoc = Application.OpenDocumentFile(mp, opt);                               
 /*                        SaveAsOptions options = new SaveAsOptions();*/
                          TransactWithCentralOptions twcOpts = new TransactWithCentralOptions();
                         SynchronizeWithCentralOptions syncopt = new SynchronizeWithCentralOptions();
                         RelinquishOptions rOptions = new RelinquishOptions(true);
                         rOptions.UserWorksets = true;
                         syncopt.SetRelinquishOptions(rOptions);
                         syncopt.SaveLocalBefore = false;
                         syncopt.SaveLocalAfter = false;
 /*                        options.OverwriteExistingFile = true;
                         ModelPath modelPathout = ModelPathUtils.ConvertUserVisiblePathToModelPath(mpath + "\\" + mpathOnlyFilename);
                         openedDoc.SaveAs(modelPathout, options);*/
                         openedDoc.SynchronizeWithCentral(twcOpts, syncopt);
                         openedDoc.Close(false);
                }
         }
 }}}

Then,

  • Add the System.Windows.Form reference and
  • Build the Solution

Note: I built and tested this on Revit 2018.2.

How to Use It?

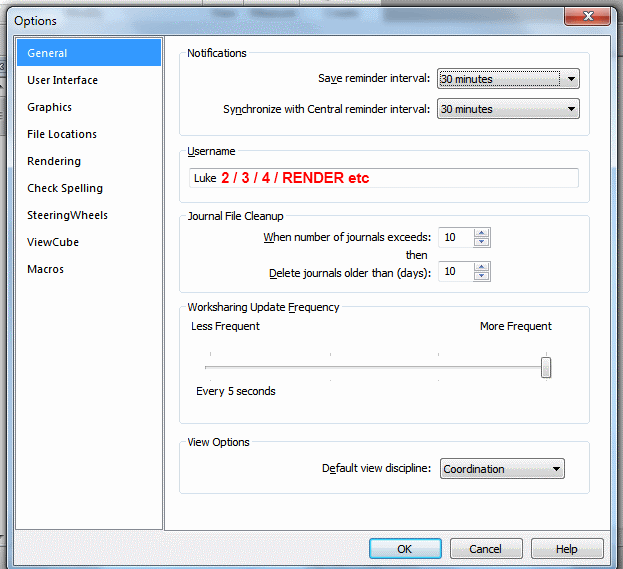
  1. Set your Revit User Name to the user that you want to Relinquish the Worksets for…
    • You may have to logout of your own SSO first
    • Go to Revit Options
    • Input the exact user name (including @ if an email address)
  2. Start a new blank project in Revit
  3. Start the Macro Manager
  4. Select the RelinquishMineFromFiles macro that you built
  5. Click Run
  6. Select the files you want to fix
  7. Click Ok
  8. Wait for the result. The macro will step through them, Relinquish, Sync and Close the files.


Note:

Please use at your own risk, this has the potential to be pretty risky in a real project environment. Only use it if you understand what is going on 🙂

Also, you can refer to this Revit API Doc page.

OwnCloud is a free file sharing and syncing software, and for the most part it works ok. I don’t think it really compares with a full featured, appliance based enterprise solution… but, its free. You may find it useful for sharing folders on a BIM project, but it can be prickly at times.

If you are using it and want to run multiple instances, perhaps to work with multiple folder structures or different OwnCloud permission accounts, you can do it this way (tested on Windows 7 and 10):

  1. Install OwnCloud and psexec
  2. Make a new local PC user account to run the instance.
    In Windows 10 this is by:
    Add, edit or remove other users” settings option from Start menu, then
    “I don’t have this person’s sign-in information”, then
    “Add a user without a Microsoft account”

    In Windows 7 it was the more traditional user management, which you can access from Computer Management – Local Users and Groups – Users – rightclick “New User”

  3. Set a password for this new user and give them Admin permissions (consider security of this in your environment…) You can set a password using Control Panel:
    User AccountsManage AccountsChange an AccountCreate Password
  4. Make a CMD with contents like this:
    psexec -u YourNewOwncloudUser -p YourNewOwncloudUserPassword -d -i “C:Program Files (x86)ownCloudowncloud.exe”
    This cmd will launch a new instance of OwnCloud executable under a different username using psexec…
  5. Go to %APPDATA%MicrosoftWindowsStart MenuProgramsStartup in Windows Explorer
  6. Make a shortcut to the CMD from step 4
  7. Double click the shortcut now to test it
  8. First run will give you the setup stages for OwnCloud (Server, Username, Password). You don’t ever need to use that user account you made for anything else, it is just there as a separate identity for the OwnCloud process
  9. Before adding folders to sync, you should add Read/Write permissions to a Folder on your pc to that new user you created in step 2, something like this:
  10. In Task Manager, it will look something like this:
  11.  

    Now, you have a new instance of OwnCloud, running at startup and syncing with different OwnCloud credentials to a folder on your PC.

    We have been told that Dynamo core code can eventually support network sharing of custom node definitions. In the meantime, how can you share custom nodes between a few different pcs and laptops, keeping them all in sync?

    There are a few ways to do this:

    1. Packages and package management
      The main issue here is that if you are working on IP related code or just generally don’t want to publish your nodes to the world, there will always be some left over ‘private’ custom nodes in your definitions folder that you still may want to sync with other pcs, leaving us with…
    2. Shared cloud definition folder with live update to local definitions folder

    The second way can be done with FreeFileSync and its partner, RealTimeSync. RealTimeSync is automatically included when you install FreeFileSync. How do we set it up?

    Let’s say we have a few workstations and we want to share Dynamo definitions between them:

    1. Set up a shared cloud folder called LiveDefinitions between users of these pcs (Google Drive or Dropbox or similar).
    2. Then, set up a sync process that mirrors that cloud version to your local Dynamo definitions folder, in my case:
      C:UsersLukeAppDataRoamingDynamo.8definitions

     It might look something like this:

     In the above example, I also set up a versioning folder to catch any conflicts.

    The RealTimeSync can be set up as follows:

    1. Launch FreeFileSync and create a Mirror sync between these folders (that’s in the image above)
    2. Save this as a ffs_batch file
    3. Open that file in RealTimeSync
    4. Save as a ffs_real file
    5. Right-click and Copy this ffs_real file in Windows Explorer
    6. Paste shortcut into your Windows Startup folder, such as:
      C:UsersLukeAppDataRoamingMicrosoftWindowsStart MenuProgramsStartup
    7. Double click the shortcut in Startup and check that it runs ok. It should automatically place a red RealTimeSync icon in your task bar that polls the source folder periodically for changes. If you ever want to stop the sync, just right-click on that red icon to stop the sync running. To disable automatic startup, just delete the shortcut from the startup menu.

    The final piece: make sure you save all of you custom definitions directly to the LiveDefinitions folder. In the example above, I should save all of my custom .dyf files to this folder after creating them:
    C:UsersLukeGoogle DriveVirtualBuilt (LJ only)DynamowipLiveDefinitions
    Even if I just right-click and edit a custom node in Dynamo, I will have to go Save As to the above folder to make this system work.

    Google Drive will sync that file up, and then RealTimeSync will push it into the required Dynamo folder.

    This way, the point of truth for all of your custom definitions is in the cloud, and these are downloaded and overwritten into your local Dynamo definitions folder (the one that Dynamo uses).

    Use this idea with care 🙂 As always make a backup of everything first, and also remember that often simply closing and re-opening Dynamo can help to refresh the dependencies and correct some problems.

    Sometimes Google Drive isn’t happy when you have it syncing large folders of often-changing files (sounds like a BIM environment, yeah?) But usually, all it needs is to restart the googledrivesync process to get things back in order. Here is one way you can do that:

    1) Copy the following to a text document and save as BAT or CMD:
    TASKKILL /F /IM googledrivesync.exe
    START “” “C:Program Files (x86)GoogleDrivegoogledrivesync.exe” –noshow_confirmation_dialog_on_delete

    2) Once you have the batch file ready, you can create a basic Windows task that runs daily (before you come into work) to restart Google Drive and ensure it is in sync.

    From rvit:
    We got everyone else to sync and get out of the model.  Then, in the central file’s backup folder, we hunted down the SLOG file… and deleted it.
    And that works.  He opens his local file and all is right in the world.  Everyone else hops in and all is still well.  Revit generates a new SLOG file and people can get work done.

    Read the rest (including disclaimers) at:
    SLOG it Out – Cannot Find Central File � RVIT – Revit rants, tips, and junk

    Note: you should be able to find the slog file under the _backup folder of the affected Central (order by Date modified):

    Steve’s post recently reminded me of something I have done in the past – using multiple pseudo usernames to access the same Central File in different instances of Revit.

    Let’s say that you wanted to render a certain scene in Revit, and then save the resultant image to the Project (a Central File).  As this render could take 10 minutes, you want to keep working on something useful in the same Central File.  What to do?

    You just need to open a new instance of Revit and change the Username, then open a Local Copy of the Central as per usual.  You now have 2 instances of the same Central model open, and you can work in and Synchronize from both of them … obviously you are going to need some decent hardware if you are working on a large central file with links.  Set the first instance to render, and work in the second instance while that is happening (keep in mind that local renders in Revit can use multiple cores, so you may want to think about manually adjusting core affinity).

    The username can be changed in the Revit Options dialog:

    From Steve’s post:
    You can however change your username anytime you want when you work in a central file. It isn’t a great idea to actually work this way, switching usernames as you go. It is however a way to clear out users that have not relinquished worksets properly though. When nobody else is working on the project you can open a central file and pretend to be the ill mannered users that haven’t relinquished elements properly. It’s another reason you might consider working in a central file, even though it is generally frowned upon.

    Read more at:
    Revit OpEd: Changing a Username

    Daryl Gregoire posted about this recently and I found his post very helpful.  In the past, if the checkbox was grayed out to ‘Create New Local’, I would just manually copy the file to my C: drive, append my username to it, and then open it that way.  This is ‘old school’ Revit, before the automated local file creation became available.  However, Daryl’s fix is better than my workaround…

    Why is the checkbox not available?
    you are NOT using the same version of REVIT that was used to create the Central file

    How to fix it properly?
    open the file, upgrade it to your version of REVIT (done automatic) then ‘save as’ the file and click the ‘Option‘ button in the Save dialog box and tick the option for ‘Make this a central file after save‘.

    Read more:
    REVIT Rocks !: REVIT – My Create New Local is Greyed Out

    EDITSteve posted about another cause for this problem, and he gives some wise advice along the lines of “before you upgrade, think about the consequences…”  Check out his post:
    Revit OpEd: Can’t Alter Create New Local Selection

    Problem

    The Autodesk Sync component does not upgrade properly under the following conditions:

    • You installed AutoCAD Beta 2013 (or Showcase Beta 2013) and subsequently install Inventor 2013.
    • You installed Inventor Beta 2013 and subsequently install AutoCAD 2013 (or Showcase 2013 )

    A couple of problems arise with this combination of products.
    Problem 1: Autodesk Sync from the Beta Product cannot be uninstalled
    Problem 2: You will receive a warning message that the Autodesk Sync component cannot be uninstalled during the installation process of the officially released product. You will need to dismiss this dialog and proceed with the installation.
    Problem 3: After the installation of the release product is completed, you will find two entries of the Autodesk Sync component listed in Add/Remove Programs.  If you decide to do nothing about this problem, the Beta Product and the release product will continue to work as expected. However, if you decide to remove the two entries of the Autodesk Sync component, you will need to follow the instructions described in the Solution section.  It is not recommended that you uninstall either of the duplicate entries of the Autodesk Sync component, as this action may break the sync functionality.

    Solution

    To replace the two entries of Autodesk Sync by the appropriate single entry of the Autodesk Sync component, follow these instructions:

    1. Download and run preInstall.exe
    2. Uninstall the two Autodesk Sync entries in Add/Remove Programs
    3. Install Autodesk Sync using the standalone installer that comes with the software
    4. Download and run postInstall.exe
    preinstall.exe (exe – 23Kb)
    postinstall.exe (exe – 23Kb)

    via
    Autodesk – AutoCAD Services & Support – Autodesk Sync issues when installing a 2013 release product after installing a 2013 beta product