When working with a large project, you may often close all or most Worksets for performance reasons.

Secret #1

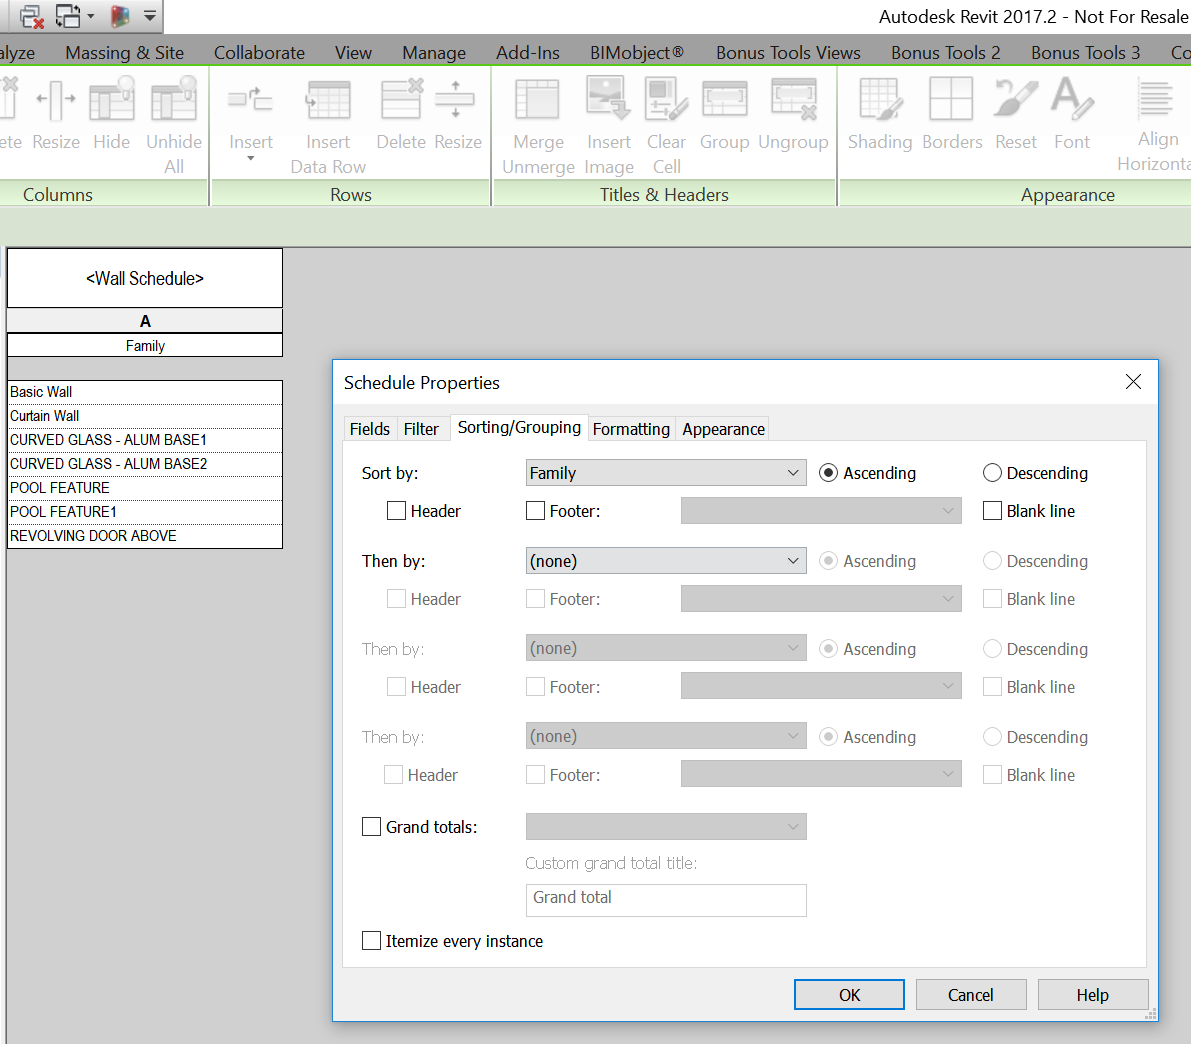
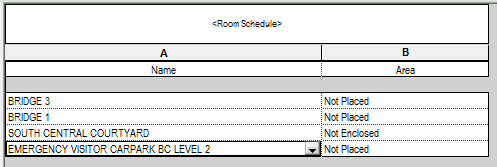
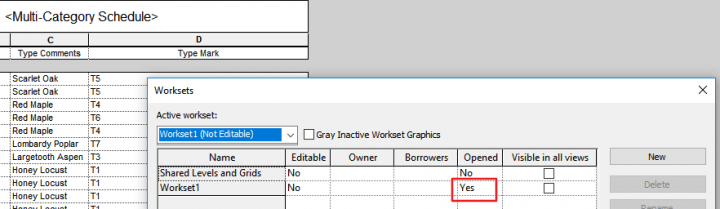
Did you know that objects still show in Schedules when the Workset is closed? And even if the Visible in all views checkbox is unticked?

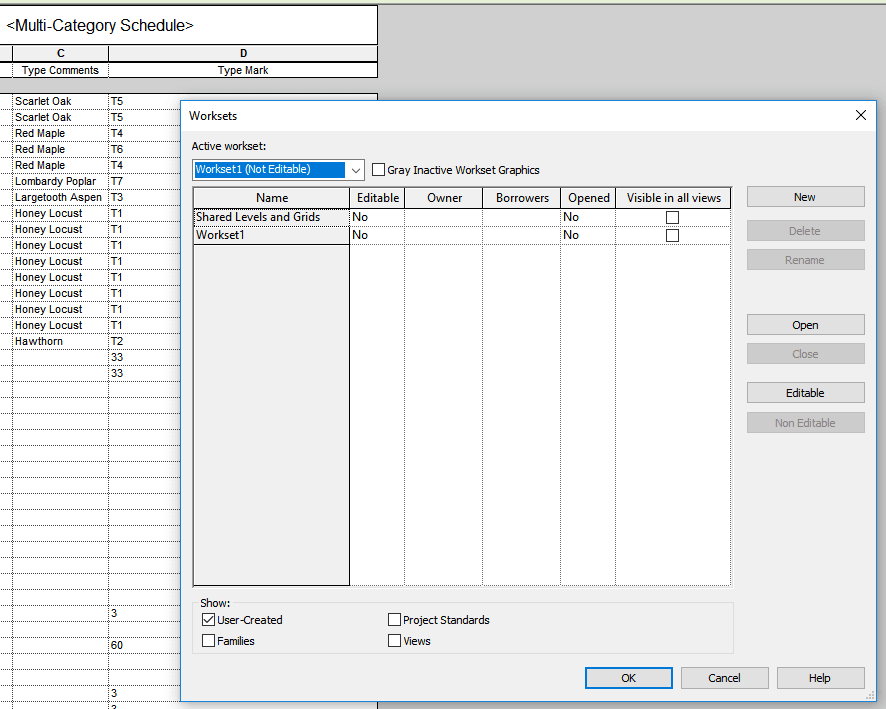
Additionally, the Schedules dialog does not give us an easy method to filter by Workset. Sometimes this results in some weird workarounds like using Dynamo to copy the Workset name to a parameter in each element (yes, I have seen this on real projects).

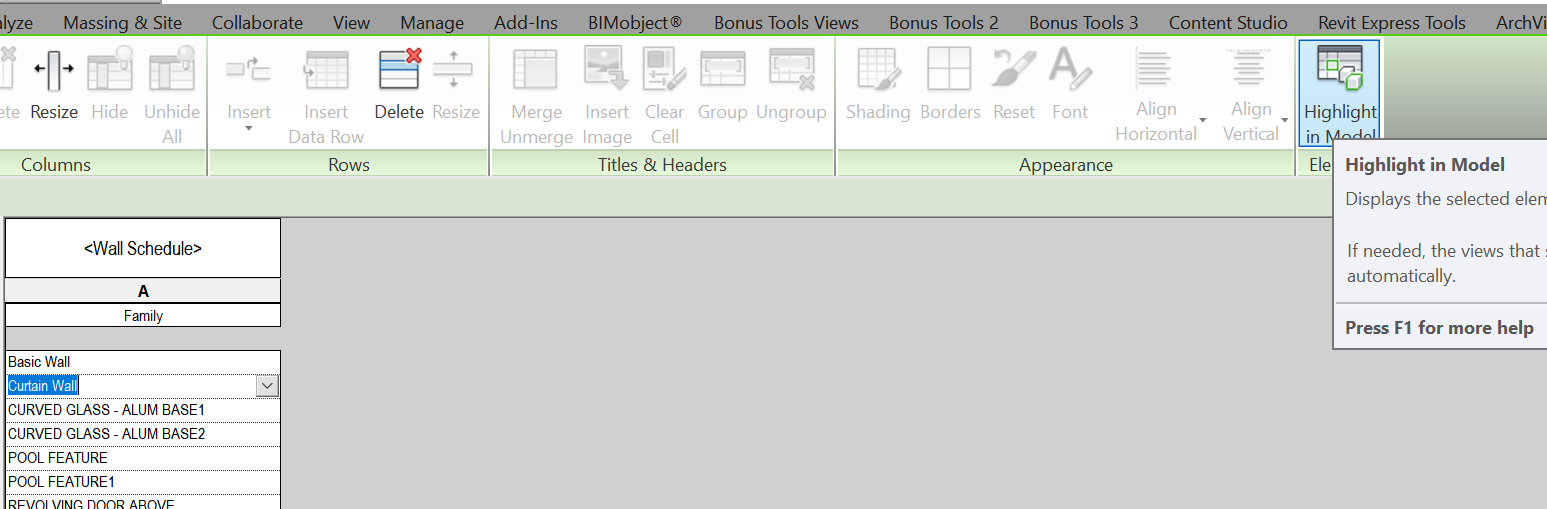
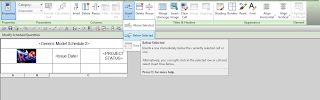
But what happens if we try Highlight in Model now, with these elements on closed worksets?

Secret #2

Interestingly, Revit will immediately and transparently open the Workset that the object resides on. This happens even if Revit can’t find the object in a view (such as because the Workset is set to be invisible in all views). You will not be warned or asked about this ‘open Workset’ action.

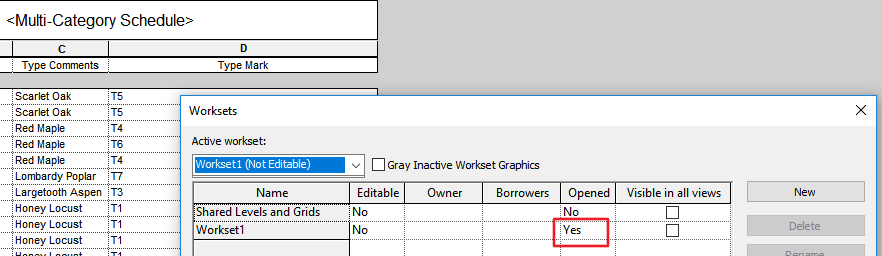
This automatic action does not create an entry in the Undo list, and therefore you must manually open the Worksets dialog and close the Workset yourself.

I’ll leave it up to you to decide if this is desired functionality or not? But it is definitely something to be aware of when working with Revit Schedules, Closed Worksets, and the Highlight in Model button.

Curtain Walls in Revit are strictly a Family of the Walls Category. Then you have Types for each type of Curtain Wall. What if you want to select all Curtain Walls at once? You can’t multi-select types in the Project Browser to do this, but…

You can make a suitable Schedule to do it. Here’s how:

  1. Make a new Wall Schedule
  2. Only add the Family data field
  3. In Sorting / Grouping tab, Sort by: Family and untick ‘Itemize every instance’
  4. Now, in the schedule, click inside the Curtain Wall cell, and
  5. Use Highlight in Model to select them all

You could then use Save Selection, or Temporarily Isolate Elements in View, depending on what you want to do next.

The first Revit point update each year typically brings some features that the dev team didn’t quite have cooked for the initial release, and this year we get something pretty special… the ability to apply Browser Organisation to Schedules node of the Project Browser. It has been that one long, messy part of the PB for a while, and I welcome that this long-requested feature has now been implemented! Good job Factory 🙂

Note that after this update is applied, there will be two versions of Dynamo Core installed, 1.2.2.373 and 1.3.1.1736…

Here are the links:

Direct Download Revit 2018.1

Readme

Release Notes

Using Schedules, you can usually use Highlight in Model to find an element (or group of elements) from a schedule row.

However, this does not work if the element is hidden in the only view that it is instantiated in – for example, a single Generic Annotation entry in a Note Block (Schedule).  Revit will not be able to find the element.

One workaround – interestingly, selecting a Schedule row actually selects the object/s in Revit, but at least in my configuration (Properties Palette on second monitor), it does not show the Properties in the Palette for that object while the Schedule view is active.  However, you can:

  1. Select the schedule row
  2. Switch to another view (for example, a 3D view)
  3. The Properties Palette has now updated to show the properties for the Element!
  4. You can trigger normal commands – such as IDs of Selection or Save Selection

Another workaround:

  1. Install RevitLookup
  2. Select the row in the Schedule
  3. Revitlookup – Snoop Current Selection… (this will give you Element ID and other info)

In previous versions of Revit, Key Schedules were often used for generic data, general notes and the like.  However, Key Schedules have limitations – one of which is that you cannot insert an image in a Data Row.

Are you ready to see a more powerful version of generic, custom schedules in Revit?  Do this:

  1. Make a Schedule that finds no elements (you can use a Filter), and turn off “Show Headers” but leave “Show Title” checked
  2. Click in the Title
  3. Insert Row Below Selected, as per image:

You can also insert columns (these are not “aligned” to actual Schedule parameters).

And guess what?  You can insert images into these cells, AND you can insert Fields / Parameters by using the drop down list:

Interestingly, this is a somewhat un-Revit workflow – we have a sandbox here for creating a custom Schedule, perhaps for Title Sheets (including Consultant Logos).  But you cannot really enter or leverage new data here – it is reading data from the Project or View (Schedule) parameters.  However, you can enter “dumb” text in any of these fields.

Idea via this comment:
David Conant (yep, that guy)
Principal User Experience Designer

In 2014, create a schedule that finds no elements (use an unused category or filter out the elements). Go to the header and add rows and columns. Voila, a generic table into which you can add text, project parameters, view parameters, or images. You can modify cell shading, borders, font properties etc. The table will appear in the project browser schedule section.
link: Revit Users | LinkedIn

Full thread:
I know Revit schedules are very versatile and can be used many other ways than simply scheduling items in a model. What are some of the more creative ways you have found to use Revit schedules? | LinkedIn

You can do a logical test between a Project Parameter (in essence, a global constant for this Revit file) and an element parameter in most schedules.  If we leverage this for Rooms, we can check if the current Room Data has been checked against the most recent set of briefing documents from the Client.

To reveal Project Information as a possible parameter in a Room Schedule, just tick the “Include elements in linked files” box.

Both the Project Parameter and the SP parameter applied to the Room in the image above are Number type, meaning we can do the “greater than” test.

You can colour a given column field using Conditional Formatting, but did you know you can base the conditional formatting test on any of the fields in the Schedule (not just the target field for the formatting?)

Revit Keyboard Shortcuts don’t work too well in Schedules, because Revit thinks you are trying to input data.

However, you can use the alternative key entry method – basically, it starts by pressing Alt, then following the onscreen text options that show up.

In some cases, this will be all you need.  But I wanted to make a quick way to Insert Data Row in a Room Schedule, and unfortunately it is buried under a drop down list on the contextual ribbon.

Here is part of the solution – add the Insert dropdown to the Quick Access Toolbar.  Now, when you press Alt, Revit will assign a shortcut to that position.  In my case, to trigger the insert data row command, I had to press this key sequence:
Alt
0
2
downarrow
downarrow
downarrow
Enter

So, still a pain.  But what if we could assign this as a macro to some smart shortcut system.  That’s where the new Radial Menus on the SpacePilot Pro come in.  I created the above key sequence and added it to a Radial Menu.  Now I just press a button on my 3D mouse, select the Data Row shortcut that I created, and there it is…

See the top right banner on this page for an affordable way to enter the 3D mouse world…

What does it do?
Gives you more granular control over the calculation of wall and opening area

The results you get are divided according to an area value you can set. All the openings below that Maximum value are stored as Opening Area Smaller Max, and the total openings area are added to the Opening Area Parameter. Now, you can schedule this parameters and get the Gross area of the wall by playing with calculated parameters.
Heads-up and more info from here

Where can you get it?
From here