If you have just scaled an object (such as a Raster Image) at a certain scale, did you know you can re-use that previous scaling method very quickly on other objects?

Simply:

  1. Scale one element
  2. Select the next element
  3. Switch to “Numerical” in the Options bar
  4. The previous scaling method is already here
  5. Click on the desired basepoint (origin) on the element
  6. The object is immediately scaled

https://wrw.is/wp-content/uploads/2016/07/numerical.png

We have come across a slightly annoying issue: someone modifies a Linked DWG file in AutoCAD, and upon reloading in Revit, the Import Scale will have been somehow automatically and incorrectly set to some Imperial conversion factor.

The fix is relatively simple – just reset the Import Units and Scale Factor to correct settings:

The cause of this particular seems to be that some users are modifying DWGs in versions of AutoCAD and saving them in newer formats than Revit can understand.  In this case, Revit 2012 was not impressed with 2013 DWG files from AutoCAD 2014…  If the AutoCAD Options Dialog, Open and Save was set to save as an older DWG version (like 2004), there was no problem.  However, if the file was saved to 2013 version, this would trigger various errors from Revit 2012 when trying to reload it.

In the course of this change (including messages about “Do you want to import from Paper Space” etc), Revit 2012 basically modified the Scale of the DWG.  The trigger point for this could actually be when you try re-linking the DWG, because it seems to have “disappeared” after the version problem.  When finally resaving the dwg to an older version and reloading to fix the scaling problem (often associated with a fatal error / crash), the Scale would probably have to be reset as detailed above.

This PDF may be useful:
http://communities.autodesk.com/india/sites/default/files/india/resources/Acad-imports-issues.pdf

After inserting an image in Revit, sometimes the X and Y (Raster Image Width and Height parameters) values of the image are somewhat “warped” and need to be adjusted to match your model background.

I created a Line Based Detail Item family that generates a scaling factor that can be used to properly warp the image aspect ratio.

Just untick Lock Proportions, type an = sign in front of the value that needs to be warped and then put an asterisk (meaning multiply) followed by the Scaling Factor that the family generates.  It will look something like:
=34542.8*1.056

The image below explains it further:

Download the Family here

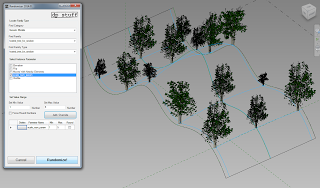
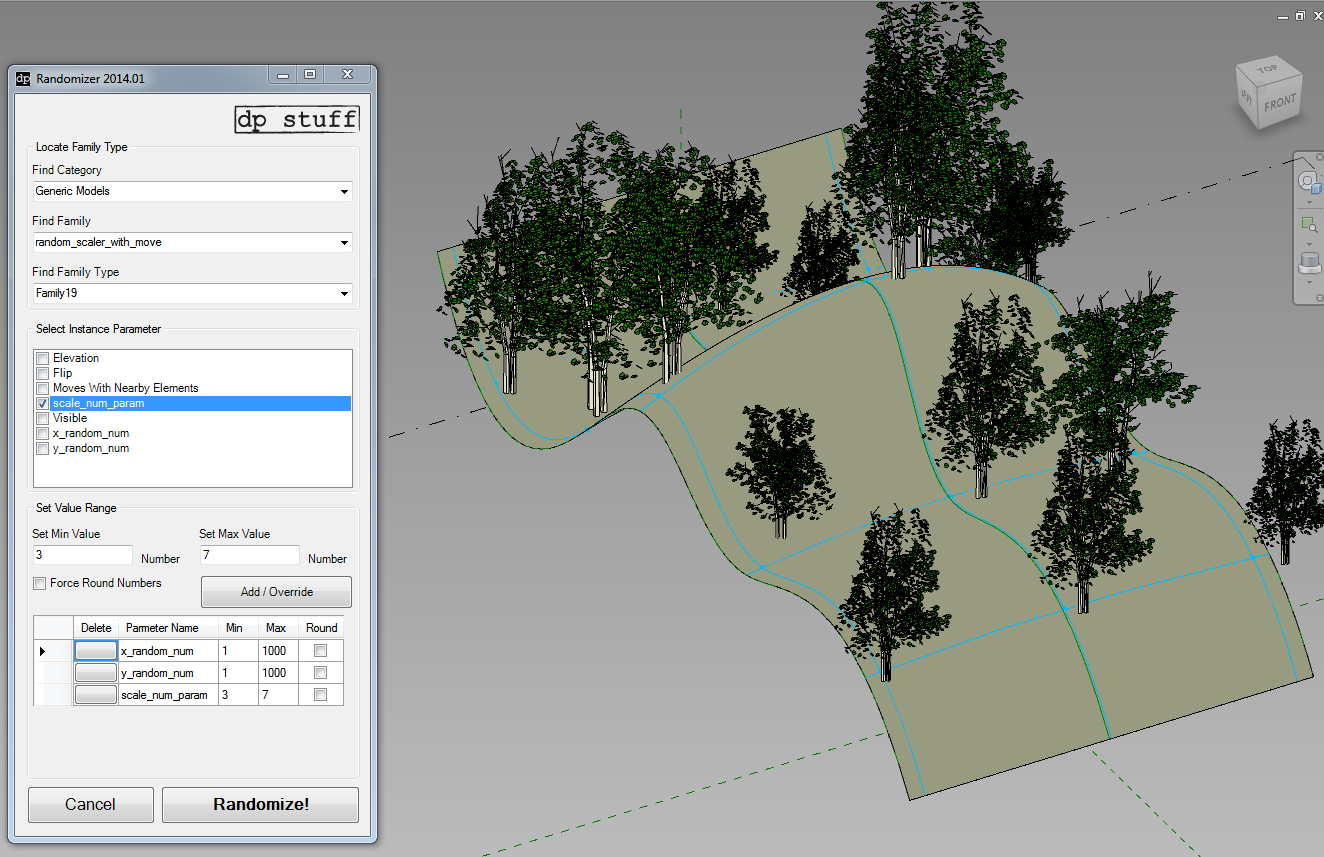
After spending some time trying to make a workable, geometrically driven random reactor, I decided that it was far easier to use dp Stuff Randomizer (get 2014 version for free from here or older 2013 one on Exchange here).  This is a great little addin that just drives random instance number parameters into family instances.  You pick the parameter to drive, give it a max and min “bracket”, click Add and then Randomize.

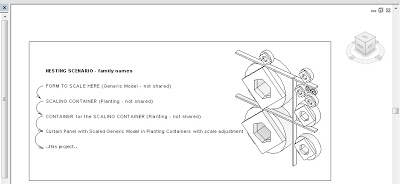
I set up an Adaptive tree family that used the scaling method, linked through some parameters, Repeated it on a Divided Surface, and then used Randomizer – this random forest is so easy 🙂  With the scaling method working, we can even just drop some imported Sketchup trees into the most deeply nested family (the one that gets scaled), reload it through the hosts back to the project, and even these imported CAD files will scale correctly.

This is the simple tree randomizer (height only):

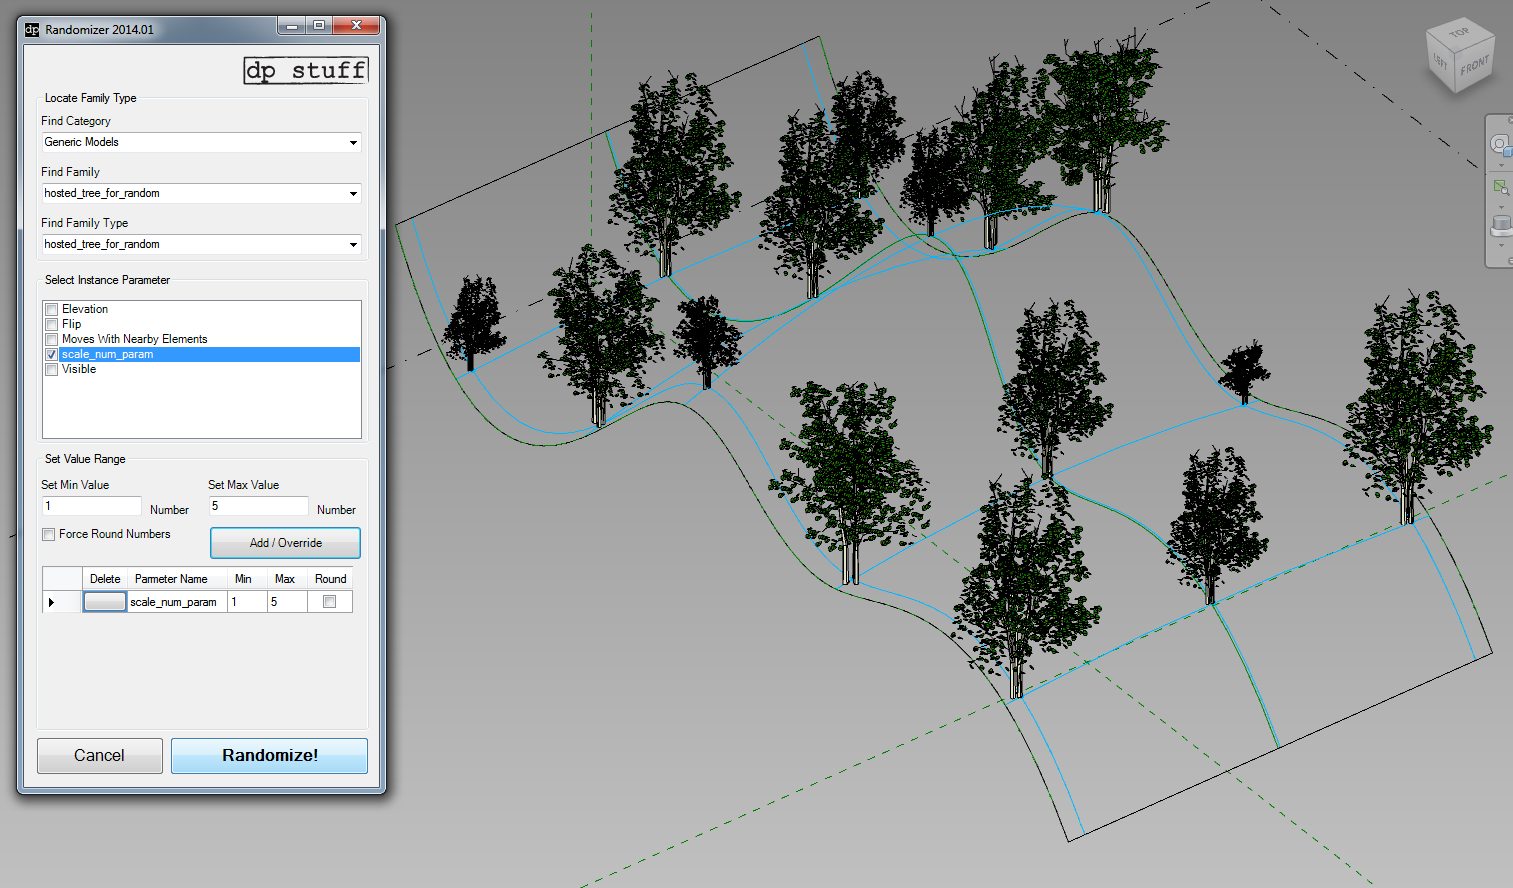
Next, I added an X and Y offset so I could randomize the position from the grid slightly, resulting in this…

Tree randomizer with move parameter:

Here are the sample files for download.  Enjoy!

(this is the Sketchup tree that I used for the example above)

Dave Light gives the very concise version:
So as others have shown, I have various nested generic model families, dropped them into a plant family template. This family is then nested into another plant family. This is then placed into a project. Using the height parameter in the family, changing this, scales the family.
via
Revit : Scaling families – #empirebim

In brilliant form, he then describes how you can use an instance reporting parameter in a Curtain Wall Panel family to drive the Height value in a nested Planting family, making a Curtain Panel that can scale its nested geometry to any panel size.

To save you some time and trouble, I have created a template for this scenario.  Basically, it is a Revit project file that contains the Curtain Wall Panel family with the fully nested setup already in place.  I also added a Scale Override type parameter in the Curtain Panel family that allows you to globally adjust the scale of the resident geometry.

Download the project and family files here
(the project RVT is Family Scaling Template – GM to Planting to Planting to Curtain Wall Panel.rvt)

Note:  using a shared Generic Model family will not work (it breaks the automatic scaling ability of Planting families)

EDIT:
Looks like original credit actually goes to Kelvin Tam.

Original credit for this general idea goes to Marcello (I think), and partly to Dave.  It is definitely one of those hacks that is getting re-interpreted and expanded upon as it gets blogged and reblogged…

Once you have imported an image into Revit and then warped it (by unticking the Lock Proportions box and resizing it), then it is not immediately evident how you can reset it to 1:1 (its default X:Y state).  Even if you toggle the tick box, it doesn’t reset the scale to be un-warped.

Here is how you can do it:

  1. Select image and Edit Type
  2. Take note of the pixel sizes
  3. Directly set the image size using these values in the instance properties
  4. Tick the Lock Proportions box

Also, did you notice that Revit records where the image was originally loaded from?  Even though there is no ‘link’ as such, this does allow you to find and edit the source image easily.

    If you have problems with your Revit Filled Region hatch patterns displaying grayscale when they should be black, its probably because Revit thinks that the lines are too close together for the scale of view that you are using.

    What Revit wants is for you to increase the scale or spacing between the individual lines of the Filled Region pattern – then it will switch back to black, as it should be.

    Using a Model pattern, I was able to observe the pattern go from light gray to black as I changed the scale (spacing) between the lines.

    Interestingly, using a Drafting pattern allowed me to put the lines in the Filled Region much closer together…

    Some more info at:
    RevitCity.com | filled region pattern color changes when drawing scale changes