At Virtual Built, we typically create a federated Revit model for every project we work on. This allows us to run a host of automated processes on the links, right from the federated file.

Recently we received a dataset for a high rise building. The Architect had used 5 typical linked ‘module’ files, copied throughout a master file.

Initially, I used a Dynamo script to collect all the link instances into a saved selection set. I could then copy / paste aligned the link instances into our federated Revit model:

Link Instances to Selection Set


The Problem

This works fine, but in this models there were also nested consultant links inside the Architectural linked modules. So we have:

Architectural container file -> Architectural module files -> Consultant nested links


We want:

Federated Central file -> Everything else (no nested links)


Next challenge: how can we quickly promote those nested links into our federated model? Well, we currently have the module files populated, so how can we leverage those positions to promote the nested links?


Promoting Nested Links

It is a bit hacky, but here is how I went about it. For each module file:

  1. Create an empty proxy file (New Revit project, no template)
  2. Open the Module file and resolve all link paths (so they are loaded)
  3. Set links to Attachment
  4. Copy / paste the link Instances from the module file (Level 0 or Base Level) into the empty file (Level 1, default level). You can use Dynamo graph above.
  5. Save the new proxy file as ‘ModuleContainer’ or similar. We know have a file that only has link instances in it.
  6. Open a detached copy of the Federated Central file (you can save as temporary copy if you like)
  7. Manage Links
    • Select the current Module file,
    • Reload From,
    • replace with the ModuleContainer you created. Once you have done all the modules, you are ready for binding as described below.

After populating the detached Federated Central file, we just need to Bind and then Copy / Paste the free instances:

  1. After load, Bind the ModuleContainer files to the detached Federated Central model
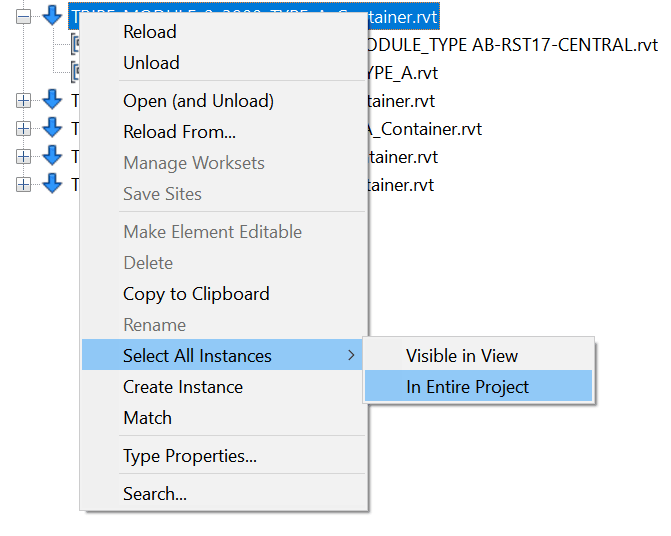
    1. To do this, right-click on the file in Revit Links in Project Browser

    2. Select All Instances – In Entire Project
    3. In the Ribbon, click Bind Link
    4. Untick Attached Details, Levels, Grids
    5. Click Remove Link when prompted
    6. Your nested links are now promoted!
  2. Optional: Ungroup all of those bound free instances (select all from Project Browser, Ungroup in Ribbon)
  3. Open the real Federated Central file
  4. Copy / paste the populated free instances from the detached Federated Model to the real Federated Model. Use the Dynamo script to collect them.
    Tip: Paste into a closed workset for better performance.
  5. Close the detached one, and sync the real one

The only thing we technically ‘broke’ or lost in this process is the module link->nested link relationship. So if someone decides to move one of the nested links in the module link, obviously that won’t replicate into the Federated Central file.

Hope this helps some of you out there building or dealing with large federated models.


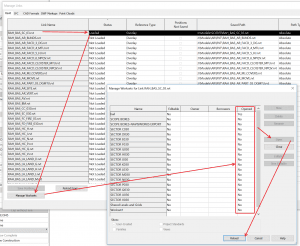
When working in Revit with linked files and worksets, it can be pretty exciting / maddening to figure out where an element actually is. I’m not talking about the 33 Reasons Something Might be Hidden (and here), the Order of Linework Overrides, Places to Hide Things, or even the View Discipline.  I’m talking about whether or not an object is actually even loaded into the Revit session for viewing purposes…

Consider this hierarchy and let me know what you think:

“I can’t find this object, is it loaded?”

  • If the current model is non-workshared:
    1. Does the object reside in a link?
    2. Is the link loaded?
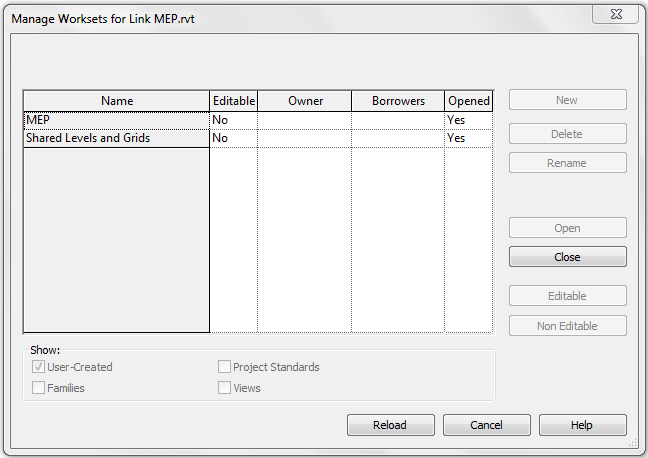
    3. In Manage Worksets for the link, is the relevant Workset open?
  • If the current model is workshared:
    1. Is the object in the current model?
      • If yes, is the Workset it resides on open?
    2. Does the object reside in a link? If yes:
      • Is the Link Type Workset Open?
      • Is the Link Instance Workset Open?
      • Is the Link loaded in Manage Links?
        • In Manage Worksets for the link, is the relevant Workset open?

The above does not even consider the next level of nesting (Attached Links to a Link loaded in the current Host Revit model).

Enjoy Revit everyone 🙂

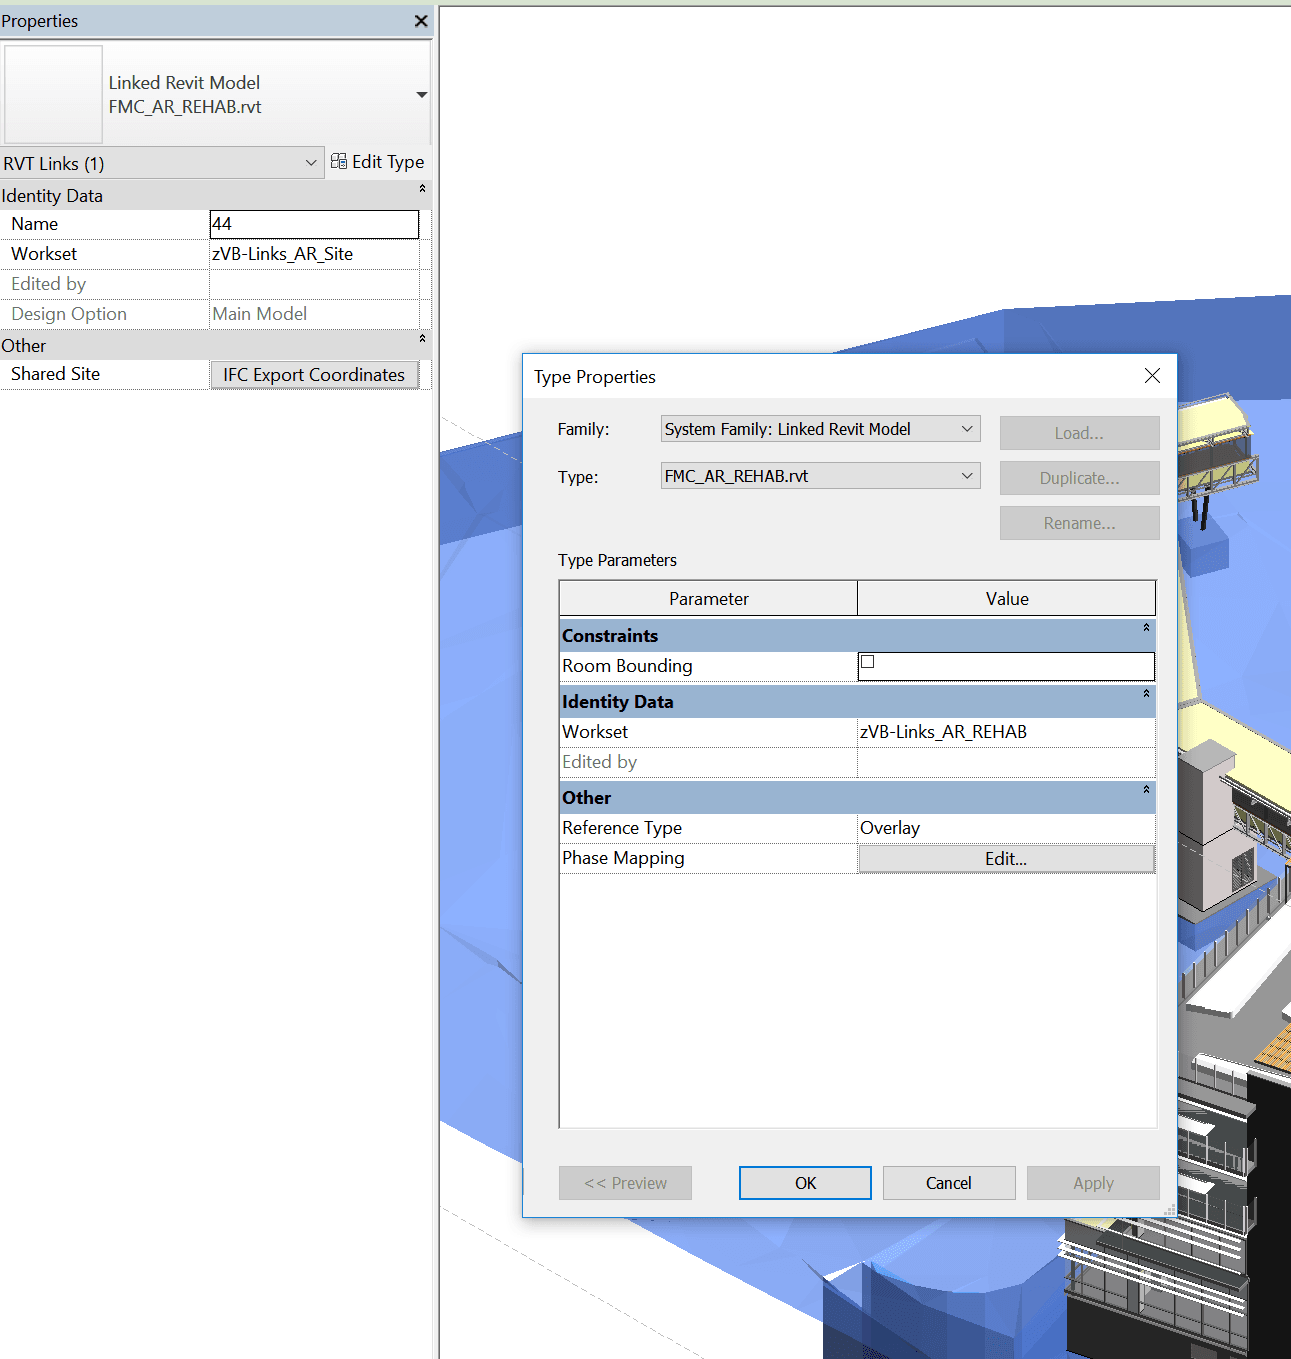
In Revit, each Link is bound to both a Type and an Instance. So you can have one Link ‘Type’ – relating to a single RVT file that is linked into the project. But it can be placed multiple times in the project, thus having multiple instances. In workshared projects, the Type and the Instance can belong to different Worksets.

Did you know you can use Linked Views to display two identical copies of the same linked model in different ways?

To add control, you should create 3 worksets – 1 for the Type, and 1 for each Instance, as shown below:

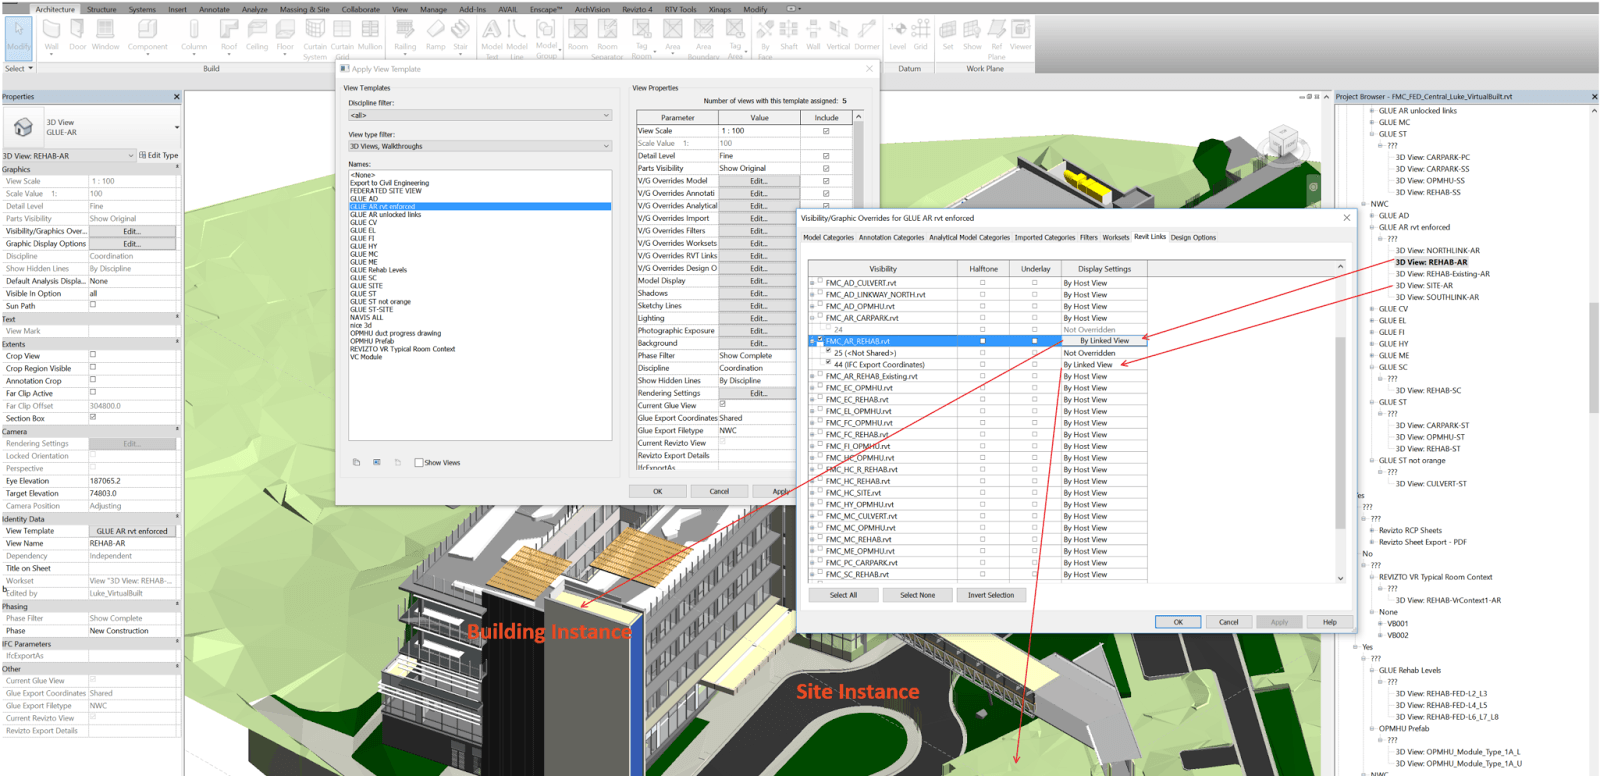
Then, set up two different Linked Views in that linked model. In this particular case, I want to use a model converted from ArchiCAD to a single Revit file. But I want to be able to separately load and display the Site objects, and the Building objects. So I have an Link Instance for each, and linked views for each. The whole rig can be seen in the image below.

Using the worksets, I can separately Load / Unload each Instance (closing a Workset unloads any Link instances on that Workset from memory). And using the Linked Views and Overrides for the Instance, I can display each instance as I like. I can also load both instances and show both in a ‘combined’ view.

Final note: Link Instances can be located in different positions in the Host model, and they can have different Shared Coordinates. Using the methods above, you have a lot of flexibility to be able to use a single linked Revit model in many different ways…

It can be pretty hard to track what is visible in a big federated model, and even harder to figure out when something has been changed or updated. Until now…

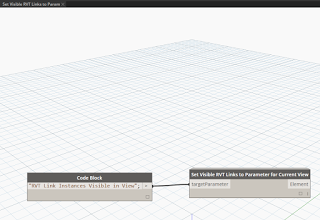
Check this little node out:

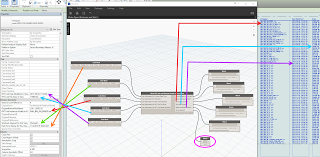
This gets five pieces of information and writes each of them to a View instance parameter. Currently, it works in the context of the currently active view in Revit. The information acquired is as follows:

  • current date / time
  • worksets currently opened
  • RVT links that are visible in the view
  • the file sizes of those links
  • the date modified for those links

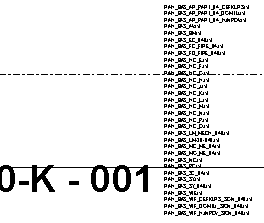
The ‘list items’ are converted to a string with line breaks. Then when it is referenced in a Label in a View Title family (on the far right of image above), it basically shows up as a list.

Future applications of this can easily include reading the link status from the view parameter (by converting the string back to a list), comparing it to current link status, and then immediately showing what models have been updated and need to be reloaded…

There is no immediately easy way to override the colour of an entire Revit Link. Of course, you can set up a View Template and override all of the individual subcategories, but that can get time consuming when working with many links…

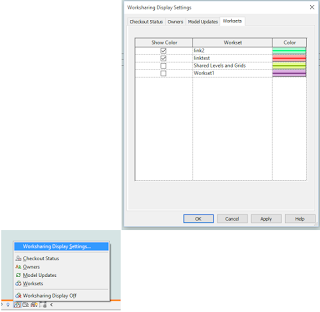
Worksharing Display Mode gives us a quick way of visualising Worksets. What if we put each Revit Link on its own Workset? Then if we set Worksharing Display Mode to Worksets, these Links are overridden with the Workset colours selected in the dialog:

Unfortunately, the Worksharing Display Mode setting is a temporary override (notice the border around the view?), and it will be switched off when we close and open the file. However, the colour choices will be retained. Is there a way we can quickly ‘turn on’ the Worksharing Display Mode for all views in the document? Perhaps this could be done just prior to printing, or at the start of an editing session?

Enter… you guessed it… Dynamo.

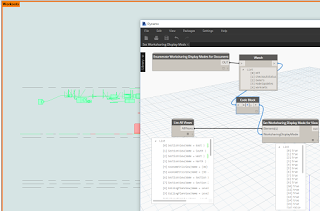
I made a node to Enumerate Worksharing Display Modes available, and another one to Set Worksharing Display Mode for View. Finally, I adapted the archi-lab Get All Views node into a List All Views node. Now, we can set them in one click:

And a Screencast:

Each time you print, you will be prompted to “Leave the mode on and print…“, but the colour override will print fine 🙂

Update:
Colours will transfer using Transfer Project Standards, as per:
Transfer Project Standards

If you populate a project with the desired worksets, usernames, and colors you can automatically transfer most of this data over to another project.  Under Manage > Transfer Project Standards, there is a new option for Worksharing Display Settings.

Keep in mind this will not transfer over workset names from one project to another. 

It will however transfer over workset colors, should the same name workset appear in both projects.

Each category has a Show Color column with a checkbox; these are project specific and do not transfer.
Revit 2012 Worksharing Display Modes and Transfer Project Standards – The Revit Clinic

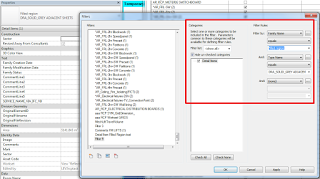
Let’s say you have some linked RVT files and you are using ‘By Linked View’ for visibility. What if you just want to hide off a single type of Filled Region from that Linked View? Is it possible? Yep, here’s how:

  1. Make a new View Filter for Detail Items that looks like the below, using Family Name equals Filled Region, and the relevant Type as properties:
  2. Add this View Filter to your View or View Template
  3. In the visibility properties for that Link, make sure you set Filters to By Host View…

Done!

    Here’s how:

    1. Make a View parameter (Text) in Revit that will hold the list of RVT Links that are visible in a given view
    2. Install Dynamo and my Bakery package
    3. Go to the required View
    4. Set up your definition as below and run it:

    This will create a list and convert it to a single string with a line break between each entry, meaning that the resulting view Label in your View Title needs to account for it to ‘grow’ (vertical align to Top or Bottom as required).

     This will need to be run each time you want to ‘update’ the visible Revit link parameter.

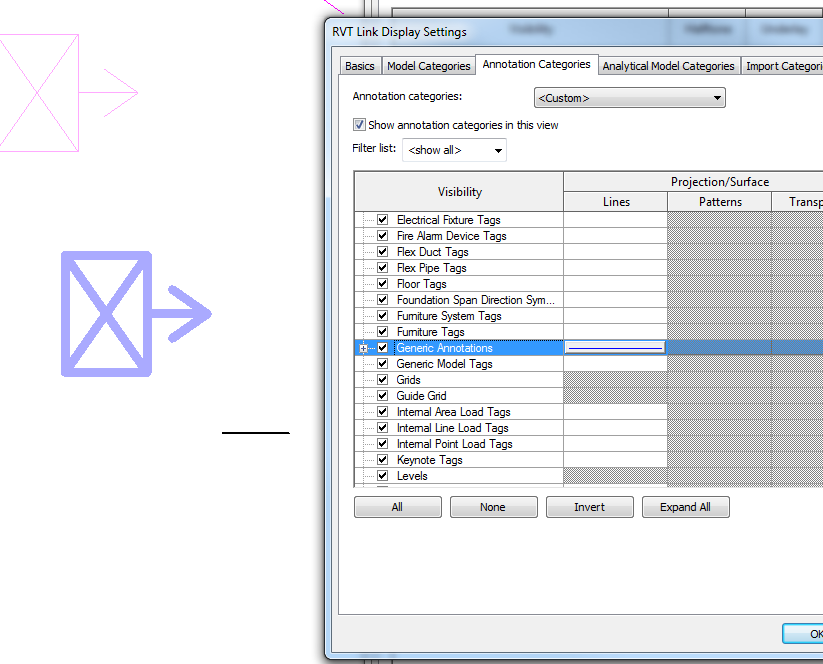
    Oh wait, you can’t… put more simply, you cannot override the lineweight of Generic Annotations for a linked file. In fact, it turns out you can’t override lineweights for anything, including Model elements in a linked file… you are stuck with them. You can Transfer Project Standards into the link but that is a painful workaround.

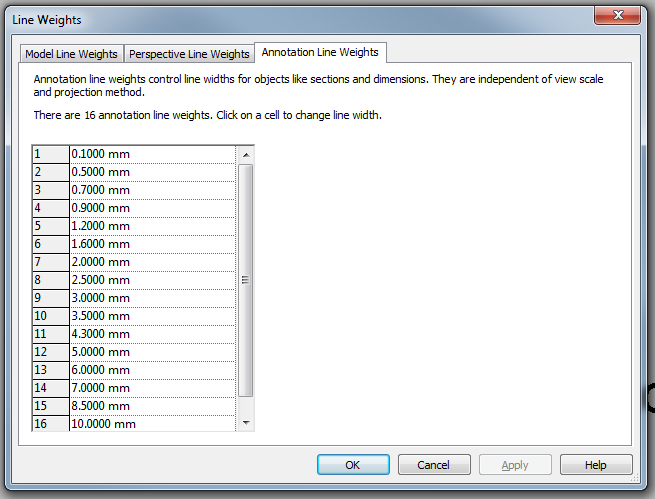
    You can override the colour and linetype, no problem. But no matter what you try: Object Styles, Visibility Graphics, Revit Link Visibility overrides, none of this overrides the actual Lineweight of Generic Annotations in the linked file. It is using the value from the Line Weight settings, Annotation Line Weights tab IN THE LINKED file to draw these items in the host file. If Pen 1 is set to 0.3mm in the Link, you will never be able to get a lighter pen weight override in the Host.

    To me, this is a bug. If the Revit Link visibility is set to Object Styles – By Host File, annotation line weights should be overriden to match the applied pens.

    Unfortunately, this is not the case. Here is a video showing the problem:

    Upon further investigation, nested Annotations in Component families that live in a Linked File can’t really be overridden by Visibility/Graphics, unless you edit the Revit Link visibility. Even then, you can set line weights and colours but they will still reference the Linked File Annotation Line Weights.

    Fairly nasty stuff, particularly if you are working with linked files from consultants / contractors that extensively use nested Generic Annotations inside their families (sidenote: I’m pretty sure this always a bad idea. Model in 3D, use tags for text, if you have to have text in the family use Model Lines or Model Text or some other method so that you don’t have nested Generic Annotations. They scale wildly around and become a crutch for not modelling in real world scale).

    Ok, so we have a problem. I discovered that there is one master switch that works in the Host file to get around this.

    1) Set the Family Category to Halftone, this will override the linked, nested Generic Annotation

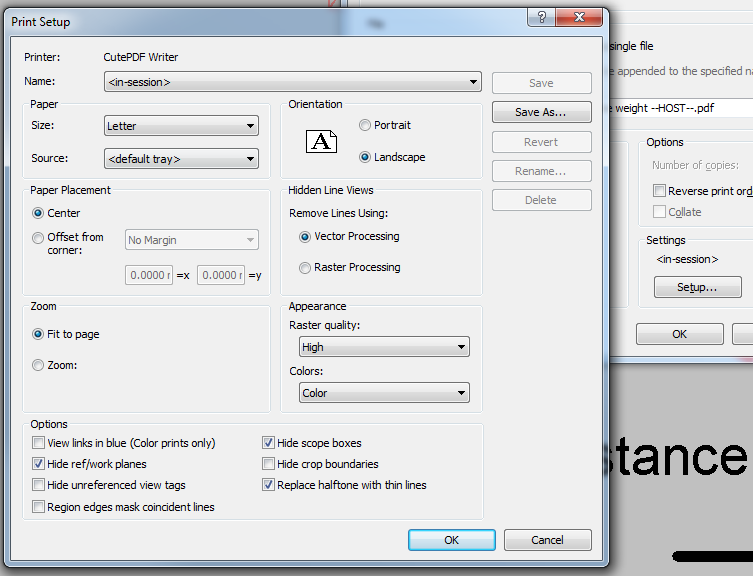
    2) When printing, tick the “Replace halftone with thin lines” box in Print Setup

    I realise that this is not WYSIWYG, and I really don’t like that. But it does work. Here is a video:

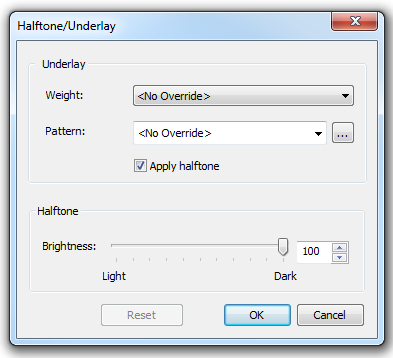
    But wait, there’s more. We can actually make it closer to WYSIWYG (is that a thing?), if we adjust the Manage – Additional Settings – Halftone/Underlay to 100. The lineweight will still display incorrectly, but it will print correctly, and there will be no halftone effect.

    Some further reading:
    Linked File Line Weights – The Revit Clinic

    Let’s say you have 15 RVT links in FileA, and you want to copy them into FileB. Revit doesn’t usually want you to have two instances of the same linked file loaded into two different open files in a single instance of Revit (that was a mouthful!) 

    However, we need to work in the same instance of Revit to be able to copy/paste. So, here is how you can do it (relatively reliably):

    1. Open FileA.rvt
    2. Open FileB.rvt
    3. In FileA.rvt, Select all of the Revit links that you want to copy (easiest in a 3D view)
    4. Switch to a Plan view and Ctrl+C
    5. Still in FileA.rvt, open Manage Links dialog and unload all of these links that you are copying
    6. Switch to FileB.rvt, and go to a Plan view that matches the one in step 4
    7. Modify – Paste – Aligned to Current View
    8. Even though they are unloaded in FileA, the important stuff is in the Clipboard in memory, so Revit can still paste properly into FileB, and you don’t have a “conflict” of the file being loaded in two files at once
    9. Save FileB, close FileA without saving (or reload the links etc)

    There you go, you have learned how to copy unloaded RVT links. Enjoy!

    (Note: this was tested on Revit 2013 Update Release 3)

    When working with multiple linked files, you can utilize the ability of Revit to close Worksets in Linked Files, and in some cases this is a good visibility shortcut. Along these lines Simon over at BIM42 has written “a few line of code for set up every Scope Box, and Reference plane to the correct workset…”

    See the code at:

    Managing linked worksets | BIM 42