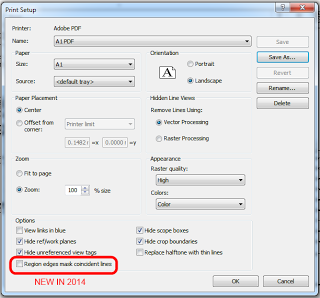
Have you noticed this in 2014?
If I can borrow some imagery from Caddman13 on the Autodesk Forum, this is what it means:
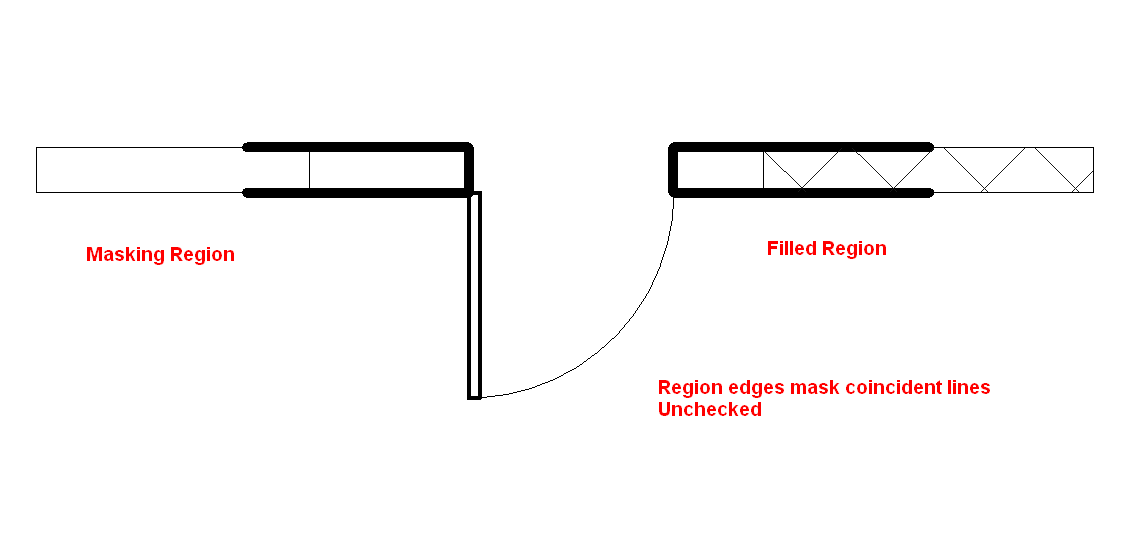
Unticked:
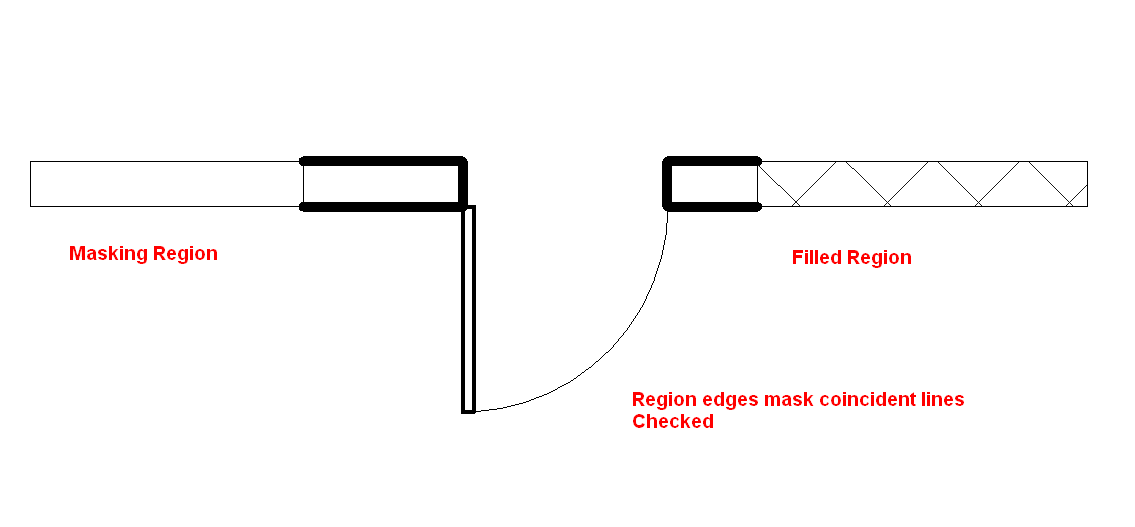
Ticked:
What Revit Wants

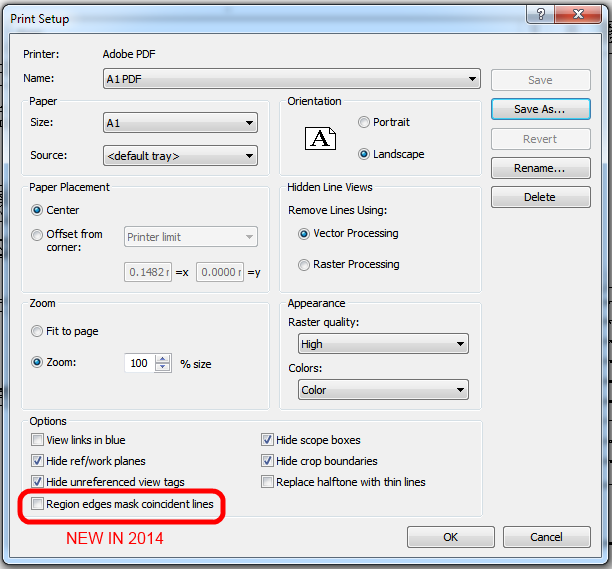
Have you noticed this in 2014?
If I can borrow some imagery from Caddman13 on the Autodesk Forum, this is what it means:
Unticked:
Ticked:
To do this in Windows 7, open up the printer from the Devices and Printers option on the Start menu (or search for your printer by name). Drag the relevant files onto the printer window, and you’ll see a dialog box asking if you want to print multiple files. Click ‘Yes’ and they’ll all be opened and printed in their entirety, with the default settings.
from
Print Multiple Files At Once With Drag And Drop | Lifehacker Australia:
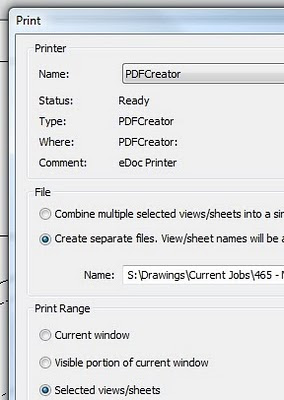
Sometimes you will want to produce a large set of PDFs where each drawing sheet is in its own PDF file. You also want the PDFs to be automatically named and created. There are a number of ways to accomplish this – here is the simple way that I use.
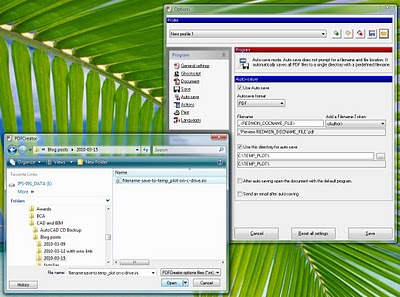
You can tweak these settings to your own individual taste – you may want to change the Autosave folder, for example.
Revit wants you to work efficiently, and it wants you to maximise the value of the data inherent to the BIM model. In this case, we leverage the View/Sheet name to automatically name the PDF files.
But what if you want to modify the filenames – perhaps adding a prefix or suffix to all PDF filenames? Well, you will just have to subscribe and wait for the next post…