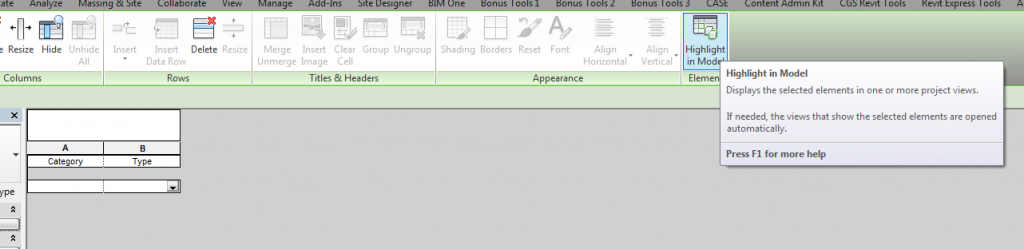
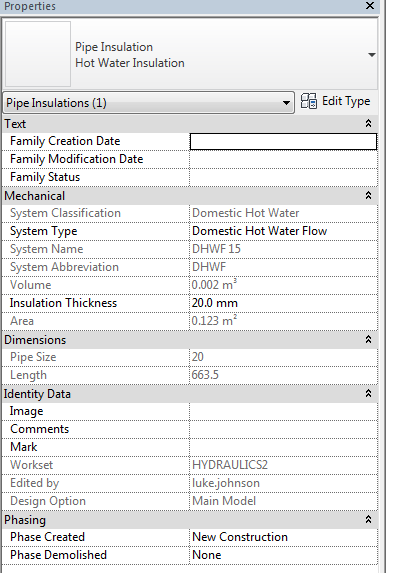
Insulation in Revit can be incredibly difficult to work with. It can be difficult to select the insulation individually, but you can select them by using a specific schedule (ie. Pipe Insulation Schedule) and then using the Highlight in Model ribbon button. However, once selected, you still can’t change the Workset (it is grayed out). And it seems that the Workset is set by whatever Workset was current when the Pipe Insulation was created (this issue seems to affect upgraded models, but it may occur in other situations). Some people have ‘solved’ this by going through and removing and then remaking all of the Insulation! But that is not What Revit Wants, not by a long way…

So, you might think “we can Group them and then change the Workset“. Also not possible – you can’t group Pipe Insulation without selecting its host Pipe. But guess what? When you select a host pipe and Group it, it will automatically add the insulation to the group too…

See where we are heading? If we want to change all Pipes and Pipe Insulations to one specific Workset, let’s do it this way:

  1. Make a Pipe Schedule
  2. Select all Pipes with Highlight in Model
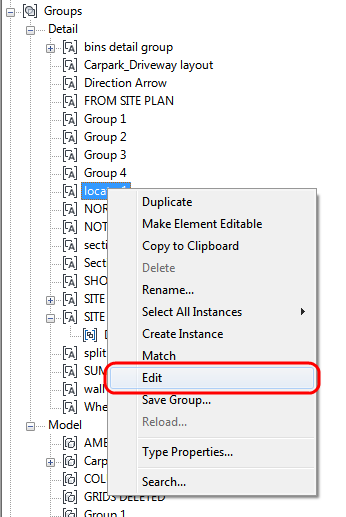
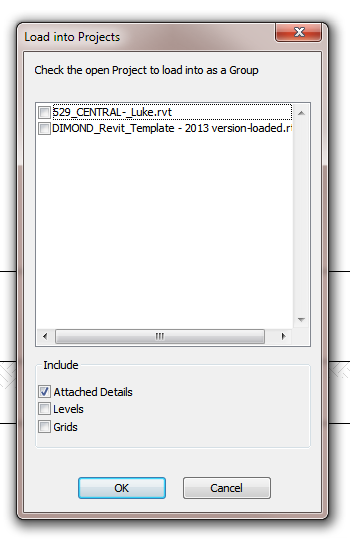
  3. Group them (takes a while on 10000+ items). Now we have a massive group, let’s…
  4. Change the Workset of the Group
  5. Finally, Ungroup the massive group. Done!
    (Note: you will observe that the members of the group include Pipe Insulation, even though you didn’t explicitly add them)


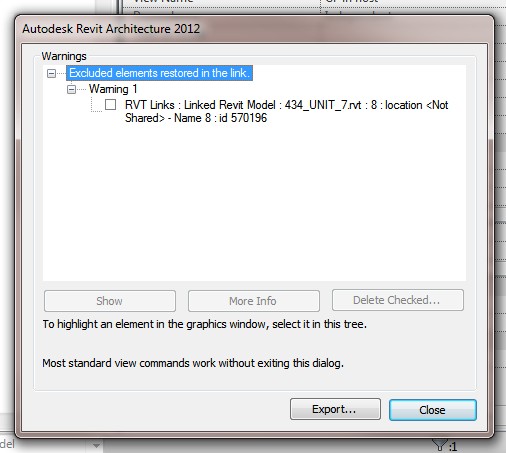
Warning: be wary of the impact of grouping and ungrouping items in your particular project model. In most cases, it shouldn’t hurt too many things, but it would be advisable to test this process on a smaller set of your sample data first.

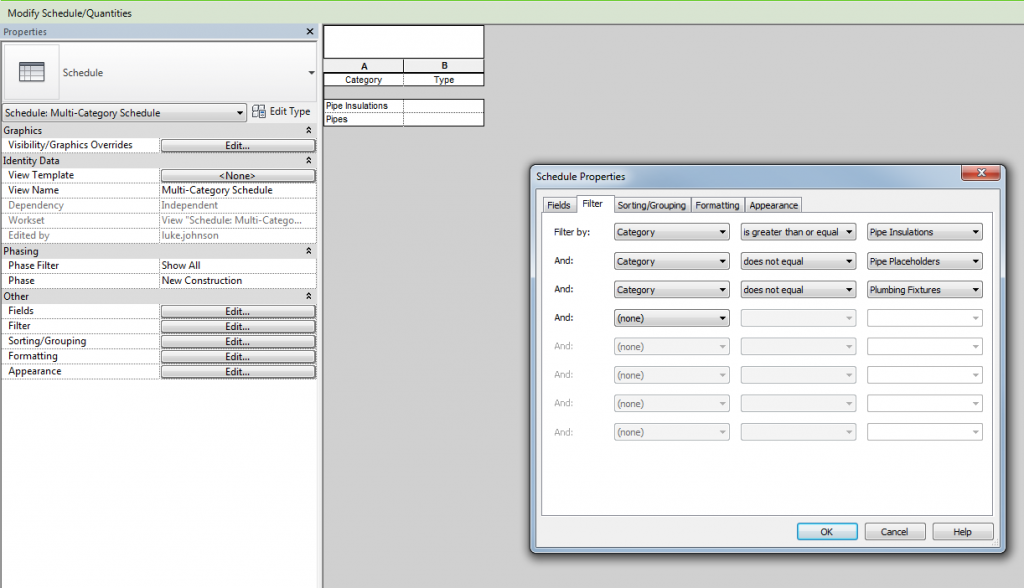
Slightly related tip – You can use Multicategory Schedules to Select Objects on Certain Categories
Let’s make a Multicategory Schedule, and then filter it to show only Pipes and Pipe Insulation (using some ‘greater than’ and ‘does not equal’ filters). Then, Select them all with Highlight in Model.


As part of meeting his RTCNA requests, Harry posted this idea for saving all groups to file:

  • API can be used to generate a text file listing all model groups. 
  • this text file can be used as input to a journal file that saves each group to its own file

Its good to keep this general principle in mind when working with and around Revit – if it doesn’t seem possible, try and think about it from a different direction. Usually there is another way to attack the problem you are facing. Don’t give up… just find the unobvious answer, make it work, and then share it with the rest of us!

View the demonstration video at:
#RTCNA Wish 6: Save all groups to file | Boost Your BIM
 
via https://twitter.com/BoostYourBIM/status/480096851555672065

A great way to test if you know What Revit Wants is to try and run a complicated high rise or health facility using model groups. The principle and general functionality of groups is fine, but they can get very difficult to manage if not treated properly. However, they can be mastered.

As Ceilidh Higgins puts it:
Whilst groups are error prone and seem to have a lot of bugs … they are still the best available solution within revit for collecting together repetitive sets of objects. 

She recently presented at RTC on this subject, and she has provided the associated presentation slides for download and viewing.

Embedded here:

via
Get your groupon! A guide to Revit groups | The Midnight Lunch

You may also be interested in this AU class by Aaron Maller:
Autodesk® Revit® Links, Groups, and Documentation: How to Make It Really Work!

Let’s say you want to quickly schedule a particular Model Group’s instances in your project, and also be able to quickly “find” them in the project:

  1. Make a new Generic Model that can have everything “hidden”
  2. Make sure it has a Shared Parameter that is set to “Varies by Group Instance” in the Project
  3. Make a Schedule that shows only this family (using a Filter).  In essence, this schedule will now be scheduling the actual group.
  4. If you want to, enter some identifying information into the “varying” Shared Parameter that you made in step 2
  5. Use the Highlight in Model option in the Schedule to locate each instance

This process is only made possible in 2014, due to the ability for parameters to vary by Group Instance.

I adapted and expanded on this method over at:
Auditing and Comparing Model Groups in Revit 2014

    I have been searching for a quick and easy way to compare exclusions between Group instances – and nothing really exists at this point.  So, I have developed a method to do this by using Revit and some schedules.  It doesn’t require add-ins, macros or extensions – but it does require full Revit 2014.

    Part A – create a Shared Parameter, applied to all Categories, that can vary by Group instance

    Part B – To automatically create selection sets for each group instance

    1. Open a new 3D view
    2. Edit the most complete version of the Group (the one with the least exclusions, ideally none)
    3. Select everything
    4. Save Selection set
    5. Finish Group – Revit will automatically create a unique Selection Set for each Group instance

    Part C – fill the parameter from Part A with appropriate values for each Group instance:

    1. Load one of the automatically created selection sets
    2. Determine what parameter value represents that Group instance (for example “Level 8”)
    3. Filter the Selection – you will need to untick Lines, Wall Openings and Curtain Wall Grids (these items do not accept parameters)
    4. Make Elements Editable
    5. Edit the Shared Parameter with the appropriate value and Apply (ie. “Level 8”)
    6. While the elements are still selected, save the filtered Selection Set
    7. Deselect everything
    8. Select the Group instance and Isolate it
    9. Load the Selection Set from step 6 and Temporary Hide
    10. Any elements left over will need to be selected and have the same parameter from step 2 applied to them
    11. Rinse and Repeat steps 1 to 10 for each Group instance you want to audit / compare.
    Make a set of Schedules.  You will typically need at least these Schedule types (depending on what Categories exist in your Group):
    • Multicategory Schedule
    • Walls
    • Floors
    • Ceilings
    • Columns
    Make sure the Schedules have at least these fields:
    • The Shared Parameter you created in Part A
    • Family and Type
    • Count field added and set to Calculate Totals
    Filter the schedules – you can use the Shared Parameter you set up with an “is greater than” blank operator to show only elements that have something in that parameter.

    Using Sorting to make things look right, you can end up with a schedule you can quickly scroll through to find differences in Model Groups:

    Additionally, using Highlight in Model directly from the schedules will help you to figure out exactly what elements are missing or different.

    EDIT Along similar lines, you can check out Dave Light’s post at:
    Revit : Scheduling Apartments

    Let’s say you have inherited a multi-storey project that has been set up with Model Groups for Typical Levels – not necessarily a bad thing (see this post).

    There are a couple of things that do scare me a bit, like the fact that groups can break down after a long editing session, and that its not easy to find out which elements are excluded from which group instances.
    EDIT Here is an answer using Compare Models by Julien Benoit (note – Compare Models is a Subscriber only Extension, now available on Exchange here.  You will need to login).

    After installing Compare Models, you need to open two files.  I opened a ‘live’ version and a detached version of the same model.  Go to Extensions – Tools – Compare Models.  Wait for a while… you will get a list that shows you which Group instances have Members Excluded.

    However, this method does not give the actual Excluded Elements, just the Group Instances with Exclusions.

    There was a recent twitter exchange (initiated by me) about this (see below), but it didn’t really result in a nice solution.  The closest I came, in theory, was this:

    So…..

    Does anyone have an awesome way to list group instances and their excluded elements?  Anyone? 🙂

    Have you noticed this little gem?

    If you use the Edit command from the Project Browser for a Detail or Model Group, like this:

    … then you can use the Load as Group into Open Projects to update the group.  Upon clicking the button, you will be presented with a dialog like this:

    Once you click OK, you will be prompted to Update the group:

    Pretty handy feature isn’t it?

    Interesting message when linking a Group to a new RVT file… basically, if you have a Model Group in your project that has Excluded Elements (either deliberately or due to some unavoidable issue) and you then Link that Group, the excluded elements will be restored in the Link.

    Excluded elements are also restored for Attached Detail Groups if you choose to link them as views, but you won’t get the nice little message.

    This could be one way of recovering the excluded data without having to create a new instance or use the ‘Restore All Excluded’ command on an existing instance…

    Aaron Maller is one of the top Revit guys in the world.  In a recent blog post, he provides some handouts for download – this is basically stuff about Links and Groups for the Advanced user – very interesting!

    So here they are!
    Sample Data Sets

    Class Handout

    via
    Malleristic Revitation: Class Materials- Autodesk TA event- Dallas