Daniel Stine hosted the interestingly named RTC class:
Mastering Materials: Getting What You Want from Revit

In a recent Cadalyst article, he gives a few good material tips.  Here are just 3 of them:

1) Material Assets
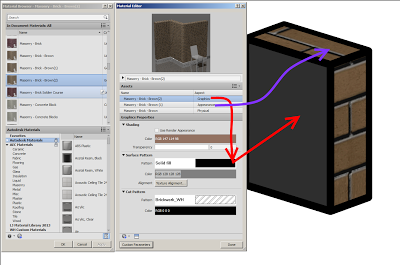
Think of a material as a container. Some of the information represents elements you can touch and see when the building is complete, while some does not. Assets are modules, if you will, that better define a material. These modules are optional and can be added or deleted as needed; however, most materials have an appearance asset, which cannot be deleted.

2) Material Transparency in Elevations (vs 3D views)
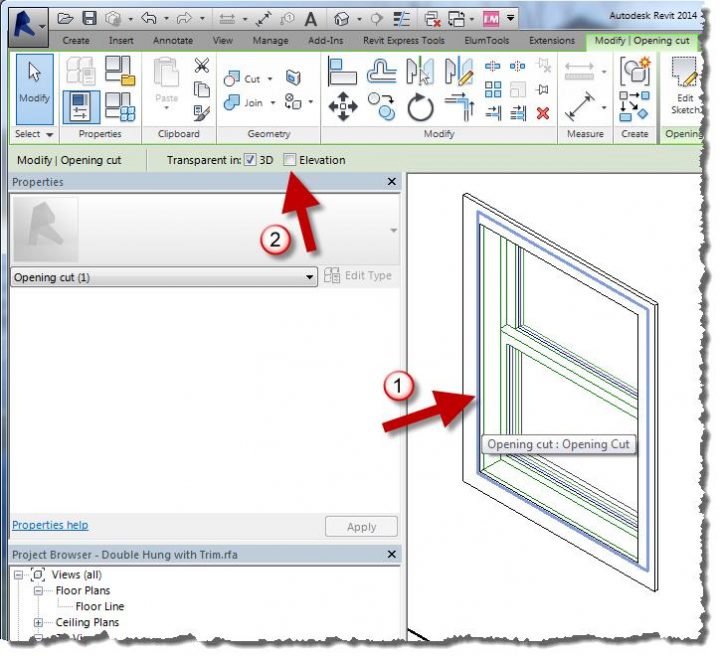
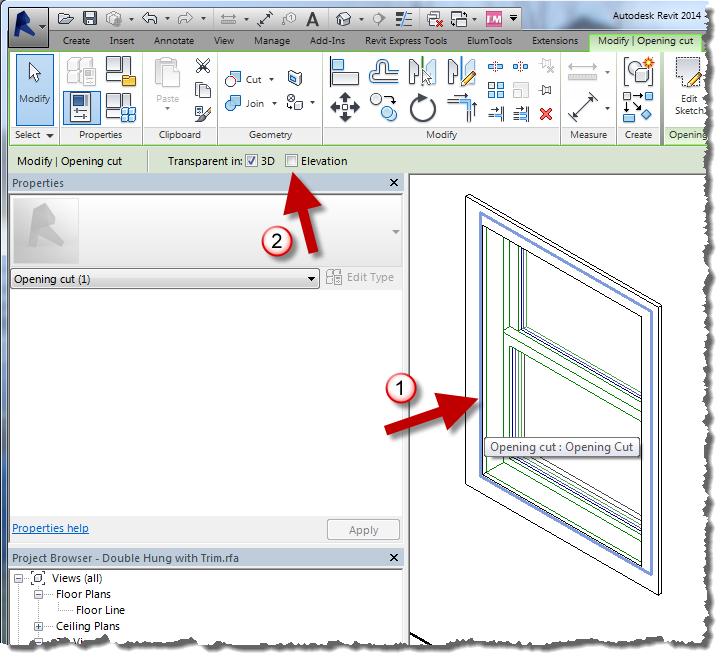
In any elevation view, materials are not transparent, as you can see in the left-hand image below (regardless of what Visual Style is set to). Even turning off the glass material in a view’s Visibility Graphics Overrides (VG) will not allow you to see through the “opening,” as seen in the second image. The trick here is to edit the opening in the family so it is transparent in elevation, as shown in the third image.

To achieve that, simply select the opening and check Elevation on the Options toolbar.

3) Self Illumination
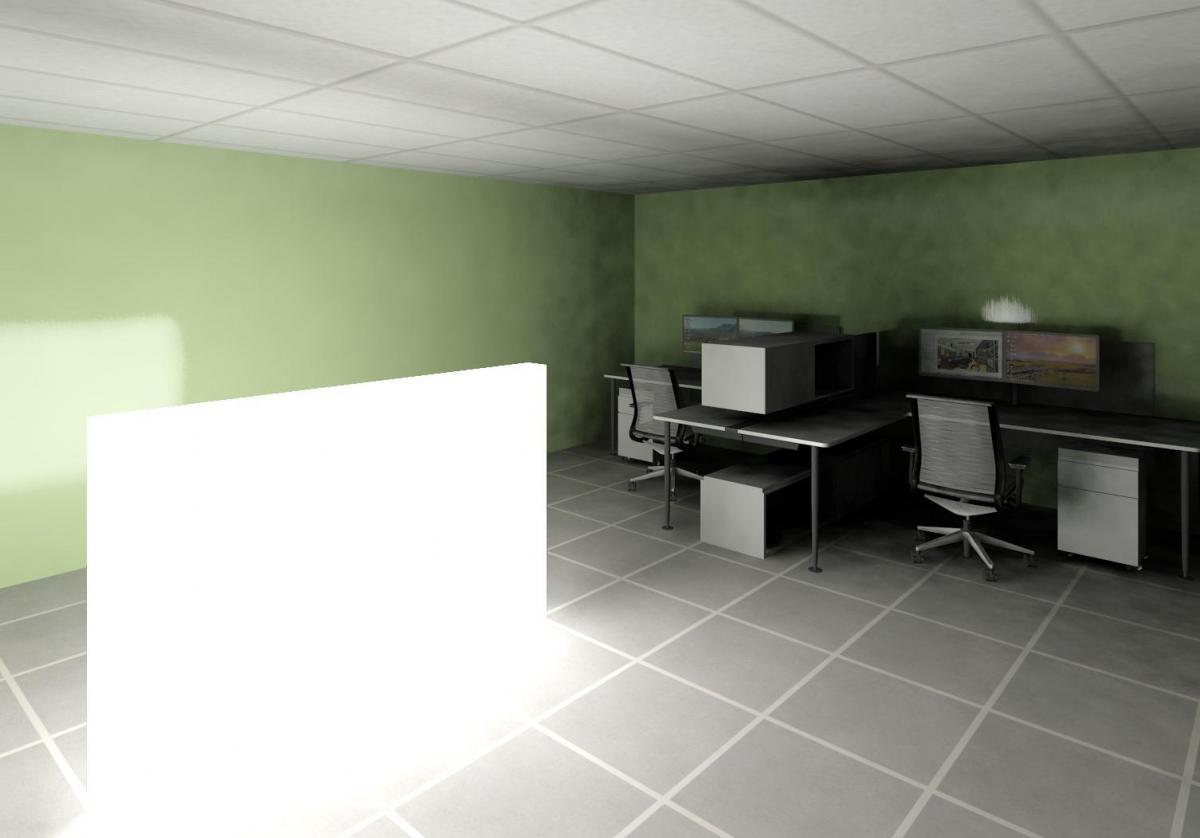
 A surface with a self-illuminating material will actually add light to a scene. In the image below, the self-illuminating low wall in the center of the room is the only light source. This material can also be used to get a very white surface when nothing else seems to be working.

Read more / via
http://www.cadalyst.com/cad/revit/understanding-autodesk-revit-materials-17422

Ever noticed how the Graphic Surface Pattern of a Material will override a Walls surface in a Realistic (ie. materiality / render check) view, but not the edges?

Firstly, I don’t think Graphics values should affect Realistic view at all.  Secondly, it should at least be consistent: either override wall faces and edges, or don’t override at all, yeah?

Anyone know if this was fixed in 2014?

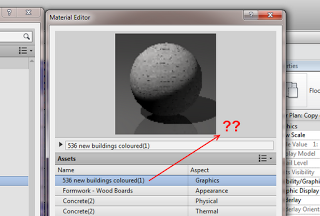
Many of us were quite disturbed by the 2013 Revit Materials Editor.  Aside from its usability (or lack thereof), it seems to be much slower than the 2012 Materials dialog.  Until Revit 2014 comes around, what can you do to speed up the Materials Editor?

A recent and highly informative post from Aaron Maller (focused particularly on Revit deployment), gives us a few clues:
Switch all the mat lists to text style, no rendered preview, open the Mat Editor and place it next to the Mat selector, then close it. 
Read the whole post here

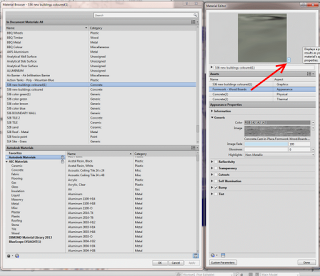
Have a look at the images below for some ‘hidden’ options:

Appears to be no way to adjust the rendered swatch?
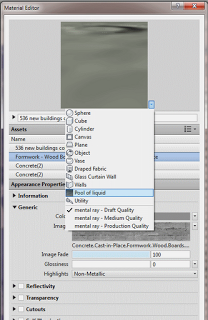
After switching to Appearance aspect, a tiny arrow appears…

We can now adjust this to speed up the Materials Editor.  The above settings seemed to be the fastest
(Pool of liquid / Draft Quality)

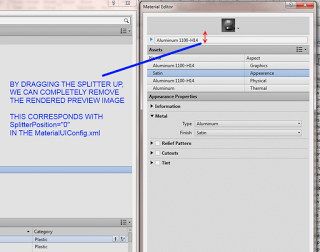
We can also completely remove the rendered preview image by dragging the splitter just below it:

Aaron made similar comments in this post on RFO.

In my case (Building Design Suite 2013 / Revit OneBox), the currently in use MaterialUIconfig was at
“C:UsersLukeAppDataRoamingAutodeskRevitAutodesk Revit 2013MaterialUIConfig.xml” 

Upon opening the MaterialUIConfig.xml, you will notice a few settings like:

MaterialBrowser inSceneMaterialViewHeight=”502″ navigationPaneWidth=”241″ isInSceneMaterialPreviewEnabled=”0″ isNavigationPaneVisible=”1″

and

MaterialEditor SplitterPosition=”0″ OGSRenderQuality=”0″ PreviewRenderQuality=”0″ PreviewRenderType=”2″

I would like to see some documentation from Autodesk to clarify what all of these actually do, but you can see the settings I am using.  If you use Notepad++, you can also open MaterialUIConfig.xml, make some changes in Revit, and then when you switch back to Notepad++ it will prompt you to reload the xml – you can then easily see what each change you make in the Materials Browser / Editor actually does.

What is the U-Value?  It is:
Also known as the U-factor or coefficient of heat transmission, a measure of the rate of non-solar heat loss or gain through a material or assembly. U-values gauge how well a material allows heat to pass through.
http://www.daviddarling.info/encyclopedia/U/AE_U-value.html

autodesk.de recently carried a detailed post on formulas related to the U-value.

Read more at:
Google Translate
of
http://www.autodesk.de/adsk/servlet/pc/item?siteID=403786&id=20378691

Summary

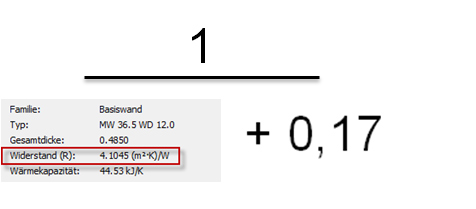
To get the U value of a wall structure, add the sum of the heat transfer coefficients for the wall types specified thermal resistance R T by this value to be used as a divisor.

With walls so:

U = 1 / (Rt (from Revit) 0.17 (K · m) / W)
formel_03

Doug Bowers posted a very informative how-to recently about Autodesk Material Libraries.  He shows you how to create a material library, add materials to it, and then share it with other users.

A couple of points I found particularly interesting:

  • Depending on the security permissions on the library file or folder containing the file, users may be able to add additional materials to the company standard or only be able to utilize materials contained in the library.
  • Materials placed in the company folder are no longer linked to the original material and may be modified, resulting in a different definition of the material in the company library than the material in the folder from which it was originally copied.

Read more at:
Sharing Autodesk Materials Throughout An Organization | Applying Technology to Architecture

Along similar lines, check out:
Upgrading Revit 2012 Material Libraries in Revit 2013
and 
Materials in Revit 2013 – the saga continues


Good post over at Andekan on Revit Materials in 2013 – I have reposted three things I found particularly insightful below.

First of all – a slight correction.  The Andekan post states that:
You can’t open the asset browser unless you open a project material in the material editor.

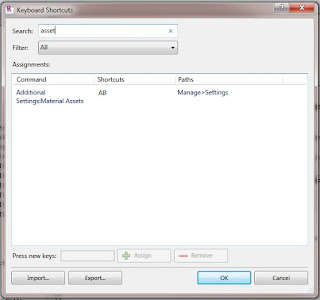
This is actually not true.  You can open the Asset Editor and the Asset Browser without opening Materials.  Just set a Keyboard Shortcut to  Additional Settings:Material Assets.  This will open the Asset Editor.  Then click the ‘lines’ icon to open the Asset Browser.  Its kinda messed up, but you can do it.

Now, on to some good stuff from the post:

Entire Materials can live in .adsklib files:
you can take a whole material from inside your project (called “In Document” materials), including all of its different property sets (now called “Assets”), and add it to any number of external libraries that you create. You can also add materials from one library to another. Libraries that you create are stored as standalone .adsklib files, just like the “materials” libraries (read “appearance properties”) of prior versions, so they can be ported and shared between installations with ease.

.adsklibs can contain Assets AND Materials

Libraries
These are groups of materials and/or assets that exist outside of any particular project or family. They are saved as standalone .adsklib files, and it’s important to note that a single library can contain both materials and assets. This makes perfect sense: if materials are made up of different assets, then a “materials” library must somehow contain appearance, physical, and thermal assets as well.

How to update and maintain .adsklib Libraries 
5. You can only edit materials and assets that are inside of a project. In a library, you are limited to viewing the names of materials and assets, and to performing basic functions like Rename or Delete. If you want to edit a material or asset that’s in one of your libraries, you have to: 1) bring it into a project, 2) make your edits, then 3) add it back into the library to overwrite the original version, and finally 4) remove the copy that’s inside the project (if you don’t want it there).

Read more / via
Andekan � Blog

If you Open a 2012 adsklib file in the Material Browser in Revit 2013, chances are you won’t see any materials (even though Revit claims to be ‘upgrading’ the library).  You need to open the .adsklib in the Asset Browser to expose the 2012 Appearance Properties for use in Revit 2013.

To quickly get at your 2012 Appearance Properties, go:

  1. Manage
  2. Additional Settings
  3. Material Assets
  4. Click the ‘lines’ icon
  5. Click the ‘gears’ icon
  6. Open the Library (it will upgrade and add (1) to the file name)
  7. You can see your 2012 Appearance Properties.

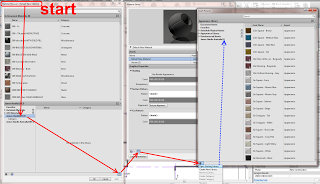
To actually get this into a Material, the process from the Material Browser starts something like this:

To apply these appearance properties to Materials, watch the 43 second video:

Needless to say, the whole Materials UI concept and process in Revit 2013 is kinda scary?

Some info from Wikihelp:
In Revit 2012, libraries contain property sets and do not contain any materials. If you use the Material Browser to load a Revit 2012 .adsklib or .adstlib file, materials will not display and therefore a warning symbol will display next to the library name. The data in Revit 2012 property sets will be migrated as assets in Revit 2013. In order to access Revit 2012 property sets as Revit 2013 assets, you must use the Asset Browser to load the Revit 2012 libraries. 
via
Upgrading Revit 2012 Libraries – WikiHelp

I anticipate there will be a lot of posts about the changes to Materials in 2013, on such topics as:

  • Why did this happen?
  • “I am angry about Materials 2013 for xyz reason”
  • How do I use this?
  • Will this change again next year?
  • Just, Why?

In any case, if you are looking for the Identity tab for Materials in Revit 2013, look for the arrow.

Video below: