Downloads:
Revit Add-In 2014
Revit Add-In 2015
SP.Writer Excel Tool
Intro video (2014 version):
Heads-up https://twitter.com/bim_source/status/463673207229538304
Useful comments over at this post
Shared Parameter Management 2014 – BIM Source
What Revit Wants

Downloads:
Revit Add-In 2014
Revit Add-In 2015
SP.Writer Excel Tool
Intro video (2014 version):
Heads-up https://twitter.com/bim_source/status/463673207229538304
Useful comments over at this post
Shared Parameter Management 2014 – BIM Source
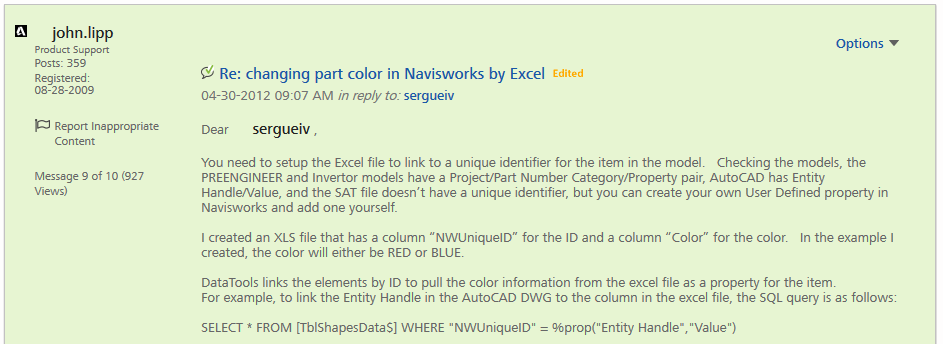
This forum post by John Lipp is definitely worth a read:
http://forums.autodesk.com/t5/Navisworks-General/changing-part-color-in-Navisworks-by-Excel/m-p/3437673#M3555
In part:
Then repeat for the other datatools links changing the Category for COLORS_proengineer, COLORS_INVENTOR, and COLORS_User Data.
Then after the profiles are set up, you can click Run in the appearance profiler, and the colors will change according to color properties that are being pulled from the excel file.
I’ve attached the Excel file, Appearance Profiles dat file to import, and the NWF with the datatools links setup. If you drop the three files in the folder with your models, open the NWF, import the .DAT file into the appearance profiler tool and run it, it should change the items in the models to either red or blue based off of the colors specified in the excel file.
This example has colors specified in the excel file, but you could use some other property in the database such as “Out of Service” column with a value of either yes or no and create an appearance profile that checks if that property is yes, and if so, set the color of those items red.
With the appearance profiler, you need to actively run the appearance profiler to set the colors if the excel file is updated. If you wanted more automation, then you may wish to look into the Navisworks API.
…
Video:
Ever pressed Cancel or No when prompted to save an Excel spreadsheet? Lost your work? How about this backup task… it basically copies Excel backup files to another location so that Excel can’t delete them when it closes.
via
microsoft office – Recovering Excel documents that were closed without saving – Super User
Daniel Monsén has created one of those addins where you just have to say “this makes sense”. The key feature of Bimframe Connect? It allows users to import and export data from Revit to a Google Spreadsheet.
The overall concept is that you can export data to a Google Spreadsheet, collaborate using a web client or mobile device, then import the data and update the Revit model. Collaborators obviously don’t need Revit – just access to the Google spreadsheet.
Personally, I love the idea. The more transparent the Revit building database is, the easier it is to add intelligence to the model, share the model, and detect design problems.
Overview:
The above video includes the following info:
Email: daniel@bimframe.com to get trial key.
Download the version 0.8 beta trial add in here:
https://drive.google.com/folderview?id=0BxQhjQerGcutN3RCV0lCS2pmeFk&usp=sharing
There is a series of tutorials on Youtube here:
http://www.youtube.com/channel/UC4_8PPGYG2g576rssp9ykCw/feed
Ceilidh Higgins recently “submitted a talk for Revit Technology Conference on this subject, What’s in a Room: Revit Models,Room Data Sheets and Interiors. You can download it here.
What’s in a Room? from Ceilidh Higgins
Read more about Revit and Room Data at the original post:
http://themidnightlunch.com/whats-in-a-room-room-data-sheets-and-the-briefing-process/
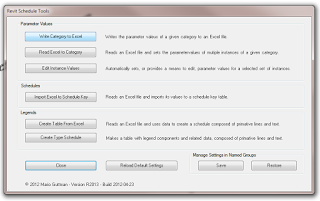
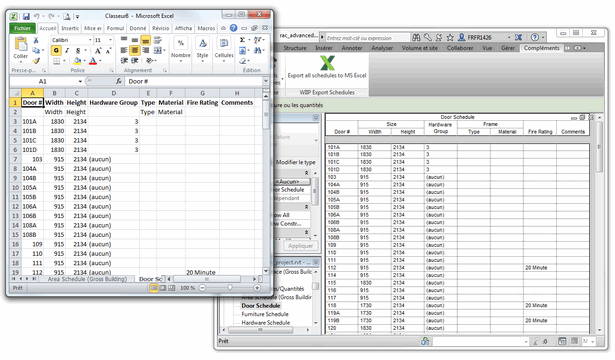
WhiteFeet Tools for Revit is a powerful set of add-ins that can make the impossible, possible. I have posted about them before. In this brief post, we look at how you can effectively Schedule the Reference Planes you have in a model.
On the Add-ins Ribbon, choose Utility Tools – Schedule Tools:
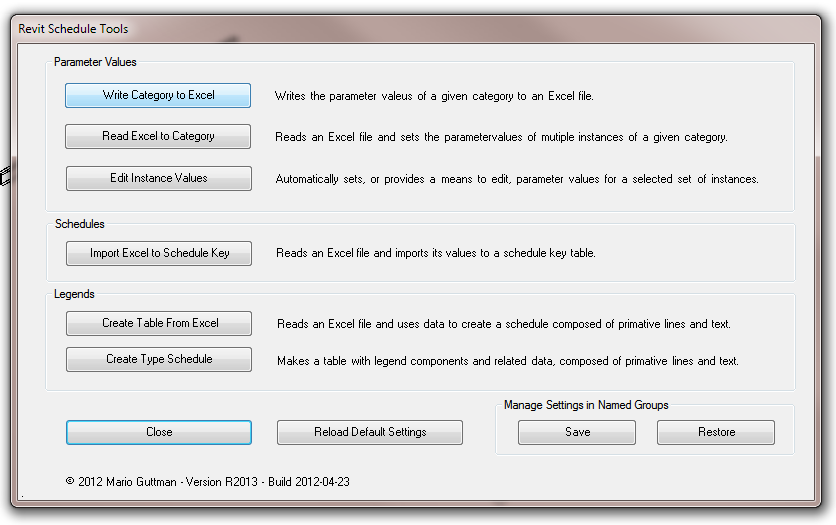
Pick Write Category to Excel, then select the Reference Plane category, All Elements in Model:
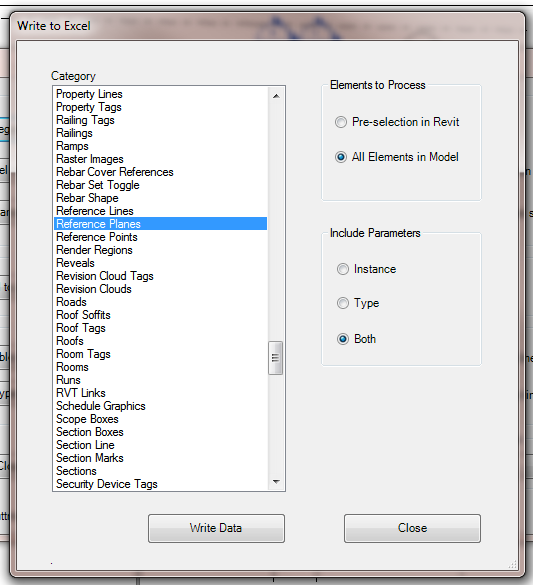
After you press Write Data, you will get something like this:
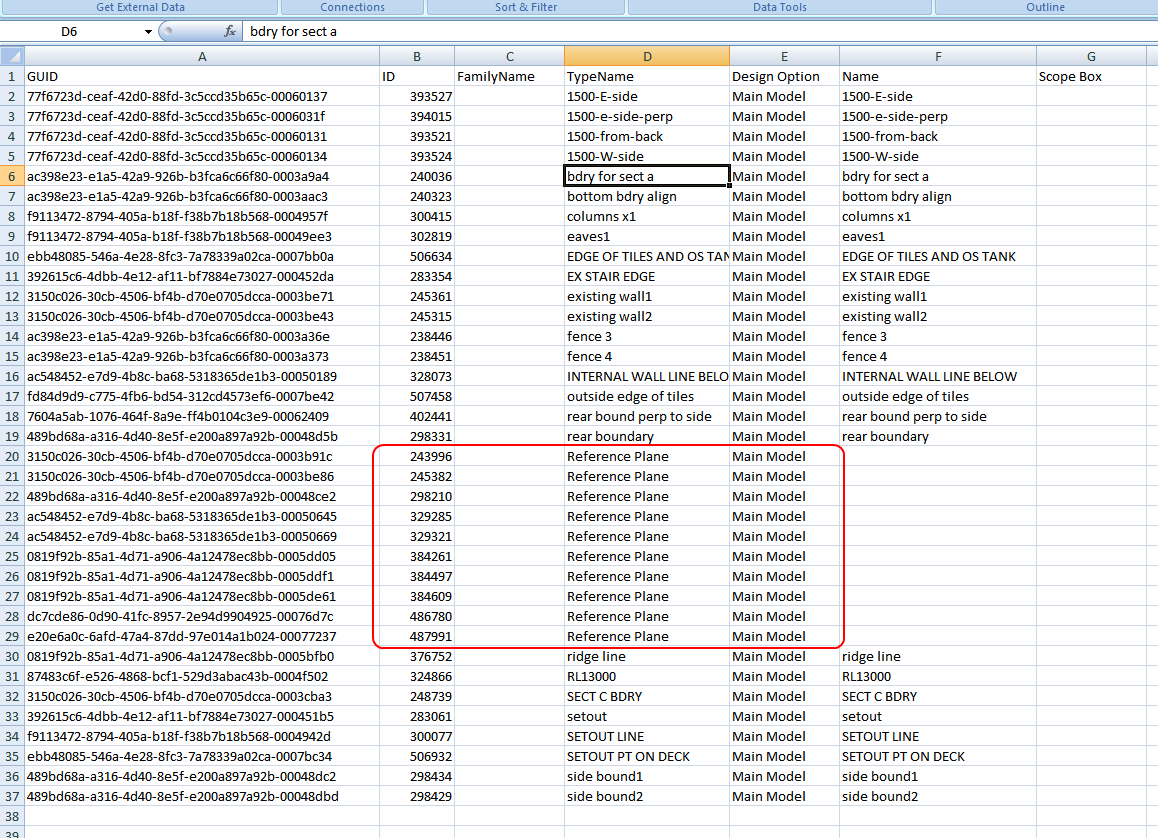
You can then sort the Data to find the unnamed versions, and then use the Element ID to select and name those Reference Planes, if you so desire. In our office, an unnamed Reference Plane is fair game for deletion…
Also, some of you may have picked up that you can use this same process to export data from ANY CATEGORY in Revit – including those that you cannot schedule!
Find out how to obtain the Whitefeet software here:
Tools
But it does cost $9…
On Exchange at:
http://apps.exchange.autodesk.com/RVT/2013/en/Detail/Index?id=appstore.exchange.autodesk.com%3awiipexportschedules%3aen

Google Translate of
Download / product page:
Wiip ExportSchedules pour Autodesk Revit | WIIP
Posted at:
Wiip ExportSchedules pour Autodesk Revit 1.0.2 | WIIP
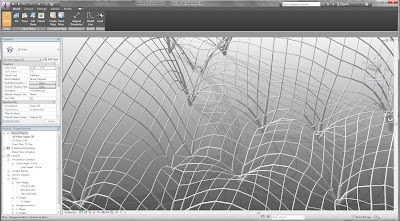
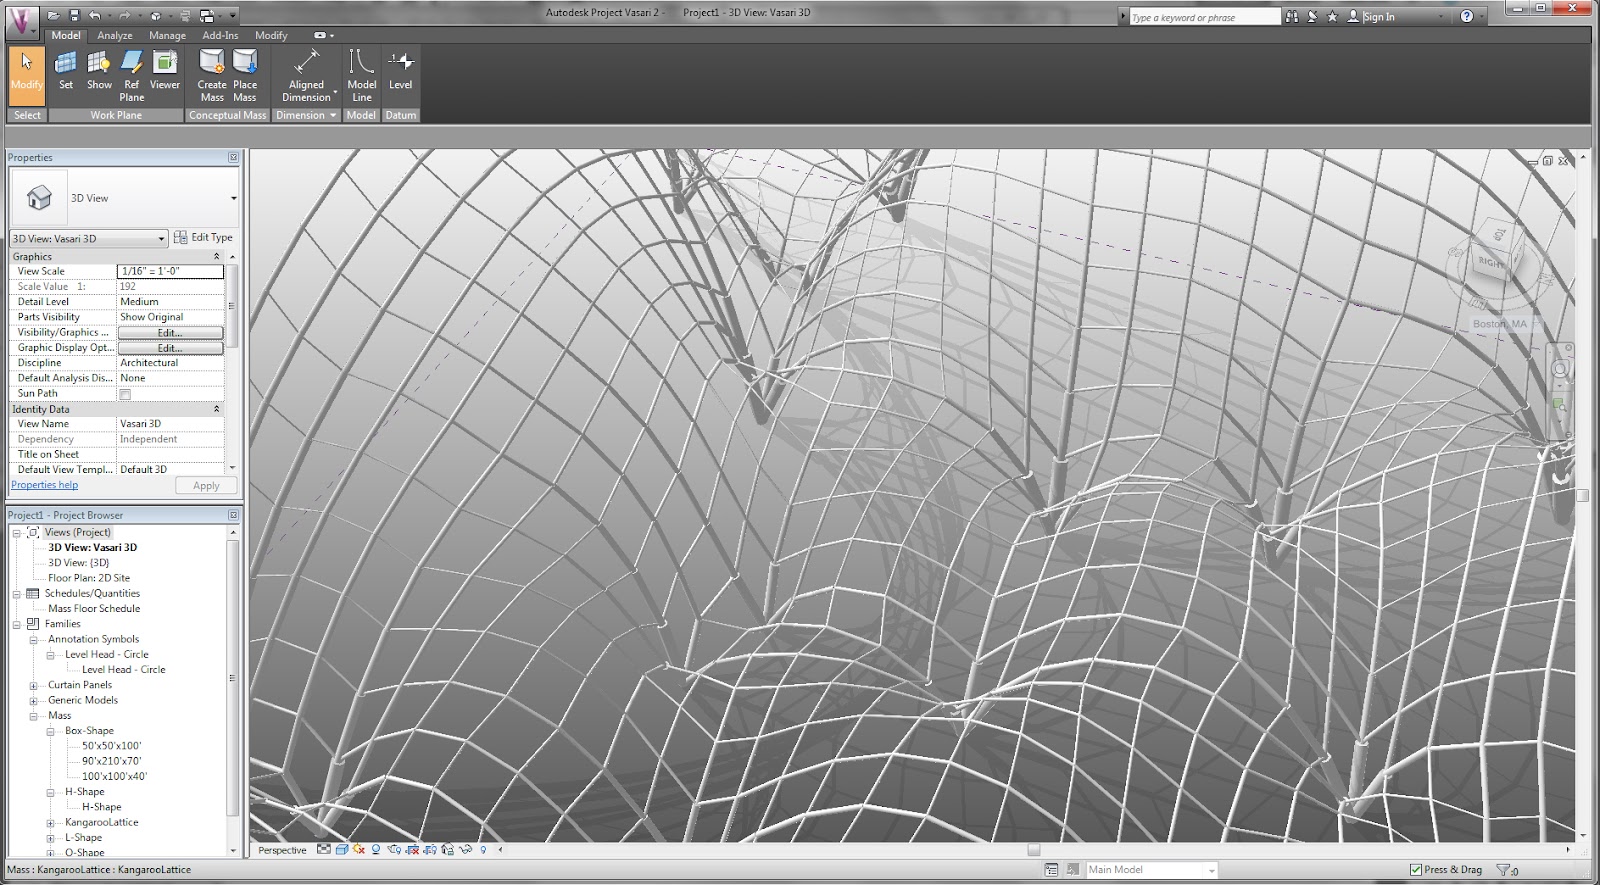
Nathan Miller strikes again:
I am creating a strange ‘catenary’ surface with Kangaroo and Grasshopper. I am then feeding the information into an Excel spreadsheet and reconstructing the shape using Adaptive Components via RevitPythonShell. Note how I am also able to adjust the radius parameter of the pipe members within Revit to reflect the ‘force’ diagram created in Kangaroo.
via
The Proving Ground by Nathan Miller: Revit API: Divided Surfaces and Excel Interop
This post looks at the post-processing side of the energy modeling workflow. Often, a spreadsheet tool like Excel is a first choice for many analysis tasks. This is great for simple cases, but if the number of files or the amount of data is large or complex, Excel will cost you time and lead to errors. This is where you should turn to Python!
Read more at:
Python for Energy Modelers – Part 3 – Simple Post-processing | openRevit