1. Select all instances of the Detail Group (either through Project Browser or right-click menu).  You will see in the Properties Palette ‘how many’ you have selected.
  2. Trigger the Group command
  3. Revit will fail with an error.  Click Expand and then review the results in the dialog box.  You will be able to list the views as per the following image:

Have you noticed this little gem?

If you use the Edit command from the Project Browser for a Detail or Model Group, like this:

… then you can use the Load as Group into Open Projects to update the group.  Upon clicking the button, you will be presented with a dialog like this:

Once you click OK, you will be prompted to Update the group:

Pretty handy feature isn’t it?

Masking can be a real pain in Revit.  Sometimes you just want to hide some bits of geometry on multiple views, but it is difficult to actually model what you want in 3D.  So you may resort to Masking Regions in Detail Groups, Copy-Paste Aligned – but all of that is suboptimal.

Today there was a great tip on Masking in multiple views over at Shades of Grey:
I could use a masking region, but this is like going back to CAD drafting … separate regions in each affected view.  What if I place the mask into a generic model family?  If this family has a vertical model line (use invisible lines) the masking region will show up in any plan where the cut plane intersects the model line.

Extending this idea into 3 dimensions I can create a family with 3 model lines (X,Y,Z) and 3 masking regions.  Give it instance parameters to control the size of this “virtual box” and it will mask out the finish layers for any view that cuts through the duct at right angles.

Read more:
Shades of Grey: MACAVITY UNMASKED

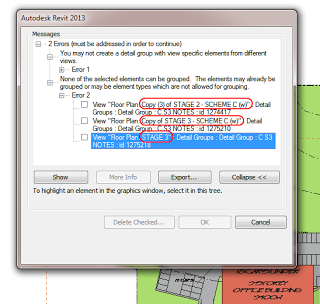
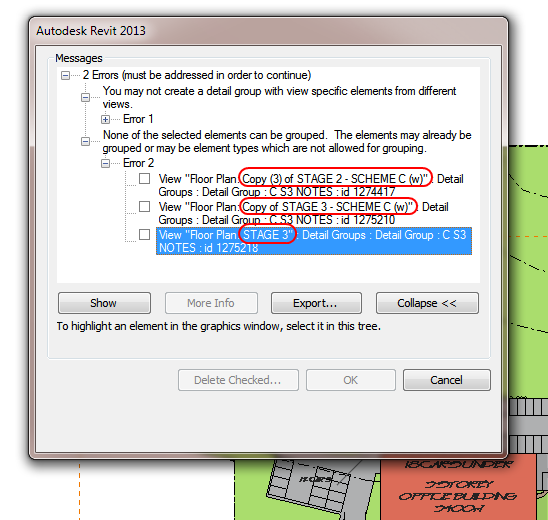
When in Edit Mode for a given Detail Group, the Spot Dimension tools are grayed out.

However, if you place the Spot Dimension OUTSIDE the Detail Group, and then ‘Add’ it to the Group – Revit is quite happy.  You can even place a Spot Coordinate in a Detail Group (in Plan View), copy the Group instance, and then drag the copied Group around with the Spot Coordinate continuously updating!

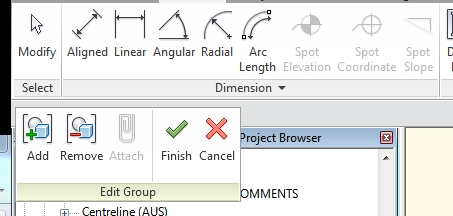
Here is a quick step-by-step:

  1. Exit the editing mode for the Detail Group
  2. Place the Spot Dimension (referencing an element inside the Detail Group)
  3. Edit the Group
  4. Use the ‘Add’ tool to add the Spot Dimension to the Detail Group
  5. Finish Group

 This works for Spot Coordinates in Plan View Detail Groups, and it works for Spot Elevations and Spot Slopes in Section / Elevation Detail Groups…