
Most of you probably know that you can use a Decal in a 3D view set to Realistic for 3D masterplanning. The annoying part is that you have to somehow scale the Decal properly.
You may also know that Vasari has a nice built-in method of grabbing Google Earth imagery and unlike Revit, Vasari is happy to show this image in 3D views.
Now, Philip Chan has combined these two methods to make a decent workflow for Revit:
- Grab the image in Vasari first
- Open that Vasari file in Revit
- Import the same image from Vasari into Revit as a Decal and place it on a flat workplane
- Use the “borders” of the Vasari image to properly scale the Revit decal
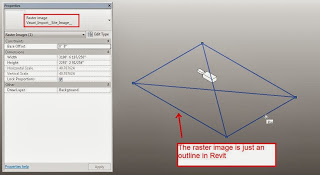
In Philip’s words:
use a trick to get it scale properly. I actually used the Vasari file that I made earlier, I drew some model lines at the boundary of the image, copy the model lines to the clipboard, and then paste them into my site file. Now that I had the actual size of the boundary, I could use the same image export from Vasari and placed it as a decal.
