With regard to my recent posts about using legacy mass forms, I would like to let you know how Autodesk responded to some feedback I gave them.
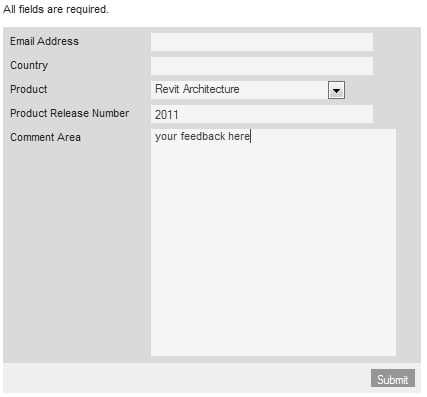
Basically, I used the Feedback Form at this link to make the following suggestion to Autodesk:

The 2009 massing tool should be available in the project environment, as well as the 2010 conceptual massing tool. Although there is a workaround (pasting a 2009 mass into a 2010/2011 project), this is not desirable. Please reinstate an option for the 2009 massing tool, which includes simple sweep and extrusion forms.

A subject matter expert at Autodesk responded with the following:

Thank you for contacting us. Being able to access older massing operations in the project environment as well as the new massing tools could be a valuable addition to help users transition to the new massing tools. In 2011 the massing tools have been updated to give more flexibility in making changes to forms once they have been created. Sketches can be altered using the “dissolve” functionality. This does not totally replace the old massing functionality but does offer some flexibility over the tools in 2010.

I will be sure to pass along your feedback to the development team.

I recommend that you post any sincere feedback and recommendations using this the abovementioned feedback form. Clearly, Autodesk are monitoring and evaluating this feedback.

Here is the problem:

An elevation crop region is not visible. It cannot be turned on using any of Visibility/Graphics settings. The problem is not anything to do with the ‘Show Crop Region’ switch. There are no Filters applied. Using the ‘Reveal Hidden Elements’ lightbulb, uncropping the view and then selecting all visible elements DOES NOT select the Crop Region (when you filter the selection, the Crop Region shows up as ‘Other’).

So, what do you think? Where is this Crop Region?

I noticed that there were Design Options present in the project. However, there are NO Properties with regard to Design Options while in the Elevation view (Properties Palette), OR while selecting the ‘Elevation Head’ in a Plan View.

However…selecting the Elevation circle (or square) itself yields ONE property – ‘Visible in Option’. Yay, we have found the problem!


This problem can also be diagnosed by attempting to add the Elevation Head to another Design Option – the following error results:


This shows how Revit views Elevations in a somewhat ‘cascading fashion’ – ie. Elevation (circle) as a parent of the actual Elevation (head).

Yet another example proving that it pays to know What Revit Wants.

By ‘legacy mass forms’, I mean the nice, simple kind – sweeps with editable profiles, extrusions with sketches and the like.

The problem with 2010 and 2011 massing is that you cannot create these nice and simple forms in the conceptual massing environment in a project.

The answer? Simply download the file below. It contains a 2009 version mass. Copy this mass to a 2010 or 2011 project and you now have access to the simple sweep and extrusion tools! You can create new sweeps within this mass and have all kinds of legacy mass fun.

Download the file from this link

EDIT the above link will let you download 2009 mass family for Revit

You should all know something about adaptive points by now. I will here describe how I recently used them to solve a modeling problem.

Basically, I need to create a surface that was quite irregular – it did not fall in a way that could be describe in 1 or 2 slopes. I didn’t want to use a shape-edited floor, as I wanted a form that would be smooth – not triangulated. Further to this, I wanted to be able to easily edit this form, and I wanted to be able to be able to derive some intelligence from it (ie. report the slope of the form). What would you do?

Here is how I handled it:

  1. Create an Adaptive Component (generic) family.
  2. Place some points and make them Shape Handle Points (Adaptive)
  3. Create two splines based on these adaptive points that meet at two endpoints (see image below).
  4. In the Project, create an in-place Mass family.
  5. Create an Instance of this Adaptive Component inside the in-place Mass.
  6. Finish the in-place Mass.
  7. Create a new Wall based on the face (surface) from the Adaptive Component family.
  8. You are done!


The fun part is editing – here is how you do it:

  1. Select the in-place Mass (use the Project Browser if you can’t pick any actual Mass geometry), and edit-in-place.
  2. Hold your mouse over one of the points and ‘Tab’ until you can select the actual adaptive point (see image below).
  3. Once selected, you can pull this point around.
  4. Adjust the points to suit, and then Finish Mass.
  5. Pick the Wall that you applied to the face (surface), and then ‘Update-to-Face’.


If you wish to add further details or even ‘trim’ the Wall, just create another in-place family of Category walls and go for your life (you can use Cut Extrusions etc to trim the face-applied wall to a form that suits you).

I’m sure that this isn’t the only way of attacking this problem, and I’m sure that it may not be ‘recommended’ in every case. But I hope you enjoyed this tutorial. Here are the Adaptive Component family and the Project for you to download and look at:

Project File – Bending the Rules with Adaptive Points

Family – Adaptive Component

I am quite sure that I was the first to post about the Web Update for RAC 2011 (please feel free to correct me if I am wrong). So I thought this might be a good time to encourage you to subscribe to this blog.

Subscribe using RSS

Subscribe using Email

Also, here are the updated links to the downloads for the various flavours of Revit (thanks Revit3D.com)

Revit Architecture 2011

Autodesk Revit Architecture 2011 Update 1_32-bit (exe – 39575Kb)
Autodesk Revit Architecture 2011 Update 1_64-bit (exe – 59876Kb)

Update Enhancement List (pdf – 204Kb)
Service Pack Readme (htm – 39Kb)

Revit Structure 2011

Autodesk Revit Structure 2011 Update 1_32-bit (exe – 39575Kb)
Autodesk Revit Structure 2011 Update 1_64-bit (exe – 59881Kb)

Update Enhancement List (pdf – 254Kb)
Service Pack Readme (htm – 37Kb)

Revit MEP 2011

Autodesk Revit MEP 2011 Update 2_32-bit (exe – 39555Kb)
Autodesk Revit MEP 2011 Update 2_64-bit (exe – 59867Kb)

Update Enhancement List (pdf – 212Kb)
Service Pack Readme (htm – 36Kb)

If you have correctly applied the update, you should see ‘Web Update 1 Service Pack’ in the ‘About Autodesk Revit 2011’ dialog box (see below):


Also, as Steve noted, it pays to check the Communications Center when first opening Revit each day:

There is a Maintenance Update available for Revit 2011 x64.

Please use the link below to download the update for 64-bit:
http://updatesdl.autodesk.com/updates/files/rac_x64_ur10.exe

For 32-bit:
http://updatesdl.autodesk.com/updates/files/rac_x86_ur10.exe

The readme file is at:
http://updatesdl.autodesk.com/updates/files/autodesk_revit_architecture_2011_update_1_readme.htm


Enjoy! And remember where you heard it first…

There has been a few posts about Revit content recently, one being at http://chrismounts.com/content/places-find-revit-content and another at http://excel2bim.com/revitbim/?p=2238. These are related to a LinkedIn discussion on Club Revit.

Some of you would be aware of the Revit Blog Directory I have set up. I have taken this content link list and added it to the blog directory site at http://www.revitprofessionals.com/

So you have some electronic information that you really want to read, but you just can’t find the time?

You are madly Revit-ing away, and you have some PDF training files that might really help you, but you are just TOO BUSY to read them?

Then try out this free program. It basically uses inbuilt Windows text to speech tools to read any document. I use the SpeakComputer TTS Reader. Just select the text you want to read, and paste it into the box…

Then press Play! There are a few other options to do with speed of reading etc – just tweak these to suit yourself.


If you can’t find anything Revit related and interesting to read, head over to Scribd and search for Revit

PS – Hopefully Microsoft Anna doesn’t distract you too much from whatever work you are actually doing 🙂

Let’s say you have isolated a few categories, and you have included Dimensions so that they are still visible.

However, your dimensions are no longer showing the Centerline symbol text – do you know why?

It is because this item is on a different category to dimensions themselves. In my case, I had to turn on the ‘Generic Annotation’ category in order to show this text.