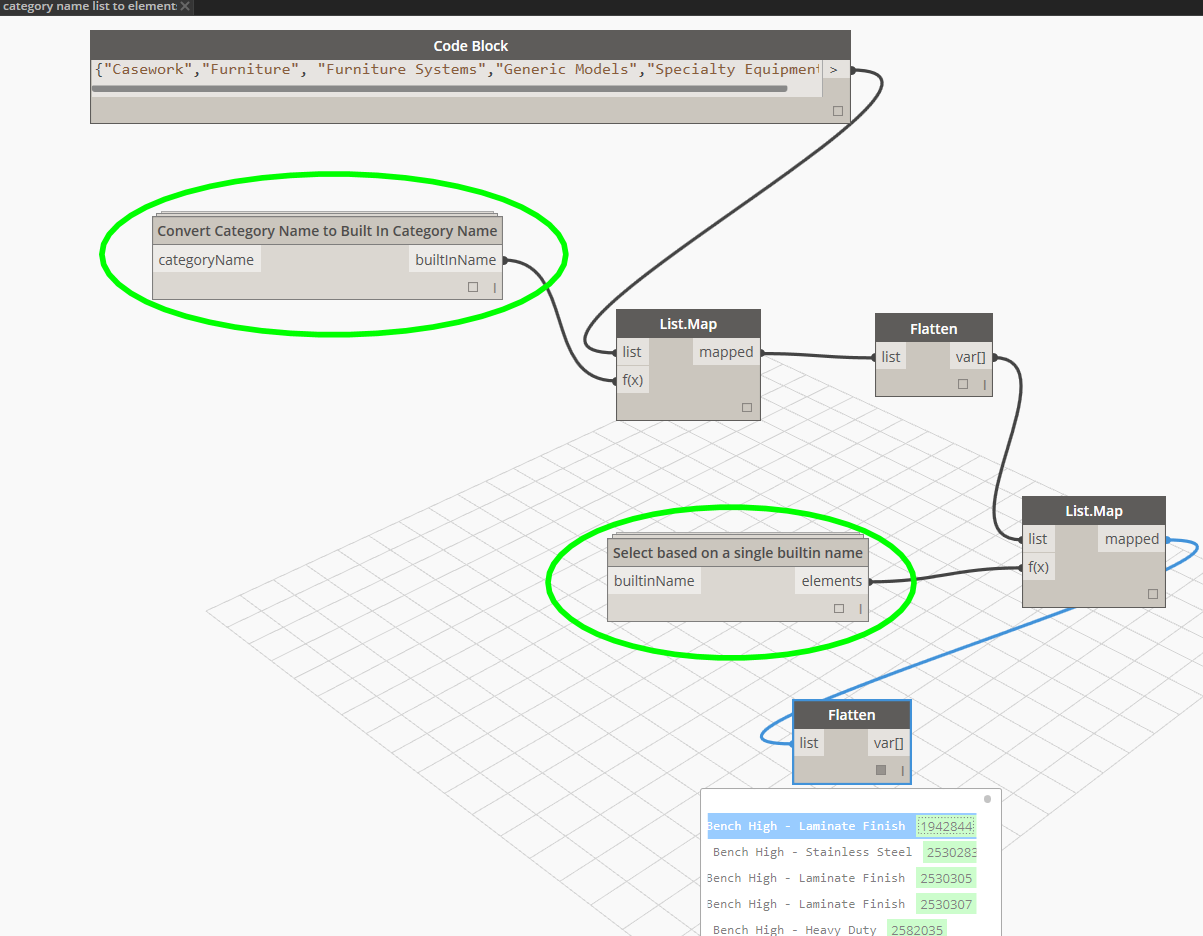
From here we could export a list of Element IDs to CSV, make a Selection Set by Elements using Clockwork, or use one of the Select in Revit nodes.
As you can see, to make a string list in a code block, you need to enclose list in curly brackets, divide with commas and use quotation marks around the entries themselves. More about code blocks at: http://dynamobim.com/cbns-for-dummies/
Update use this code to get a discount on your Revizto annual purchase: LUKEJH
Oh, and across devices too. You might say “hey, I’ve heard of Revizto before“. Someone tweeted today “”Even if we could get the model into a game engine, it would be difficult to navigate.” We can. It isn’t.”
Revizto has been providing smooth, great-looking visualizations of your Revit model for a while now. It has some very cool features, like Oculus Rift support (fun!) But its not just about the game-smooth graphics anymore.. I’m excited about something else…
Firstly, the big picture: what does Revizto do? Well, it shares your 3D model with others via the cloud, which is pretty normal these days. But over the past few months (and especially the last few days), it has added collaboration features that make it an extremely useful tool for BIM teams. Some of these are:
intelligent issue tracking
sheet and 3D collaboration attached to the same issue
issue reporting
enhanced Navisworks export, which includes overridden colours (meaning it can be useful for services visualizations where you use the Appearance Profiler in Navis)
If you like videos, maybe start here:
Revizto bridges some obvious gaps in current Autodesk interoperability scenarios, as it allows you to easily:
create and share viewpoints between Revit, Navisworks and AutoCAD
go straight to the 3D viewpoint of an issue in whatever model you have open (using the Issue Tracker addins)
Also, compared to various other collaboration services, it is relatively inexpensive, especially given the level of functionality it provides.
So how do we get started with Revizto? Here’s a quick few steps:
Open a Revit model, or a federated Navisworks model, and upload to Revizto using the addin
Choose a project name
After upload is complete and your model is open in Revizto, share it with others
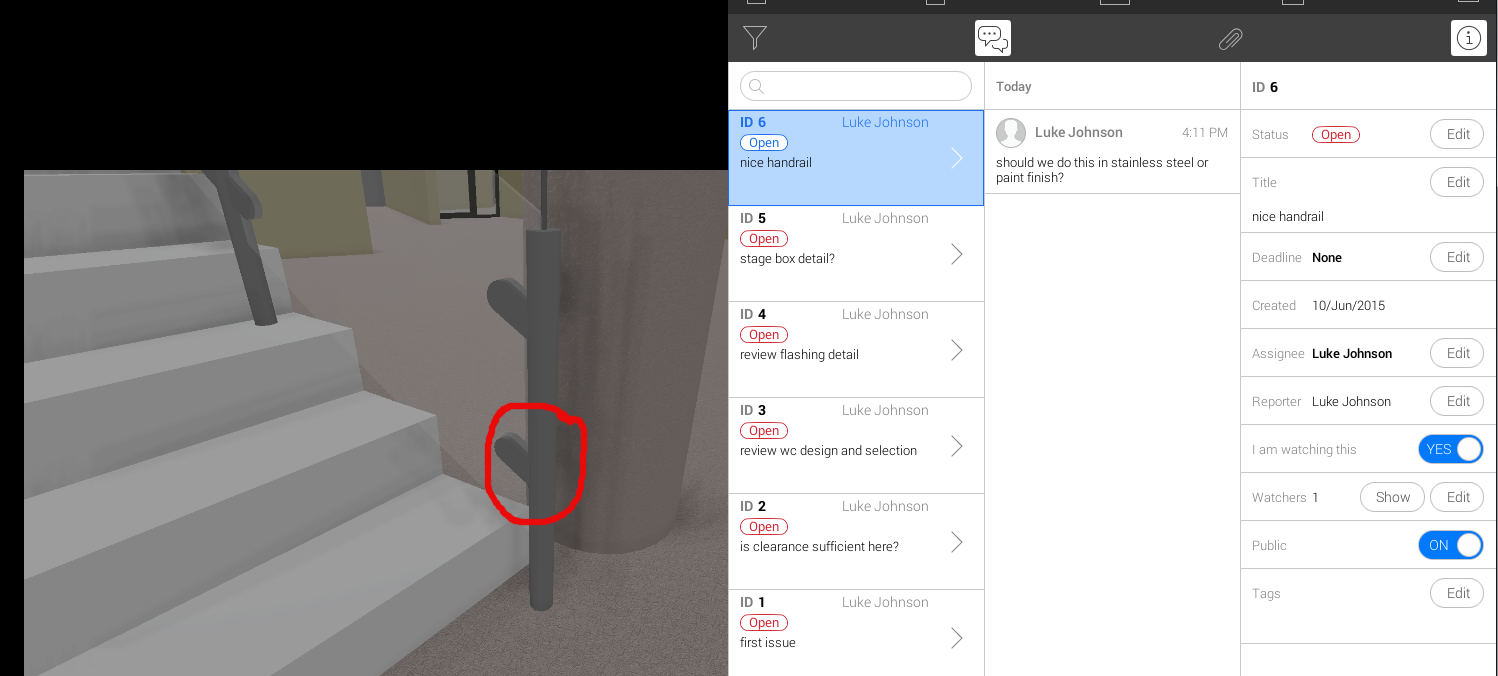
Start collaborating! Make an issue with + sign in the top bar, then type some words, assign it to someone, start a conversation about that issue.
Once an issue is created, you can easily switch between multiple different representations:
You can also quickly create or export issues to BCF. It uses the bcfzip format, so imagery and viewpoint information is all included.
Issues can be quickly tagged to create custom lists of related issues too.
A few beginner-style tips:
The Viewer is different to the Editor. The Editor is mostly used to create and upload projects.
Go to hamburger (top left) Objects to be able to turn off and select items in the model
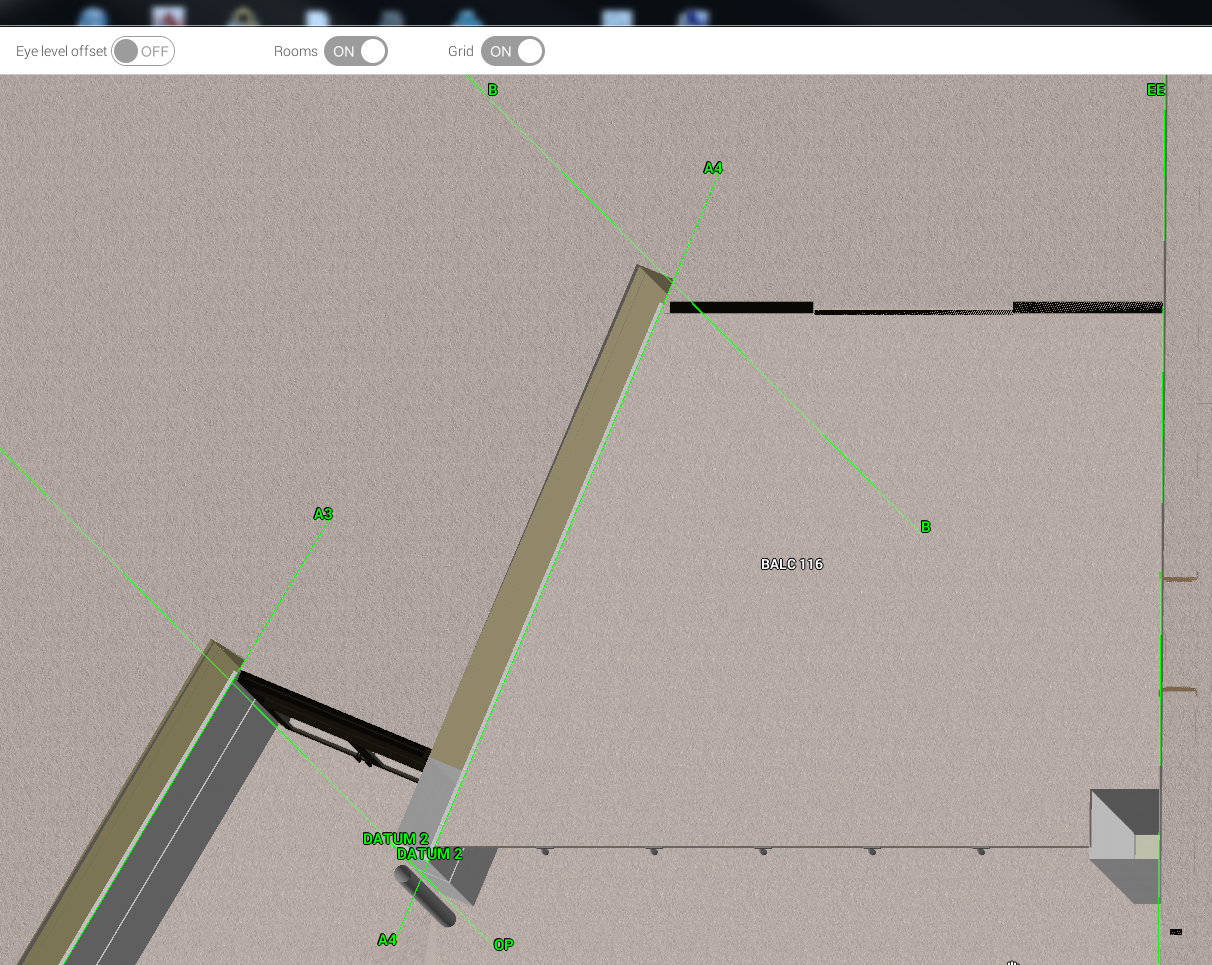
You can see the room names in the Map mode (little compass arrow in top of Viewer). When you scroll down to any level you can see all of the rooms, and by clicking to any part of the room you it will take you there in 3D
Grids and Rooms visible in 3D Map view
The recommended workflow is to use a combined, federated model in Navisworks or Revit and then export to Revizto, rather than trying to federate models in Revizto itself
What’s New in 3.4:
Collaboration on 2D sheets, now you will be able to mark up on top of 2D sheet and see them in 3D and all your issues made in 3D will be visible on 2D sheet
Ability to see the 2D sheet on top of the 3D
Invitation in the Viewer, now you can accept invitations to projects you have been invited to right from the Viewer
Revision control, now you will be able to see all your versions of the files you have synced to the cloud right from the Editor and open and review them and/or revert to the version you choose and make it master file for everyone.
You can see what have been updated in the project gallery in the Viewer and open the latest version
Great enhancements in export from Navisworks
ArchiCad support, now you will be able to export from ArchiCad your files and benefit Revizto collaboration
Grid visibility in Revizto, now you will be able to see the grid in the Viewer in 2D Map View.
Ability to set self-luminous material to any object in the scene to be visible in the Viewer and in the Editor after you bake the light maps
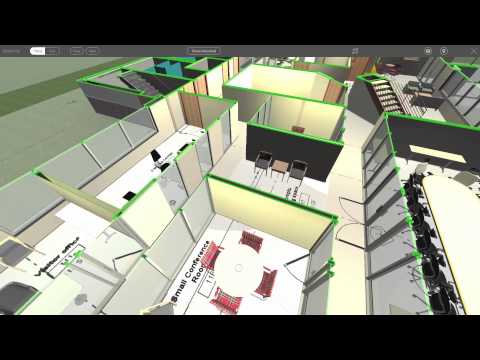
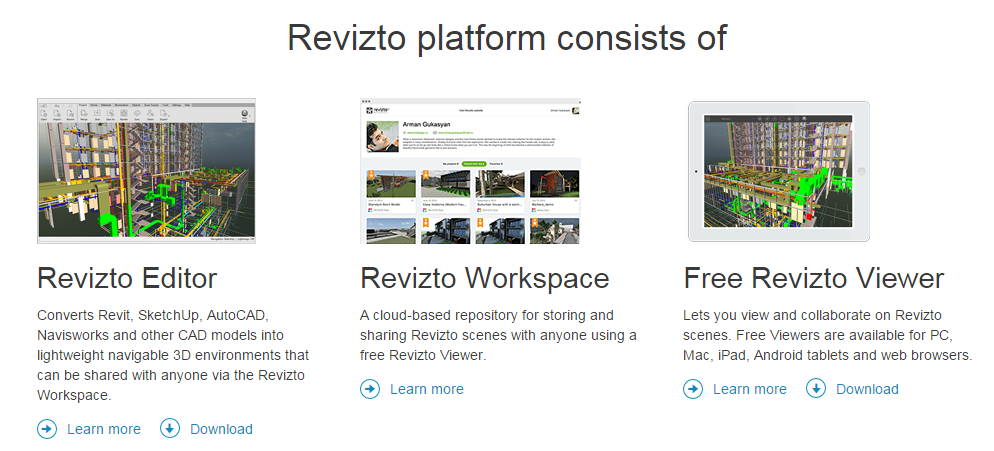
What is it again? Revizto is a tool that transforms heavy-weight 3D data into navigable lightweight scene in one click. The resulting scene can be opened with free Revizto Viewer on PC, Mac, iPad and Android tablets or in any web browser with Unity plugin. Revizto Workspace allows users to upload their projects to cloud storage and access them from any point of the globe. Revizto works with the most architectural and 3D-modelling software (Revit, SketchUp and any software that supports FBX export).
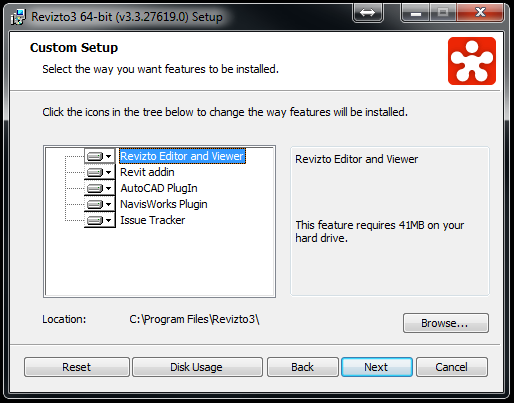
Installation screenshot (addins):
Platform includes:
To conclude: give the latest version a go, and feel free to comment with your thoughts. Update use this code to get a discount on your Revizto annual purchase: LUKEJH
Most of these are bug fixes, and some BIM360 Glue integration performance improvements. Details and direct links below: Autodesk Navisworks 2016 Service pack 2 delivers user experience and stability improvements to the Autodesk BIM 360 integration. Service pack 2 also addresses problems identified in other parts of Autodesk Navisworks 2016. Service Pack 2 also includes all of the updates from Service Pack 1. Service Pack 2 can be installed on either the original version or the Service Pack 1 version of Autodesk Navisworks 2016.
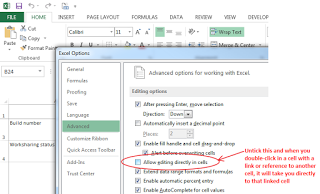
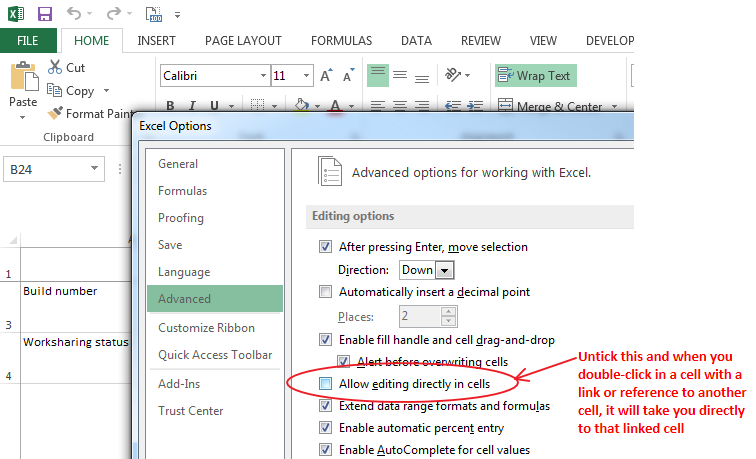
Something you might find very useful in BIM world, where Excel currently thrives and will continue to do so for the foreseeable(?) future. You need to adjust this option:
And then if a cell references G33, and you double-click on it, it will take you straight to G33.
Check out this excellent forum post by Tobias Hathorn, in which he describes the best workflow for Sketchup to Revit conversion via FormIt 360. Interestingly, the major steps are:
Install Revit addin
Use addin to convert SKP to format for Formit
Import to FormIt Web
Export Locally
Use the same Revit addin to convert the FormIt 360 Sketch to RVT
Some more detail here, reproduced from the post:
The one ‘gotcha’ (which should be kind of obvious)… if the model is poorly constructed geometrically in SketchUp, then that same geometry will come down the pipe into FormIt and eventually into Revit… Another comment about size – you’ll get better results componentizing your SketchUp import – doing a blanket conversion of your entire existing SketchUp model will take longer and be a MUCH bigger memory footprint. Here are the steps for SketchUp conversion…
Go to the SketchUp Warehouse – browse to a great looking catalog – LINK
Download the files you want locally onto the hard drive
Get the free FormIt Converter Plugin for Revit 2015 – LINK
Install the Plugin and restart Revit 2015
Go to the Add-Ins tab, FormIt 360 Conversion panel and choose Convert SketchUp Files from the drop down menu
Navigate to the folder with the SKP files in them
Then navigate to where I want the FormIt 360 files to be (can also go to A360
Have you ever exploded a SAT or DWG in the Family Environment, and then gone looking for the Visibility Settings ribbon button for one of the resulting freeform elements? Its not there:
But, as you can see from the image above, you can still access these settings by using the Properties Palette – Visibility/Graphics button.
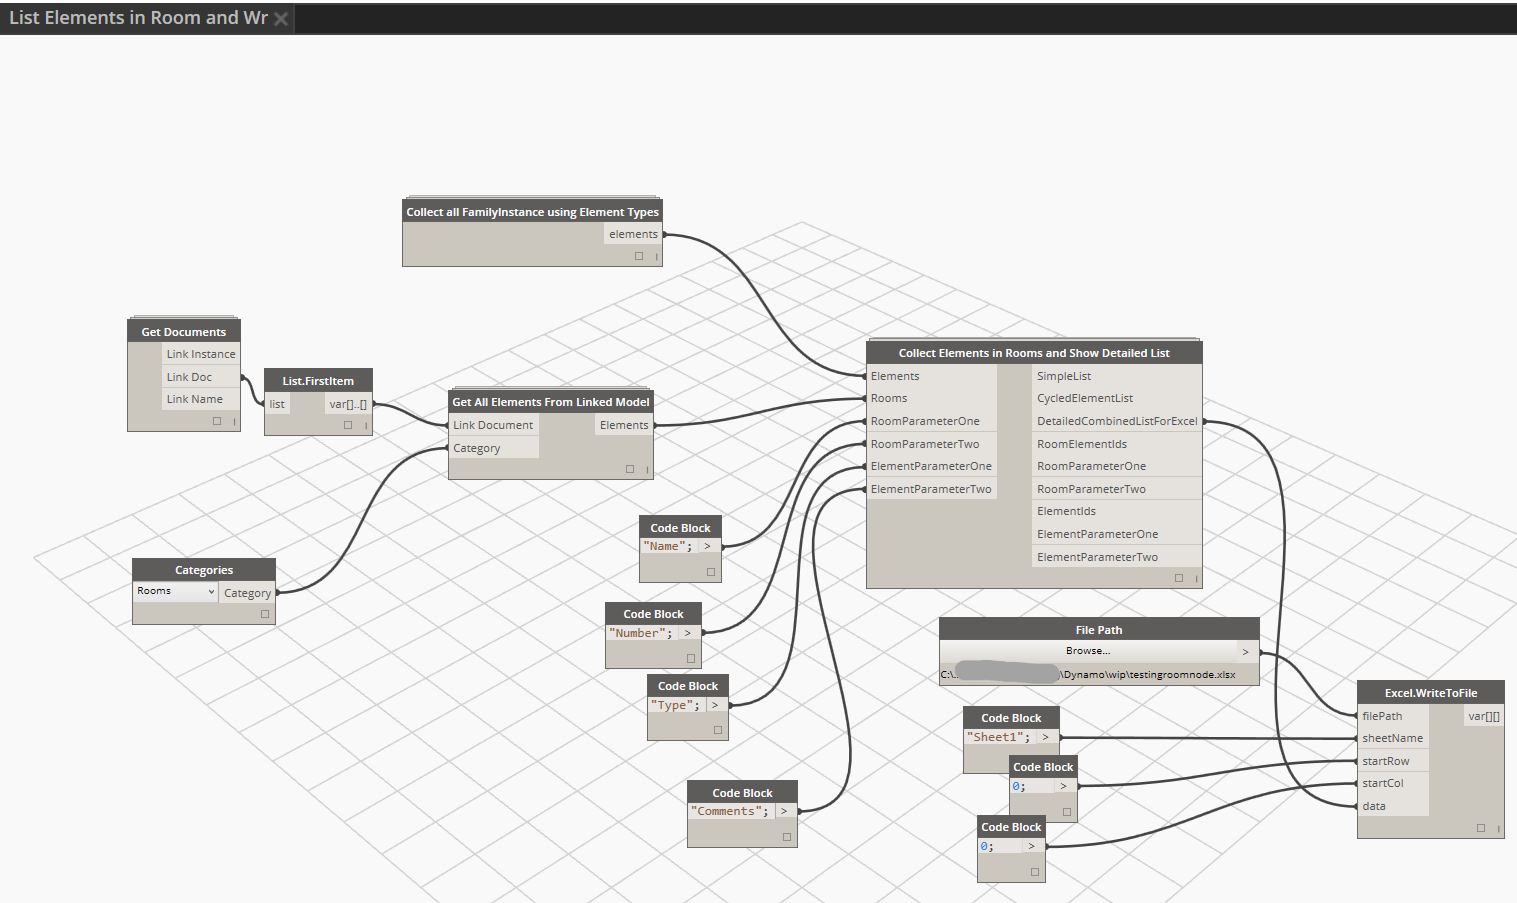
Its a long-winded title, but its only one Dynamo node… Just added to the Bakery package, called Collect Elements in Rooms and Show Detailed List. Basically, it takes a list of Rooms and a list of Elements and then tells you which Rooms those Elements are in. It also works across linked files, so you can have a fixture model, link in the Architectural containing Rooms, and use those to do the comparison.
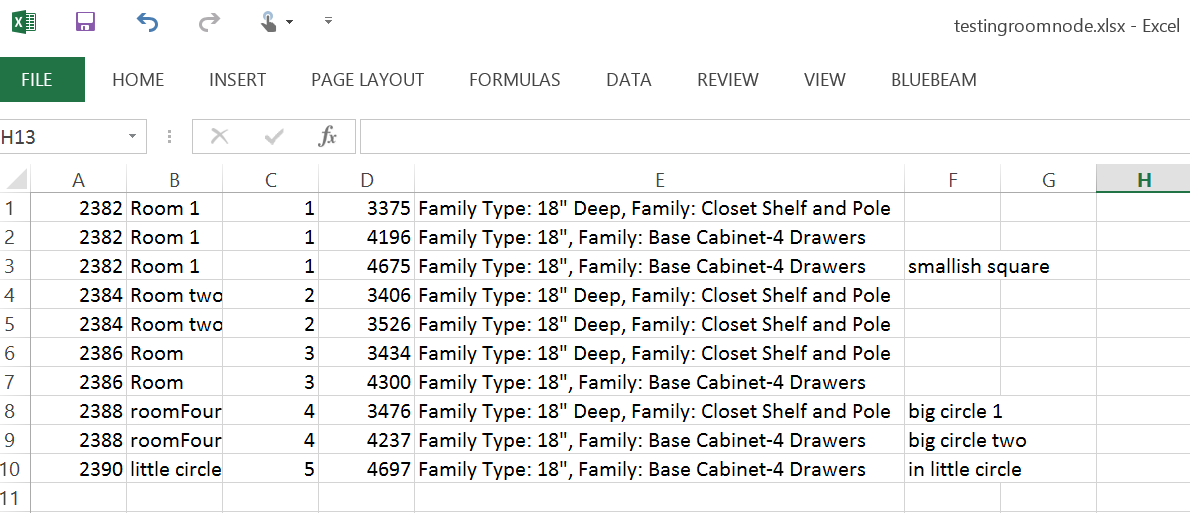
Once we have the Room that an element lives in (mostly thanks to Konrad’s work on Family.InRoom, which I have altered a little bit here), we can do lots of things. I used a Cycle and LaceShortest to get a 1:1 list of Room:Element. This makes it easier to do things with the resulting combined lists. Like, one of the outputs of the node is a detailed 6 index list, which can be directly exported to Excel. The list in Excel can then be filtered by Room. You can choose two parameters from Rooms, two from the Elements, and it also gives you the Element Ids of both:
I could have added headers to the list in Dynamo, but I didn’t do it for this first version (yet):
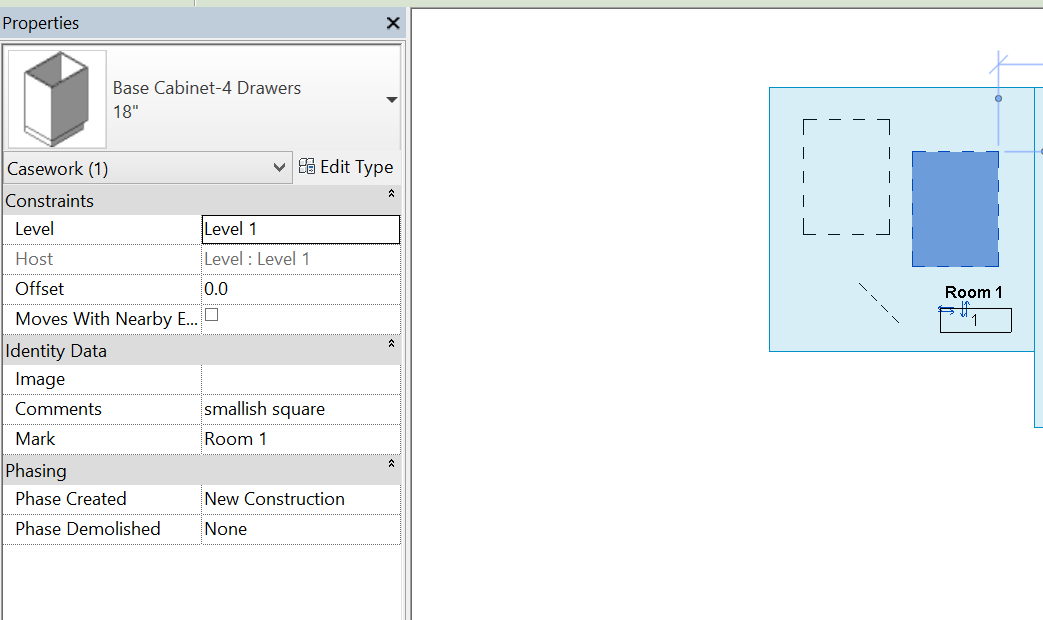
We can also take a parameter from a Room (like Room Name or Room Number) and then write it directly into a parameter in the Elements, like this:
This shows the Mark parameter populated with Room Name:
Or, we can take two parameters from linked Architectural rooms, and drive two Shared Parameters in every element in the current model. I ran the following node to set parameters for about 2500 elements in just a couple of minutes:
Or, we can use another Bakery node to do a wildcard search and collect elements from one Category across multiple links, and then check against these:
While this is a basic implementation at this stage (and no doubt there may be some hiccups), it demonstrates a powerful concept: to be able to take a mixture of linked Rooms and/or linked Elements and determine their relationship, then export that data or use it to instantly drive other parameters in Revit.
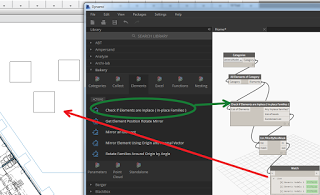
I’ve added this checking node to the Bakerypackage. Much of the credit goes to Andreas Dieckmann for the Family.IsInPlace node in the Clockwork package:
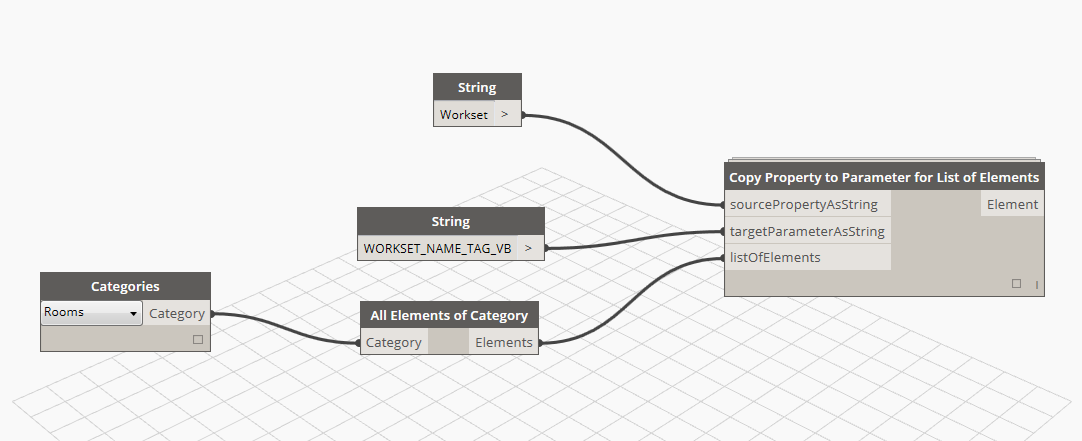
You may also be interested in copying a non-schedulable property to another parameter for a list of elements. This Bakery node works for things like Workset too:
I reviewed RTV Xporter PRO late last year, but there have been a few updates and new features since then so I thought I’d briefly list them here. For less than $50US per user, you get a lot of automation capability. A 2016 compatible version is now available. Also, a new build for Revit 2015 has been released.
Here are some of the new features in Xporter PRO 2015 build (599):
improved revision management
improved stability for unattended scheduled tasks with Revit
improved PDF connectors
new Citrix Sharefile connector
new Edit/Update Revit Sheet Parameter data mode
new Right-Click shortcut menu options on the main interface
new Create 3D views split by floor level and export to individual NWC files