Direct link:
download.autodesk.com/SWDLDDLM/Updates/AppManager/4_0_66_0/AdApplicationManager-installer.exe
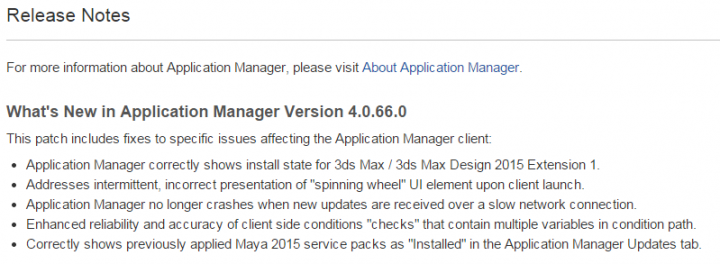
What Revit Wants

A360 Drive (previously known as Autodesk 360 Sync) is a file storage tool that syncs with your Desktop and makes your files accessible on the web, you can access your files here:
https://360.autodesk.com
A360 (or A360 Team, or A360 Project) is a project and team collaboration tool, you can access it here:
http://autodesk360.com/
and your project ‘hub’ is here:
https://myhub.autodesk360.com/portal/
You can copy something from your A360 Drive to A360 by using this drop down list option:
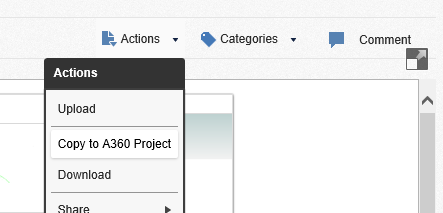
You will then be allowed to choose an A360 project. This creates a copy, there is no real link between the A360 Drive version and A360 version of that file. Obviously, the viewing and discussion capabilities are more collaborative in A360, so you may wish to take advantage of that feature if you are an A360 subscriber.
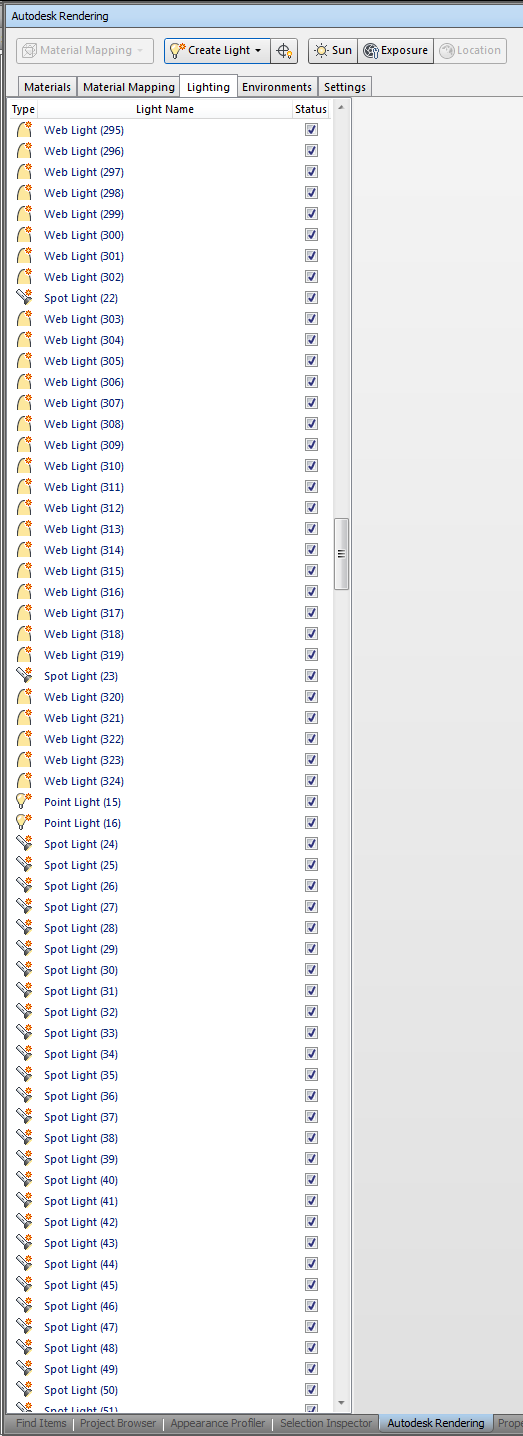
The problem – Appending a given NWC creates hundreds of lights in your NWF, as they were exported with light sources from Revit:

Update: scroll to the bottom of the Autodesk Rendering, Lights pane and select the last entry. Press and hold the Delete key on the keyboard – it will rapidly delete lights out of the Navisworks model.
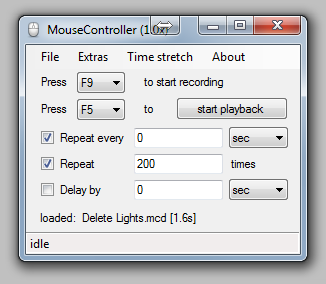
One way to get rid of all these light sources is to use a macro recorder to delete them all. This is because Navisworks 2015 does not allow you to delete multiple light sources at once (sadface), and it doesn’t allow you to “Clear Palette” like Presenter did.
The immediate workaround is to use Shaded mode with Headlight only, as this ignores Light sources. Not pretty.
You could also down-save to 2013, delete the lights in Presenter, then save-up to 2015, but that seems a little too hacky, even for me.
Here’s the clicky mouse macro method:
Some other things to try:
Another thing to try:
Some of the bugs that might show up:
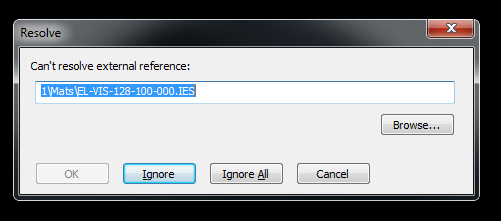 |
| Missing IES file references |
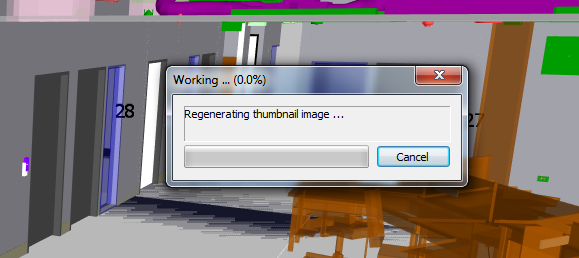 |
| Regenerating thumbnail image … |
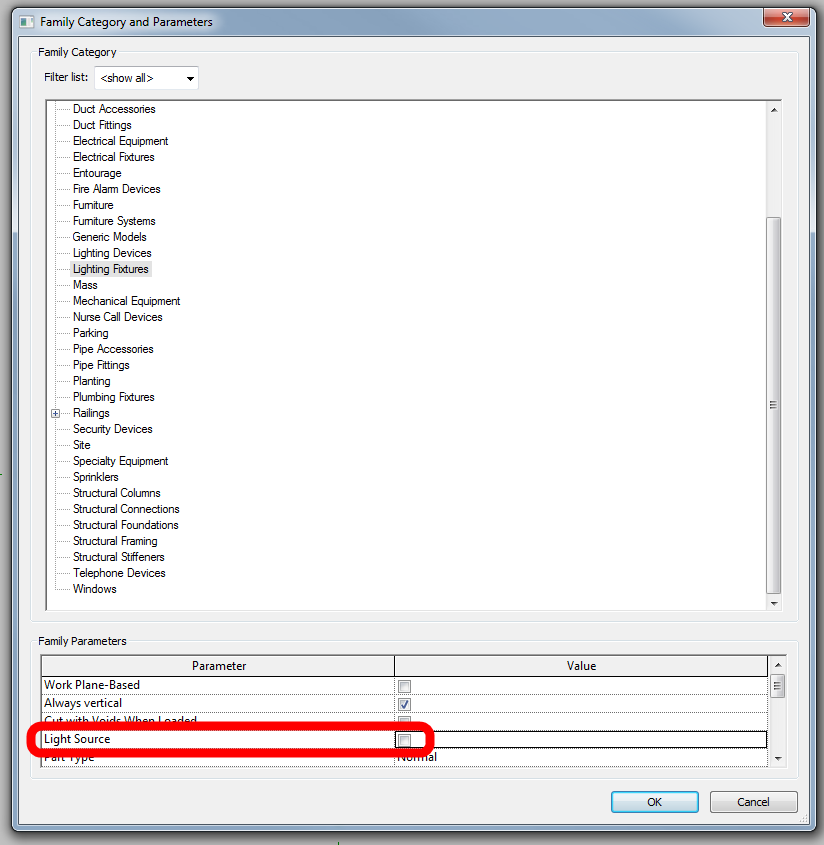
The only real fix (at this stage) is to open each Lighting Family and untick Light Source. Obviously, this is not really an option if you are doing lighting analysis or using the lights for rendering in Revit or 3dsMax etc:
Related forum links:
http://forums.augi.com/archive/index.php/t-98820.html
Why does this happen? Because the Bulk File Upgrader doesn’t work if it is trying to upgrade a Local and it can’t find a Central (I believe this is a Revit API thing)… and you may get this error:
filename.rvt could not be upgraded: The file-based central model could not be reached, because e.g. the network is down or the file server is down.
The core problem here is that someone has probably given you a Local copy, when they should have given you a Central or Detached copy to link into your project.
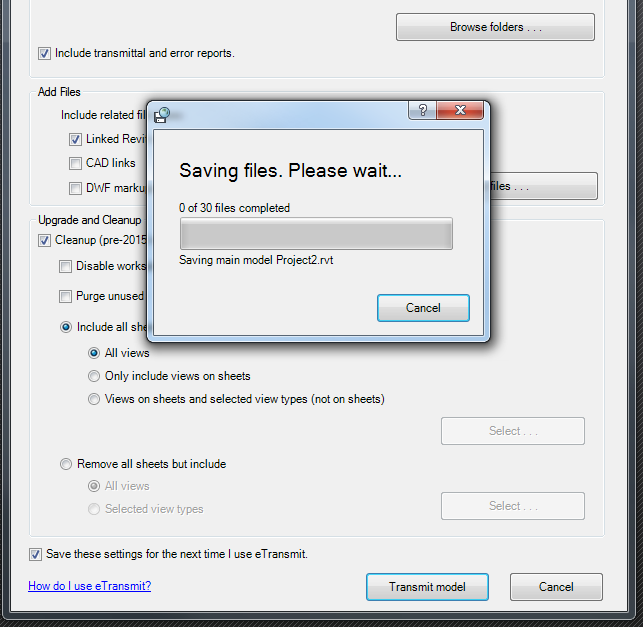
If we want to upgrade lots of these “local-type” linked files, how can we get around this batch upgrade limitation? We will need to to use eTransmit – twice. Let’s say we are upgrading from Revit 2013 to Revit 2015:
Note: using the “Add Files” option in eTransmit and adding RVTs manually will not upgrade them.
Here’s the link for eTransmit for Autodesk Revit 2015.
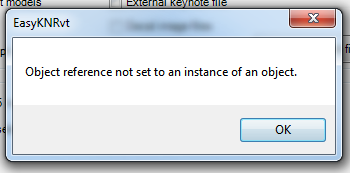
Also, you *might* have to press ok after each if you get this error (Easy Keynoter?)