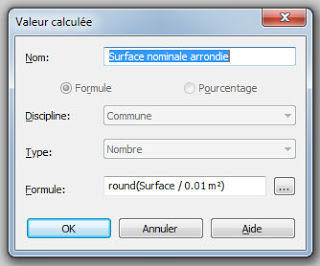
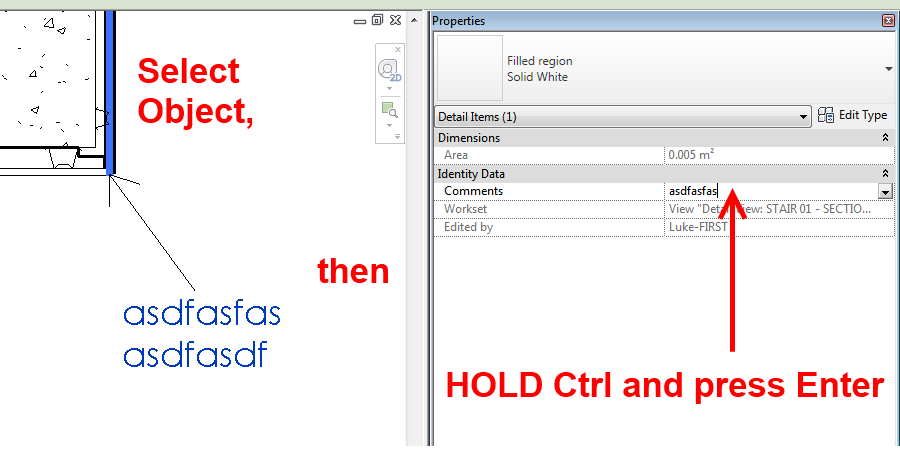
Many people know that you can add a carriage return (and thus create multi-line labels) in Revit by accessing a Properties entry box and hitting Ctrl+Enter:

Over at Revitez, another method was mentioned – namely, copy multiline text from Notepad into a Properties parameter box.  This works well – and you can navigate between the lines in Revit using Up and Down arrow keys.

Finally, you can accomplish essentially the same thing by holding Alt + typing 0010 (then release Alt).  This will also insert a well behaved carriage return into the parameter.

Some ideas via Revitez!:
Google Translate
In French http://revitez.blogspot.com/2011/07/texte-multi-ligne-dans-un-libelle.html

If you attended either RTC AUS or RTC USA this year, you can download content from BOTH conferences.  Awesome!


“We are pleased to offer the downloading of materials for both the Australasian and North American conference programs to attendees of either conference.
 

Materials can be downloaded from the respective websites – RTC 2011 Australasia and RTC 2011 North America using the following passwords…”

via email

Here are some direct links to the materials pages:
RTC AUS 2011

RTC USA 2011


If you attended, check your inbox for the passwords!!


Over at ARCxl, you can download a bunch of Revit details for free.  According to the website, these details were all created natively in Revit.

The Terms of Use describes the proper way that these details may be utilised, and you must agree to these terms when you register. 

Effective July 19, 2011, two very significant alterations were made to the ARCxl website. We have added CAD/dwg, and PDF file formats to our library. We have also removed restrictions on account location and email address types.

Quoted from
ARCxl for Revit: ARCxl adds CAD/dwg, PDF and Eases Restrictions

 
Upon downloading a detail, you must also agree with this popup:

By clicking CONTINUE, I confirm I have read and agree to the ARCxl Terms of Use in their entirety. I agree to hold all liability for the use, review, compliance with all applicable laws, codes, and ordinances. I agree to seek professional review by an architect or engineer, and that ARCxl details and components are provided as-is without warranty of any kind. I understand that this is a single-use license and not a transfer of title.

Here is how to do it:

  1. Select the detail item.
  2. Right-click > Select All Instances > In Entire Project
  3. Attempt ‘Group’ command

It will fail with an error like this:

However the resulting Error Report contains the view names that all these elements exist in…

Click Expand >> and then Export…
Save the Error Report to a file and have fun going through them one by one 🙂

After logging in for the Maximise your Investment in BIM Across the Project Lifecycle with Autodesk® Building Design Suite Premium webinar today, I was presented with this message:


Dear Customer
It is with regret that we inform you, that due to unforeseen circumstances we will need to postpone today’s webinar on Maximising your Investment in BIM. We will be rescheduling the webinar in the coming weeks and will notify you of the revised date and time as soon as possible.
Please accept our apologies for any inconvenience that may have been caused as a result of this cancellation.

In Revit, you can sometimes get some weird results from a schedule that directly uses Totals for Areas.  For example, the individual Areas of a number of elements may add up to a certain number, but the Revit total in the Schedule is different.  The culprit?  Rounding…

Happily, Revit 2012 provides us with three extra functions we can use in formulas: ROUND(x), ROUNDUP(x), and ROUNDDOWN(x).

The solution?  Create a new Calculated Parameter that does the rounding for you, and then total this column.

Here is a Wikihelp tutorial on the subject:
Round Function in Formulas

And here is a quote from the page that originally inspired this post:

Revit 2012 version introduces three new functions for rounding formulas.
We will use the Round (x) which allows rounding to the nearest whole (The principle is the same with Roundup () and ROUNDDOWN ())
via
Google Translate

In French http://revitez.blogspot.com/2011/07/revit-2012-arrondir-les-surfaces-dans.html

Image from Revitez! blog

Do this:

  1. Place a new Room
  2. While placing, adjust the Limit Offset in the Properties Palette.  Everything is ok.
  3. Now, still while placing, adjust the Offset in the Options Bar.
  4. The Properties Palette is grayed out!  Looks like the Options Bar is top of the food chain…

“Changes made in the Option Bar super cede the newer data entry capability of the properties palette”
via
Properties Palette VS Option Bar – IMAGINiT Building Solutions Blog

Jay Zallan has posted links to some files containing lists of standard abbreviations.  Here are the links in context:

@JayZallan
#OpenRevStds Here are some Standard abbreviation files to incorporate!!!??? goo.gl/RPz3p & goo.gl/UrSu3
16 Jul…

via
Twitter / @JayZallan: #OpenRevStds Here are some …

If you want to find out more about the Open Revit Standard (or even contribute to it):
http://twitter.com/#!/search/%23OpenRevStds

LinkedIn Group


Wiki site

Open Revit Standards

I wanted to convert a PDF file into content I could use in a Planting family in Revit.  Part of that process involved converting the image into DWG hatches that Revit could understand, either as an import or as a Filled Region.

Here is the process (scroll down for video):

  1. Download Adobe Illustrator
  2. Open the image in Illustrator.
  3. Select the image
  4. Click the ‘Live Trace’ button in the bar at the top.  There are a number of different methods to choose from.  The most accurate seems to be ‘Photo High Fidelity’, but this will likely result in the largest DWG.
  5. Save the file in Illustrator.
  6. Click File – Export and save as a DWG!

 Here is the video: